background image

9/13/2005

Programming the SMLC

81

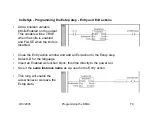
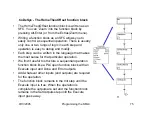
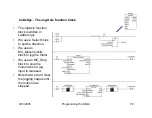
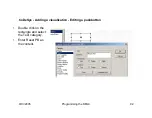
CoDeSys - Adding Comments to your program

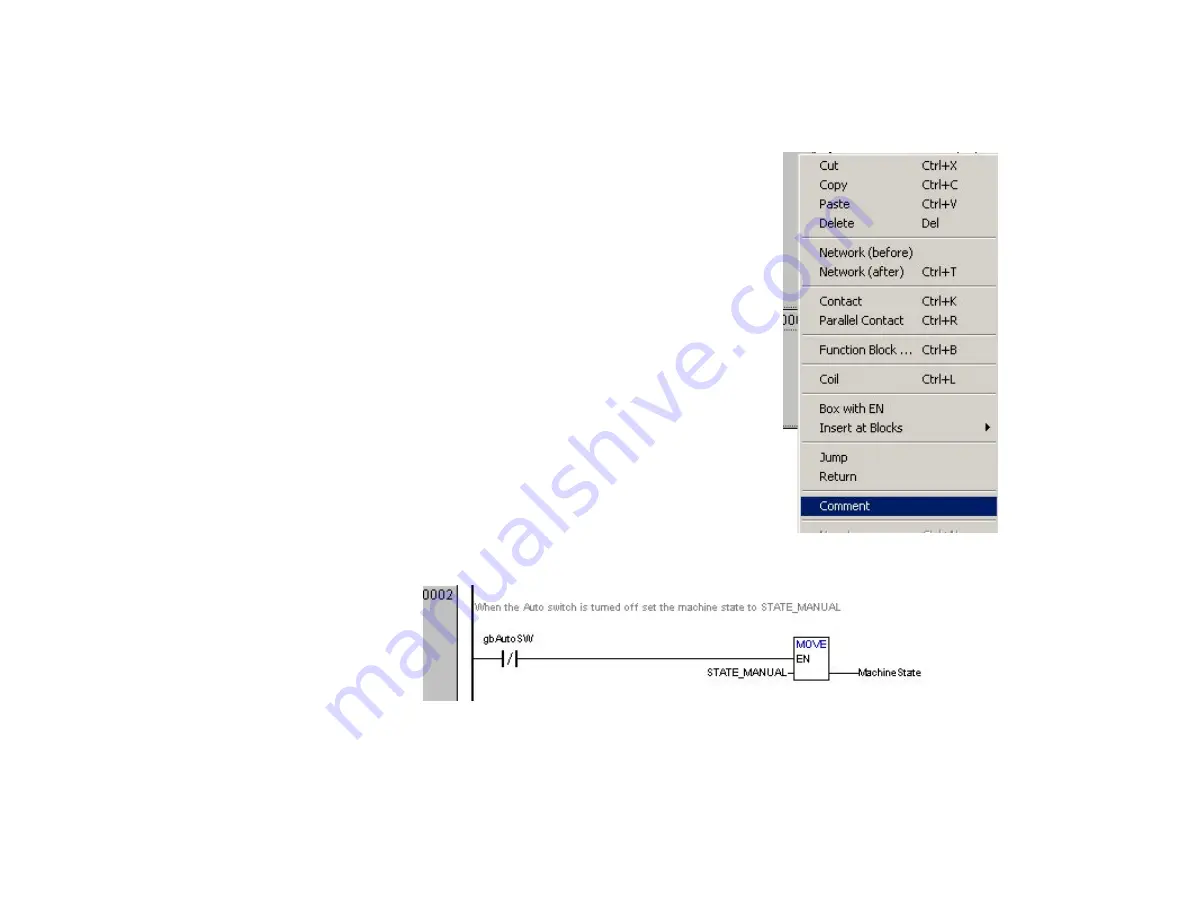
To add comments to your code right click on a rung and
select Comment. The comments appear as gray text
above the rung.

It is also possible to have comments for each contact.
Select Extras | Options and check ‘Comment per
contact’.

Содержание SMLC

Страница 1: ...Creating a project setup file SwMonitor SwTune SwUpgrade SMLC Utilities CoDeSys Creating the application program Going online with the SMLC Importing function blocks Creating a visualization I O confi...

Страница 2: ...Motion products including the SMLC ServoWire Pro contains utilities for system configuration networked and drive diagnostics axis tuning and upgrading firmware Use ServoWire Pro to create a configurat...

Страница 3: ...ject in ServoWire Pro Create a new project in SwPro by selecting File New or press the toolbar button Select the loop rate Select the drive family By unchecking Force default Axis names you can name t...

Страница 4: ...9 13 2005 Programming the SMLC 4 SwPro Right click on the SMLC and add a drive The available drive models are determined by the drive type selection you made on the System Settings page...

Страница 5: ...s setting Check Simulate drive if this is to be a virtual axis or if you want to simulate your application Select the drive input voltage The default max feedback frequency is fine for most applicati...

Страница 6: ...e SMLC 6 SwPro Configure the drive inputs The drive s inputs can be configured as general purpose hardware overtravels Estop or Quick Stop The drive s high speed sensors can be configured as NPN or PN...

Страница 7: ...ing the SMLC 7 SwPro Configure the drive outputs The drives outputs can be configured as Programmable a drive ready signal or they can pass the encoder reference or optional delay counter output Press...

Страница 8: ...ve and select Add Motor to drive At this point you can choose to add a motor to the drive an auxiliary axis or if supported by this drive model an option board Option boards can support alternate feed...

Страница 9: ...e for the application in this example we ll use Knife If its not a standard ORMEC model select User Defined for the series and then press the Edit button otherwise pick the Series Model and options Se...

Страница 10: ...know the load inertia you may enter it now otherwise we ll let SwTune calculate it for us in a later step Enter the user units conversions for position speed and accel or accept the defaults Edit the...

Страница 11: ...a percentage of peak Define the forward direction of rotation Configure position error checking or disable it The alarm generates a warning the fault disables the axis Configure modulo position in th...

Страница 12: ...The high speed sensors can be used to latch axis position within 1usec They can also be used to start and stop motions Configure the drive s high speed sensor inputs for Rising Falling High or Low Opt...

Страница 13: ...3 SwPro Configure axis outputs Optionally configure one of the drive outputs as a brake control signal and set the enable disable delays Set the time constants for the filtered versions of Current and...

Страница 14: ...s tuning parameters While you can set tuning gains from this page typically we will use SwTune Some settings such as the Notch Filter and Phase Advance require you to be in Expert Mode To enable Exper...

Страница 15: ...9 13 2005 Programming the SMLC 15 SwPro Save the SwSetup file Save the file on your computer Give it a name that relates to your machine...

Страница 16: ...e SMLC you wish to communicate with Press the Address Book button on the toolbar to pop up the edit list If necessary add the IP address of your SMLC to the address list Close the edit list and select...

Страница 17: ...providing version information for each node on the network Press the SwMonitor button on the SwPro toolbar Select the SMLC in the tree view on the left The firmware and driver versions are displayed...

Страница 18: ...Programming the SMLC 18 SwPro Run SwMonitor Drive status Info tab Click on a drive in the tree view at the left On the Info tab we can see the drive s hardware and software revisions and hardware seri...

Страница 19: ...atus Values tab On the Values tab we can see drive fault codes feedback position bus voltage various error counters as well as real time status of the drive s inputs On some motors the status of the h...

Страница 20: ...pgrade button on the toolbar to start the upgrade process The current version is displayed Check the drives you wish to upgrade and then press the Upgrade button Navigate to select the drive firmware...

Страница 21: ...1 SwPro Run SwTune Select the axis from the drop down box clear any faults and check the Enable box Go to the Motion tab SwTune is a digital oscilloscope used for tuning your axes Press the SwTune but...

Страница 22: ...ning values the system is soft and has a large overshoot The inertia estimator has given us an estimate for our load inertia which is currently set to 0 0 Select the Velocity tab to enter the load ine...

Страница 23: ...the SMLC 23 SwPro SwTune Now we can see that there is no overshoot Press the Display button We enter the load inertia and then lower the VLTC value until the system starts to oscillate a bit Back off...

Страница 24: ...ity portion of the waveform and then turn on the frequency plot If there were a noticeable resonance we could pinpoint the frequency and setup a notch filter to reduce or eliminate it When done press...

Страница 25: ...mming the SMLC 25 SwPro SwTune Saving changes When you exit SwTune you can save the tuning changes you made back into the SwSetup file After saving the changes we need to download the updated SwSetup...

Страница 26: ...p file to the SMLC Press the Sync button on the SwPro toolbar Select Download and press OK The SwSetup file is downloaded to the SMLC at the IP address selected in the Address list Note that we can al...

Страница 27: ...e SMLC upgrade packages are available on the ORMEC web site Each upgrade package contains two files that are installed in the CoDeSys directory of your PC SMLC LIB and SMLC CFG SMLC LIB contains the m...

Страница 28: ...read the configuration from an SMLC Press Load to load a configuration from a file IP addresses can be configured manually or via a DHCP server Send a new configuration to the SMLC and then cycle SMLC...

Страница 29: ...C 29 SwPro SMLC File Utility Press the File Utility button on the SwPro toolbar A list of files on the SMLC is displayed Check the files you wish to retrieve or delete Press either Delete or Retrieve...

Страница 30: ...nt environment for writing and debugging IEC 61131 3 programs 3S is one of the leading IEC 61131 3 suppliers in the world ORMEC has integrated its SoftMotion technology with CoDeSys to create the SMLC...

Страница 31: ...DeSys is used by over 150 different companies Each product has its own target configuration If you have other companies CoDeSys targets installed on your PC you will see these target options as well P...

Страница 32: ...ck Load bootproject automatically then any program you download to the SMLC will run automatically at powerup If you don t check it you will have to download the bootproject manually from the Online m...

Страница 33: ...to 512 POUs This number can be increased in the target settings While its not required we recommend that the main POU in your program be written as a Sequential Function Chart SFC It is certainly poss...

Страница 34: ...iew At the end of this tutorial we will have created a PLC_PRG POU that looks like the diagram at the right Our machine will have four states Estop Homing Manual and Auto This program can be easily mo...

Страница 35: ...SFC Init state At the top right you see a new SFC that was created when you pressed OK on the New POU dialog Double click on the Init block the New Action dialog appears Select LD Ladder Logic as the...

Страница 36: ...he SMLC 36 CoDeSys SFC Editing the ladder in the Init state The first step in creating our program is to add an MC_Open function block and use it to open our axis Right click on the ladder in rung 000...

Страница 37: ...OK Note If you don t uncheck the Structured check box you get a hierarchical view of the standard function blocks by library The Standard library contains counter timers etc The Utility library conta...

Страница 38: ...cally pop up because OpenKnife has not yet been declared The OpenKnife variable is an instance of an MC_Open function block The Declare Variable dialog will automatically add the declaration of OpenKn...

Страница 39: ..._AXTYPE_MOTOR indicates that this is a motor axis as opposed to a pacer The Tag input is a string we use to help us find errors in the program hKnife is a variable of type AXIS_REF This is a handle or...

Страница 40: ...IsOnline coil as a condition to exit the Init step in our SFC Note how we are prefacing our variable with a lower case letter to indicate its type IEC 61131 3 is a strongly typed language and this con...

Страница 41: ...and constants in our program ORMEC constants always start with O_ The names of inputs to MC_ function blocks that accept a constant are a hint to the name of the constant that is required In this exa...

Страница 42: ...elect bKnifeIsOnline Remember to delete the Putting this boolean value here means that the code in the Init step will execute over and over until the exit condition is true In other words until our ax...

Страница 43: ...ion condition Clear the text from the transition Double click on the small horizontal line where it crosses the vertical line A dialog box appears allowing us to select the language we wish to use for...

Страница 44: ...an contact When you close the Ladder editor you can see a small black triangle at the transition This triangle indicates that there is code in the transition Note also that the small triangle in the u...

Страница 45: ...low us to create a different kind of IEC step for the Supervisor step Right click on the transition below Init and select Step Transition after You can also use the button on the toolbar When you re d...

Страница 46: ...ing the Supervisor SFC step The new step should appear like this Edit the new step to appear like this Change the step name from Step2 to Supervisor Change the N to an S Change the action name from Ac...

Страница 47: ...the transition below the Supervisor Select Step Transition after or use the toolbar button Change the name of the new step to Estop Clear the text from the transition below the Estop state Change the...

Страница 48: ...sition below Estop A box should appear around both transitions and the Estop step While still holding the shift key right click and select Alternate Branch right You can alternately use the button on...

Страница 49: ...oming Clear the name of the transition below Homing Click on the transition above Homing While holding the shift key down click on the transition below Homing A box should appear around both transitio...

Страница 50: ...he SMLC 50 CoDeSys The empty state machine SFC Repeating what you ve done so far add the Manual and Auto steps to our state machine The result should look like this We re now ready to start filling in...

Страница 51: ...rogramming the SMLC 51 CoDeSys Creating the machine state enumeration constants Go to the Data Types tab in CoDeSys Right click on Data Types and select Add Object Enter eMACHINE_STATES for the name a...

Страница 52: ...ear as it does at the right An enumeration is a numbered list We are creating a number list of constants that define the valid states for our machine Now when we create a new variable of type eMACHINE...

Страница 53: ...SMLC 53 CoDeSys Adding an Exit action to the Init step Return to the POU pane and right click on the Init step Select Add Exit Action a dialog will appear Select ST Structured Text for the language of...

Страница 54: ...ble In the ST code pane of the Exit action of the Init step enter the line shown at right Note that is used for an assignment and the line ends with a semicolon We are setting our default machine stat...

Страница 55: ...here is code present in the Init step s Exit action Code in an Exit action is executed once when the step is exited Similarly we can create Entry actions Entry actions are indicated by an E in the low...

Страница 56: ...nsition Enter MachineState STATE_ESTOP Note that this is an equality test and just an is used Also note that there is no semicolon required at the end of the test Repeat this for the transition below...

Страница 57: ...nued Repeat this for the Homing Manual and Auto states For each state you should check for MachineState to be equal to the state above the step and not equal to the state below the step MachineState S...

Страница 58: ...ion named ErrorCheck on each scan The S to the left of ErrorCheck indicates that this code will be called each scan until it is Reset with an R We are not going to Reset the action in this program To...

Страница 59: ...ction Insert an MC_ReadErrorFlag function block and call it ReadErrorFlag Right click on the rung to the right of the ReadErrorFlag function block and choose Box with EN In the Box type MOVE A MOVE fu...

Страница 60: ...lock generates an error the global error bit is set If the error bit gets set we will change the MachineState to STATE_ESTOP Typically we will also monitor an I O point that indicates that no Estop co...

Страница 61: ...red in the Global Variables section on the Resources tab Global variables can be seen by all POUs Local variables can only be seen within the POU in which they are defined You can create a global vari...

Страница 62: ...Click on PLC_PRG on the POUs tab Note that the variables that have been getting auto declared are present in the pane above the SFC You can add edit variables here manually if you wish Local variable...

Страница 63: ...u haven t made any typos it should compile with 0 Errors 0 Warnings If you do get some errors they will appear in the message window below the code window Press the F4 key to jump from error to error...

Страница 64: ...axis we can run it at this point From the Online Communication Parameters dialog click the New button Enter a name for this connection and select Tcp Ip Note that you only have to do this once on thi...

Страница 65: ...close the New Channel dialog Press OK to close the Communication Parameters dialog Now you are ready to log in to the SMLC Choose Online Login or press the toolbar button If you are able to connect y...

Страница 66: ...us bar displays ONLINE and indicates the name of the SMLC that we are connected to Also note that we are not yet running The blue block in the Init step indicates that this is where the program will s...

Страница 67: ...s running The blue Estop step indicates that the Estop step is currently executing Note that the ErrorCheck action is blue as well This is because we set the ErrorCheck action to run on every scan The...

Страница 68: ...nd import the file UtilityFunctions exp This file should be available on the ORMEC web site or it may be found on the CDS SDK CD ROM We can see the Import has given us several useful functions includi...

Страница 69: ...p Disabling the axis Right click on the Estop step and select Add Entry Action Select LD Ladder Logic for the language Insert a normally open contact and label it false At the end of the rung insert a...

Страница 70: ...TRUE when the knife is enabled and FALSE when the knife is disabled Close the Entry action window and add an Exit action to the Estop step Select LD for the language Insert an EnableAxis function bloc...

Страница 71: ...STATE_HOMING In the Exit action we will enable the axis and control will pass to the Homing step of the SFC Close the Exit action window and double click on the body of the Estop step Select LD for t...

Страница 72: ...9 13 2005 Programming the SMLC 72 CoDeSys Estop state overview Entry action Disable the axis Code inside the step If Estop OK and Reset PB change state to HOMING Exit action Enable the axis...

Страница 73: ...claration section at the top you can see the Inputs and Outputs of the function block defined In the body of the function block you can see that we use instances of MC_Reset to clear any drive faults...

Страница 74: ...put remains TRUE When the Execute input is removed all outputs go off If the Execute input is removed before the internal processing of the block is complete the outputs will be set for exactly one sc...

Страница 75: ...d operation is easy to debug and modify Each step can be written in the language that makes the most sense for that particular operation We find it useful to structure a sequential operation function...

Страница 76: ...se the special SFCReset variable to force the function block back to its Init step We re going to do this in the Entry action to the Homing state We set the Execute input FALSE and the SFCReset input...

Страница 77: ...n the Home block When homing is complete the state is changed based on the Auto Manual switch The bExecute is not necessary in this step because we already called the HomeKnife instance with Execute F...

Страница 78: ...s function block is written in Ladder logic We use a Select block to set the direction We use an MC_MoveVelocity block to jog the motor We use an MC_Stop block to stop the motion when a jog input is r...

Страница 79: ...mming the Manual state Body The JogFwd and JogRev PB inputs are used as inputs to the Jog function block If the Auto SW becomes true while we re not jogging we will switch to the AUTO state otherwise...

Страница 80: ...gramming the SMLC 80 CoDeSys Programming the Auto state Body In the Auto state if we see the Cut photo eye we will command a 1 revolution index of the knife If the Auto SW input goes false we will ret...

Страница 81: ...Comments to your program To add comments to your code right click on a rung and select Comment The comments appear as gray text above the rung It is also possible to have comments for each contact Sel...

Страница 82: ...on every scan of the logic regardless of the machine state Reading axis position and velocity are examples We could put this code in our ErrorCheck action but to keeps things clean lets add another ac...

Страница 83: ...EveryScan action Right click on the Supervisor step and select Associate Action Call the new action EveryScan and set its qualifier to S For more information on IEC Steps and qualifiers look in the Co...

Страница 84: ...the SMLC 84 CoDeSys Adding an EveryScan action Insert an MC_ReadActualPosition function block Create a new variable diKnifePosAct to store the knife position Note that this variable is of type DINT d...

Страница 85: ...other rung and add an MC_ReadParameter Enter OP_VEL_MON as the ParameterNumber You can also hit the and start typing OP_ to get a list of available parameter numbers Store the velocity monitor value i...

Страница 86: ...on Our EveryScan action now looks like this Note that we use a coil bJunk on the Done outputs We call it bJunk because we don t care about the value The reads are executed and completed on each scan W...

Страница 87: ...navigate to the Estop state in the PLC_PRG SFC Double click on the gbEstopOK and gbResetPB contacts They should turn half blue with a cyan outline as they do at the upper right The cyan indicates a p...

Страница 88: ...t the inputs are true and the machine state was set to HOMING The motors should home and the machine state will switch to MANUAL when homing is complete PLC_PRG should then appear as it does at right...

Страница 89: ...ctions Double click on the gbJogRevPB input The cyan TRUE indicates that this is a pending change that won t occur until you type Ctrl F7 or select Write Values from the right click menu Double click...

Страница 90: ...9 13 2005 Programming the SMLC 90 CoDeSys Adding a visualization Go offline Select the Visualization tab Right click and select Add Object Call the new object ControlPanel...

Страница 91: ...9 13 2005 Programming the SMLC 91 CoDeSys Adding a visualization entering a pushbutton Select the rectangle on the toolbar Click on the white space of the visualization and drag out a rectangle...

Страница 92: ...9 13 2005 Programming the SMLC 92 CoDeSys Adding a visualization Editing a pushbutton Double click on the rectangle and select the Text category Enter Reset PB as the content...

Страница 93: ...ble input and in the text box type a to get the popup list The list shows all global variables in our program Select gbResetPB In visualizations you should leave the in front of the variable A Tap var...

Страница 94: ...tion Adding a toggle switch Create another button that we can use to simulate the Estop OK input This time make the input a Toggle variable instead of a Tap variable A Toggle variable changes its stat...

Страница 95: ...oggle switch colors Lets configure the EstopOK button to change colors to indicate if the variable is TRUE or FALSE Select the Colors Category and click on the Color Inside button Select a bright red...

Страница 96: ...visualization Toggle switch colors Go to the Variables Category and set the Change Color variable to gbEstopOK Now the Estop OK button will be red when the input is FALSE and green when the input is...

Страница 97: ...ng a visualization Displaying a value Set the Text Category to KnifePosAct s as shown The s is a placeholder that will store a string value In our case we want to store the Knife position Go to the Co...

Страница 98: ...a visualization Displaying a value Go to the Variables Category and type PLC_PRG in the Textdisplay Variable When you type the a list pops up select diKnifePosAct the value in PLC_PRG diKnifePosAct w...

Страница 99: ...amp that will be red when the variable PLC_PRG bEnabled is FALSE and green when its TRUE Add two jog pushbuttons that tap the gbJog booleans Make the Auto SW a toggle variable that is green when TRUE...

Страница 100: ...nput should be red when you first run Click on it and it should turn green Press the Reset PB and the axis should enable and home The Enabled lamp should turn green when you press the ResetPB Try jogg...

Страница 101: ...9 13 2005 Programming the SMLC 101 CoDeSys Adding I O To add I O to our system go the Resources tab and select PLC Configuration...

Страница 102: ...he WAGO Ethernet I O Bus and select Append WAGO 750 342 Ethernet Fieldbus Coupler Click on the coupler and edit the IP address to match the IP address you used to configure the coupler This should be...

Страница 103: ...SMLC 103 CoDeSys Adding I O adding modules Right click on the coupler and select Append Subelement Select the first module connected to your coupler Repeat this process until your configuration matche...

Страница 104: ...u can type in a variable name Whatever you type here automatically becomes a global variable in your program Lets fill in the physical I O points that we ve used in this sample program Don t forget to...

Страница 105: ...to the I O configuration Go to the Modbus HMI Interface in the tree view In the pane at the right select the type of interface you wish to support Modbus RTU Modbus TCP or both Configure the appropri...

Страница 106: ...pes you can access Modbus Registers are allocated in blocks of 80 bytes as one of 4 types INT DINT REAL and STRING Boolean values are accessed as bits within an INT The IEC address that is automatical...

Страница 107: ...g the SMLC 107 CoDeSys Adding an HMI adding Real registers Notice when you add a block of REAL variables that the registers skip one because REALs are 32 bits and take two Modbus registers This is tru...

Страница 108: ...pling Trace CoDeSys features a powerful diagnostic tool called the Sampling Trace It works like a digital storage oscilloscope for your program Select the Sampling Trace from the Resources tab Right c...

Страница 109: ...9 13 2005 Programming the SMLC 109 CoDeSys The Sampling Trace Press the Help Manager button on the lower right...

Страница 110: ...pling Trace selecting variables The Help Manager displays a tree that contains all of the variables in your program You can select up to 8 variables to monitor on each sampling trace Use the Ctrl key...

Страница 111: ...9 13 2005 Programming the SMLC 111 CoDeSys The Sampling Trace After selecting the variables set the trigger to none Set the Recording to Continuous...

Страница 112: ...3 2005 Programming the SMLC 112 CoDeSys The Sampling Trace assigning the variables In each slot of the scope select the variable you wish to monitor Right click on the scope trace and select Start Tra...

Страница 113: ...Trace viewing the trace The trace above shows the digital states of the JogFwd and JogRev pushbuttons as well as the Knife position and Velocity Note how the position wraps around this is because we...

Страница 114: ...s information for each axis smlclog displays the last 256 errors that have occurred along with a message and the tag input of the function block smlcio io displays the status of the SMLC s I O network...

Страница 115: ...PLC Browser smlcio hmi displays the current status of the HMI interface rtsinfo displays verson information for the runtime system as well as the ORMEC drivers tsk displays information on all tasks i...

Страница 116: ...Watch and Recipe manager can be used to manage lists of watch variables Since you can load and save these lists from files it can also be used as a simple recipe manager A watch list is simply a list...

Страница 117: ...If you wish to change this or add additional tasks you go to the Task Configuration page of the Resources tab To add a task right click on Task Configuration Give your new task a name in this example...

Страница 118: ...Task configuration calling a program After creating the main task we need to append a program call Click on MainTask and then on the button This is how you can call something other than PLC_PRG at pow...

Страница 119: ...19 CoDeSys Useful CoDeSys settings Auto save There are many optional settings in CoDeSys Here we will suggest a few settings that can make your life easier Turn on Auto Save and Auto save before compi...

Страница 120: ...e On the Desktop settings page there is a checkbox for Online in security mode Checking this box will cause additional warning boxes to appear before you do things like set a breakpoint start the prog...

Страница 121: ...u can configure CoDeSys to automatically store a copy of your source code on the SMLC This is useful for backing up your source code If you want to take advantage of this feature we would suggest stor...

Отзывы: