background image

10

Assembly

Assembling the telescope for the first time should take about
30 minutes. The only tools you will need are a Phillips head
screwdriver and a flat head screwdriver. As a general note,
tighten all screws securely to eliminate flexing and wobbling,
but be careful not to over-tighten and thereby strip the
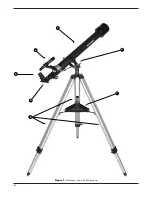
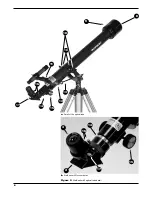
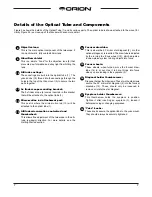
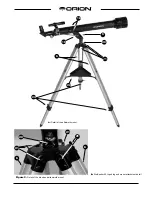
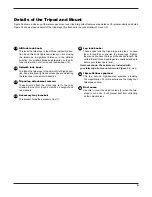
threads. Refer to Figures 1 through 4 during the assembly
process.

During assembly (and any other time, for that matter), do not
touch the surfaces of the telescope objective lens or the lens-
es of the finder scope and eyepiece with your fingers. These
optical surfaces have delicate coatings that can easily be
damaged if touched. Never remove any lens assembly from
its housing for any reason, or the product warranty will be
voided.

Begin set-up of the telescope by assembling the tripod and
mount first:

1. Lay the “Yoke” altazimuth mount (5) on its side. Attach the 

tripod legs (6), one at a time, to the base of the mount by 
sliding a tripod leg attachment screw (21) through the top of
a leg and through the holes in the base of the mount. The 
washers should be on the outside of the tripod legs. Secure
the wing nuts finger-tight. Figure 3b shows a closeup detail
of the screws attaching the tripod legs to the altazimuth 
mount.

2. Install and tighten the leg lock knobs (23) on the bottom 

braces of the tripod legs (6). For now, keep the legs at their
shortest (fully retracted) length; you can extend them to a 
more desirable length later, once the tripod is completely 
assembled.

3. Stand the tripod and mount upright and spread the tripod 

legs (6) apart as far as they will go, until the accessory tray
bracket (22) is taut. Connect the accessory tray (7) to the 
accessory tray bracket (22) with the three wing screws 
already installed in the tray. Push the wing screws up 
through the holes in the accessory tray bracket and thread 
them into the holes in the accessory tray.

4. Tighten the tripod leg attachment screws (21) at the tops of

the tripod legs so the legs are securely fastened to the 
mount. Use the Phillips head screwdriver and/or your fin
gers to do this.

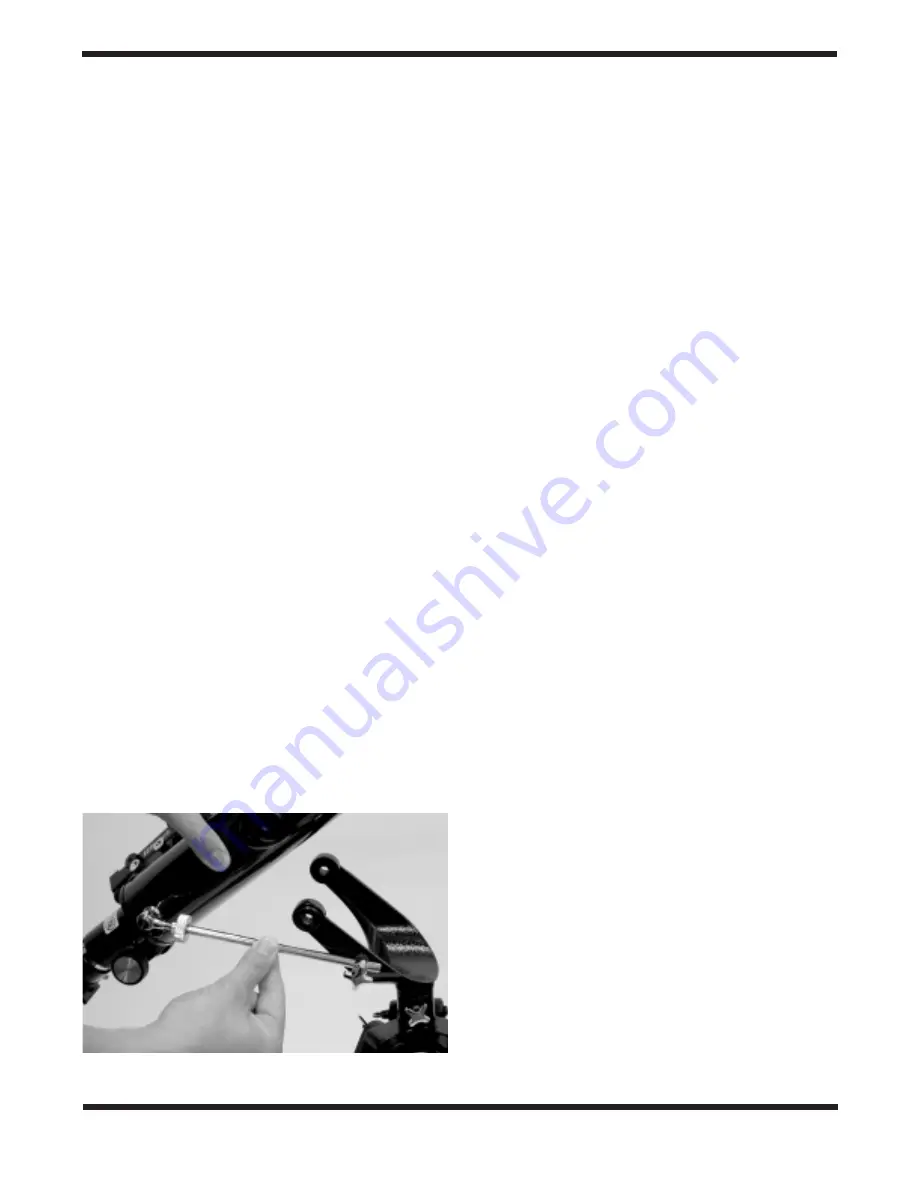
5. Attach the altitude micro-motion rod and thumbwheel (13) 

to the optical tube (1) by first removing the flat-head screw 
from the micro-motion rod attachment post (12) on the side
of the optical tube. Slide the screw through the hole at the 
end of the micro-motion rod and rethread the screw into the
attachment post. Make sure the screw is tightened.

The tripod is now completely assembled and the yoke mount
is ready for the installation of the optical tube.

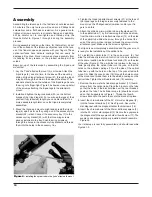
6. To install the optical tube (1) in the yoke mount  (5), first
slide the altitude micro-motion control rod into its receptacle,
at the same location as the altitude lock knob (19) on the side
of the yoke (Figure 4). Then, with the rod in place in the recep-
tacle, gently drop the optical tube into the yoke so that the
holes on the altitude castings (10) on the side of the optical
tube line up with the holes on the top of the yoke altazimuth
mount (5). Slide the yoke knobs (18) through the holes on top
of the mount and thread them into the altitude castings on the
optical tube. Tighten the altitude lock knob (19) securely.

7. Remove the two metal 5x finder scope bracket (11) thumb-

screws from the optical tube. Place the bracket on the tube
so that the holes in the bracket slide over the two threaded 
posts on the tube. The 5x finder scope (4) should be orient-
ed so that it appears as in Figure 1. Thread the thumb-
screws back onto the posts to secure the bracket in place.

8. Insert the chrome barrel of the 90˚ mirror star diagonal (2) 

into the focuser drawtube (14). See Figure 3. Secure the 
star diagonal with the diagonal holder thumbscrews (16).

9. Insert the chrome barrel of the 25mm Kellner eyepiece (3) 

into the 90˚ mirror star diagonal (2). Secure the eyepiece in
the diagonal with the eyepiece holder thumbscrew (17). The
eyepiece and diagonal properly installed should resemble 
Figure 2b.

Your telescope is now fully assembled and should resemble
Figures 1-3.

Figure 4. 

Installing the optical tube in the “yoke” altazimuth mount

Содержание StarSeeker

Страница 1: ...5 03 Providing Exceptional Consumer Optical Products Since 1975 Customer Support 800 676 1343 E mail support telescope com Corporate Offices 831 763 7000 P O Box 1815 Santa Cruz CA 95061 Orion StarSeeker 60mm Altazimuth Refractor 9891 ...

Страница 2: ...2 ...

Страница 3: ...eker 60 Altazimuth Refractor is a quality optical instrument that will deliver countless hours of exciting stargazing from magnified views of the Moon star clusters and nebulas to glimpses of Jupiter s moons and Saturn s rings The StarSeeker 60 includes everything you need to go from box to backyard in less than half an hour These instructions will help you set up use and care for your new telesco...

Страница 4: ...4 Figure 1 StarSeeker 60mm AZ Components 1 4 3 2 6 7 5 ...

Страница 5: ...ing objects that are high in the sky from a comfortable position Eyepiece The eyepiece is the part of the telescope that you actually look through to see things The focal length of the eye piece and the telescope determine the magnifying power of the telescope Magnification is discussed in more detail in the UsingYour Telescope section 5x finder scope This finder scope is a small telescope with a ...

Страница 6: ...b StarSeeker 60 focuser detail 3 2 14 16 17 15 6 18 10 11 17 14 13 12 15 16 a Detail of the optical tube 9 8 Figure 2 StarSeeker 60 optical tube detail ...

Страница 7: ...ached to the optical tube 1 Altitude micro motion control rod and thumbwheel This allows fine adjustment of the telescope in the alti tude up down direction For more details see the Getting Started section Focuser drawtube This is where the 90 mirror star diagonal 2 or other optional diagonal is inserted The drawtube is adjusted by the turning the focus wheel 15 which adjusts a rack an pinion syst...

Страница 8: ...18 19 6 23 21 20 5 22 b StarSeeker 60 tripod leg and mount attachment detail 20 21 21 21 6 6 a Detail of the altizimuth mount Figure 3 Detail of the tripod and altazimuth mount ...

Страница 9: ...he azimuth direction Tripod leg attachment screws These screws attach the tripod legs 6 to the yoke altazimuth mount 5 Each screw has a wingnut and two washers Accessory tray bracket This bracket holds the accessory tray 7 Leg lock knobs These knobs lock the tripod legs into place Loosen them to lengthen or shorten the tripod legs Tighten them once you have the legs at the desired length Be certai...

Страница 10: ... 21 at the tops of the tripod legs so the legs are securely fastened to the mount Use the Phillips head screwdriver and or your fin gers to do this 5 Attach the altitude micro motion rod and thumbwheel 13 to the optical tube 1 by first removing the flat head screw from the micro motion rod attachment post 12 on the side of the optical tube Slide the screw through the hole at the end of the micro m...

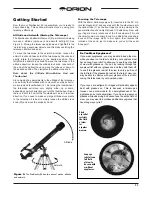
Страница 11: ...hand Focusing the Telescope With the 25mm Kellner eyepiece 3 inserted into the 90 mir ror star diagonal 2 and secured with the thumbscrews aim the optical tube 1 so the front open end is pointing in the general direction of an object at least 1 4 mile away Now with your fingers slowly rotate one of the focus wheels 15 until the object comes into sharp focus Go a little bit beyond sharp focus until...

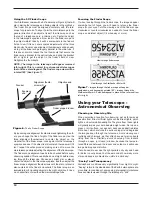
Страница 12: ...is also centered on the finder s crosshairs The finder scope is an invaluable tool for locating objects in the night sky since it has a much wider field of view than the main telescope tube Focusing the Finder Scope If when looking through the finder scope the images appear somewhat out of focus you will need to refocus the finder scope for your eyes Turn the viewing end of the finder scope clockw...

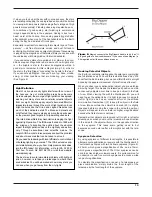
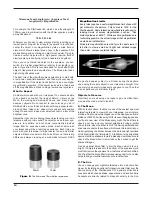
Страница 13: ...ection in the azimuth the object will move in the opposite direction in the eyepiece This takes some getting used to but becomes second nature after a few nights out with the tele scope Eyepiece Selection By using eyepieces of different focal lengths it is possible to attain many magnifications or powers with the StarSeeker 60 Your telescope comes with two Kellner eyepieces Figure 9 a 25mm which g...

Страница 14: ...sky object in a lit room during the daytime and seeing that same object in your telescope at night One can merely be a pretty image someone gave to you The other is an experience you will never forget Objects to Observe Now that you are all set up and ready to go one critical deci sion must be made what to look at A The Moon With its rocky surface the Moon is one of the easiest and most interestin...

Страница 15: ...ent types of galaxies Most deep sky objects are very faint so it is important that you find an observing site well away from light pollution Take plenty of time to let your eyes adjust to the darkness Do not expect these sub jects to appear like the photographs you see in books and magazines most will look like dim gray smudges Our eyes are not sensitive enough to see color in deep sky objects exc...

Страница 16: ...n dled or modified nor does it apply to normal wear and tear This warranty gives you specific legal rights and you may also have other rights which vary from state to state For further war ranty service information contact Customer Service Department Orion Telescopes Binoculars P O Box 1815 Santa Cruz CA 95061 800 676 1343 Orion Telescopes Binoculars Post Office Box 1815 Santa Cruz CA 95061 Custom...

Отзывы: