22
23
cally using, for example,
Quick Stretch
. The
Max Pixel
selection sets the
input range from 0 to the brightest pixel in the image. This prevents any image
pixels from being saturated in the final result, but may produce images with
low contrast. You can also manually set values with
Manual Settings
in a
similar fashion to the
Screen Stretch Window
.
The
Output Range
is used when preparing a file to be saved in a format
that has limited range. The
Output Range
maps minimum input to zero, and
maximum input to 255 (8 bit), 4095 12 bit), or 65535 (16 bit) depending on the
settings. Any values that exceed the limits are clipped. The
Unlimited
set-
ting disables all limiting and is recommended when performing
Gamma
and
Log
stretches; it is appropriate when the image will be saved in floating point
format.
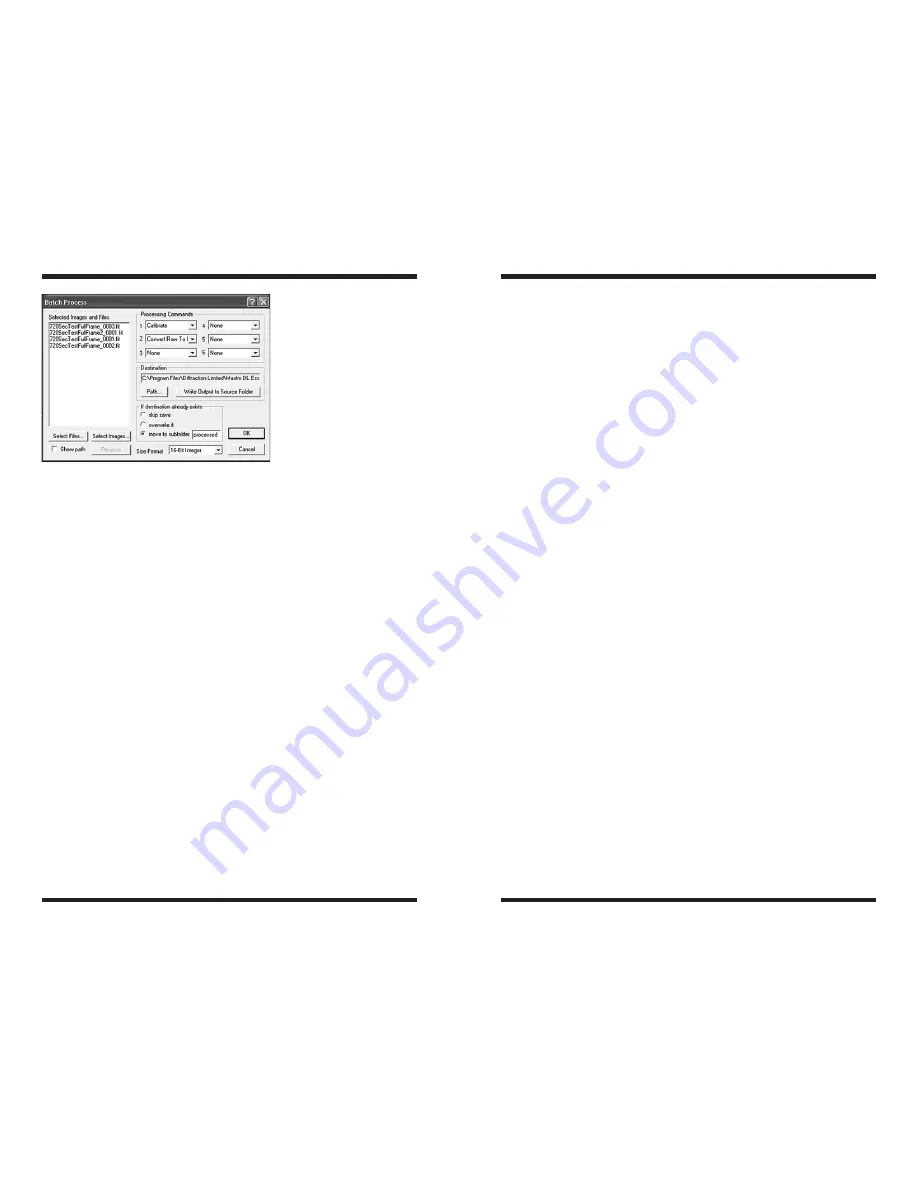
Batch Process
Planetary imaging can require processing hundreds of images. Fortunately,
Batch Process
can be used to process multiple images simultaneously using
the various commands available in MaxIm DL Essentials Edition. Select
Batch
Process
from the
Process
menu (Figure 15).
Procedure for basic batch processing:
1. Select the image file you want to process from your computer using the
Select Files
button. Use CTRL-click to select individual files, and SHIFT-
click to select a range of files. You can see the path for the selected files
by turning on the
Show Path
check box. Or you can select images already
open in MaxIm DL Essentials Edition by clicking the
Select Images
button.
The window that pops-up will indicate all the images currently open.
2. Select the processing task you want done in the
Processing Commands
box. Choose up to 6 processing commands which will be executed in
sequence.
3. Use the same recommended processing order for batch processing as
you would normally do manually. You should 1.
Calibrate
, 2. Adjust
Color
Balance
, etc.
You can remove selected images and files from the
Batch Process
list by
selecting them with the mouse and clicking the
Remove
button.
4. Select the location for the saved files using the
Path
button, or click
Write
Output to Source Folder
to cause the files to be saved back into the
folder from which they were loaded. (This option cannot be used when an
image has never been saved, for example, one freshly acquired from the
camera.) In the event that saving a file will cause it to overwrite an existing
file, you can select
skip save, overwrite it,
or
move to subfolder
. You
can specify the subfolder name in the adjacent field. Use
Size Format
to select between
16-Bit Integer
and
32-Bit IEEE Float
formats for the
processed images. To keep all processed image data intact (especially for
stacked images), we recommend using the
32-Bit IEEE
Float format. If
you need to open the resultant files in another program, however, you may
need to use the
16-Bit Integer
format.
5. Click
OK
to start the
Batch Process
operation. Successfully converted
and saved files are removed from the list box. If an error occurred the file
will remain in the list. Point the mouse cursor at an image left in the list. The
appropriate error message will appear in the
Status Bar
at the bottom of
the MaxIm DL Essentials Edition main window.
recommended Processing Sequence
What is the best order to apply the processing functions in? Here is a recom-
mended sequence:
1. Dark Subtract
2. Combine
3. Unsharp Mask
4. Color Balance
5. Stretch
Once you have the combined frames, there is a lot more room for experimenta-
tion and tinkering. Be sure to save a copy of the combined image; otherwise you
might have to go back to the beginning and stack individual images again!
note on File Format
When saving images (using
Save
or
Save As
in the
File
menu), you have a
choice of file formats. The default produces .fit files, but .tif, .jpg, .png, and
.bmp file formats can also be selected. Having a choice of output file formats
is useful, especially if images will be exported to other software programs for
additional image processing (like Adobe Photoshop, for instance).
Figure 15.


