


9
09.09/WE
ORGAPACK OR-T 400
2
GENERAL INFROMATION
These operating instructions are intended to simplify fa-
miliarisation with the strapping tool and its proper use for
the intended purpose. The operating instructions contain
important information concerning the safe, proper and
ef
fi
cient use of the strapping tool.
The operating instructions must always be available at
the place of operation of the strapping tool. They must be
read and observed by all persons working with or on the
strapping tool.
In addition to the operating instructions and the regula-
tions for accident prevention effective in the country of
use and place of operation, the recognised technical
regulations for safety and proper operation must also be
observed.
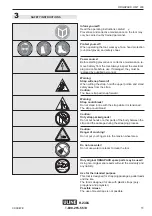
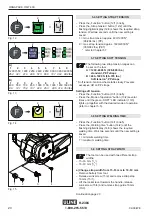
CAUTION!
Used where there is danger to life and health.
WARNING!
Used for danger which can cause material damage.
NOTE!
Used for general information and information which, if
not followed can cause faults in the operating sequence.
2.1 INFORMATION ON DISPOSAL AND
ENVIRONMENTAL PROTECTION
This tool is manufactured without any physical or chemi-
cal substances which could be dangerous to health.
The legal prescriptions for disposal of all the parts must
be observed. The electrical assemblies should be dis-
mantled so that the mechanical, electro-mechanical and
electronic components can be disposed of separately.
Charger and batteries should be sorted for environ-
mental-friendly recycling.
•
Do not open the battery.
•
Do not throw the used battery into household waste,
fi
re or water.
Defective or used batteries undergo a complete recycling
process.
H-2386
1-800-295-5510


