NE
4
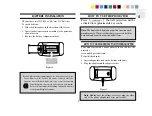
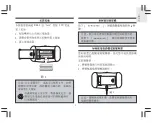
Once the power adapter is in place, you can select to turn on
the projector for longer time, such as throughout the night, by
sliding down the [
PROJECTION ON
] switch on the side of
the unit. To turn off the projector, slide the switch back.
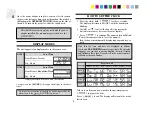
DISPLAY MODES
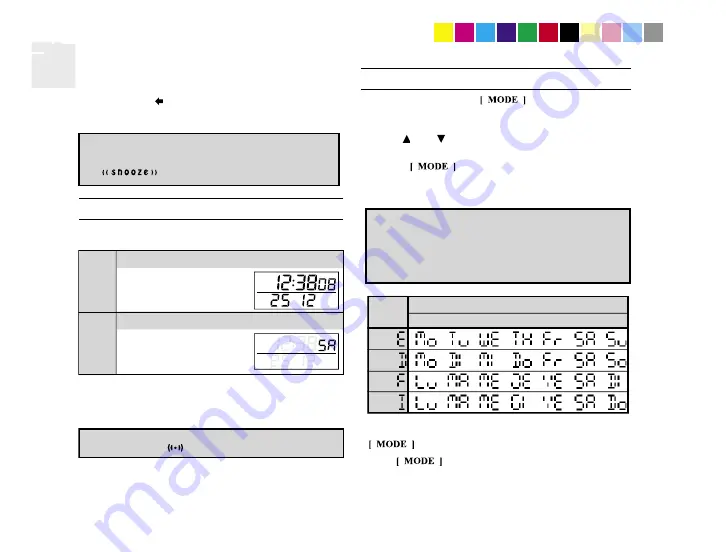
The unit supports two display modes in the sequence of:
Note that this switch can only be used with the power
adapter installed. For momentary projection, use the
[
].
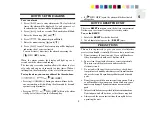
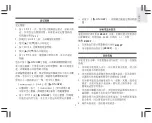
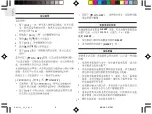
HOW TO SET THE CLOCK
1. To set the clock, hold
for three seconds.
The display will return to MODE 1, with the hour digits
blinking.
2. Use[ ] or [ ] to select the hour. Keep pressing the
button to increase or decrease the value rapidly.
3. Press
to confirm. The minute digits will blink.
Repeat the same procedure to set the minutes,
then the day-of-month,month, display language and day-of-
week.
e
g
a
u
g
n
a
L
y
a
d
n
u
S
y
a
d
r
u
t
a
S
y
a
d
ir
F
y
a
d
s
r
u
h
T
.
d
e
W
y
a
d
s
e
u
T
y
a
d
n
o
M
h
si
l
g
n
E
n
a
m
r
e
G
h
c
n
e
r
F
n
a
il
a
tI
k
e
e
w
-
e
h
t-
f
o
-
y
a
D
If there is an item you do not wish to change, simply press
to bypass the item.
Press
to exit. The display will return to the mode
last chosen.
Note that the time and date are displayed in 24-hour
clock and
DAY-MONTH
format, respectively. For display
language,you can choose among English, French, German
and Italianóin that order. Day-of-week is the usual sequence
of Monday through Sunday.
e
d
o
m
e
t
a
d
/
e
m
it
h
c
a
e
r
o
f
n
o
it
p
ir
c
s
e
d
y
a
l
p
si
D
[
e
h
t
n
o
s
s
e
r
p
h
c
a
E
E
D
O
M
e
h
t
n
i
y
a
l
p
si
d
e
h
t
e
l
g
g
o
t
ll
i
w
]
.r
e
d
r
o
e
v
o
b
a
e
h
t
y
b
d
e
c
a
l
p
e
r
e
b
l
li
w
y
a
l
p
si
d
e
h
t
f
o
e
n
il
d
n
o
c
e
s
e
h
t
t
a
h
t
e
t
o
N
e
h
t
fi
e
m
it
m
r
a
l
a
.
d
e
s
s
e
r
p
si
N
O
T
T
U
B
M
D
M
D
e
m
i
T
l
a
c
o
L
e
m
i
T
l
a
c
o
L
,
e
t
u
n
i
M
,
r
u
o
H
k
e
e
W
-
e
h
t-
f
o
-
y
a
D
h
t
n
o
M
,
y
a
D
h
t
n
o
M
,
y
a
D
s
d
n
o
c
e
S
,
e
t
u
n
i
M
,
r
u
o
H
--
--
--
--
--
--
--
--
--
--
--
--
--
--
--
--
--
--
--
-
2
E
D
O
M
1
E
D
O
M
--
--
--
--
--
--
--
--
--
--
--
--
--
--
--
--
--
--
--
-
313p en.indd 4
2006.9.19 4:32:45 PM
[
]
Содержание RA313P
Страница 1: ...PROJECTION CLOCK Model RA313P User Manual...
Страница 8: ...1 5 6 p P _ C T _ P 3 1 3 M R M P 9 2 2 4 0 9 8 2 1 RA313P...
Страница 10: ...3 AA 1 2 3 8 1 2 UM 3 1 5V 2 3...
Страница 11: ...4 PROJECTION ON MODE M D M D 1 2 5 6 p P _ C T _ P 3 1 3 M R M P 1 3 2 6 0 9 8 4 1 MODE 1 2 3 MODE 24 MODE MODE...
Страница 12: ...5 1 0 00 2 3 4 5 6 ON OFF ON OFF ON OFF 8 2 8 RESET 00 00 00 1 1 RESET 1 RESET 2 RESET 1 2 3 4 5 6 ON OFF...
Страница 13: ...6 5 C 50 C 24 2 8 0 5 2 1 5V UM 3 AA 107 X 115 X 64 X X 175 5 6 p P _ C T _ P 3 1 3 M R M P 5 3 2 4 0 9 8 2 7...
Страница 15: ...1 RA313P 5 6 p P _ C S _ P 3 1 3 M R M P 5 4 2 6 0 9 8 1...
Страница 17: ...3 UM 3 AA 1 5V 1 2 3 1 1 2 2 3 5 6 p P _ C S _ P 3 1 3 M R M P 7 4 2 6 0 9 8 3...
Страница 18: ...4 M D M D 1 2 5 6 p P _ C S _ P 3 1 3 M R M P 8 4 2 6 0 9 8 4 PROJECTION ON MODE 1 1 2 3 MODE MODE MODE MODE 24...
Страница 20: ...6 5 C 50 C 24 2 8 0 5 2 1 5V UM 3 AA 107 x115 x64 x x 175 5 6 p P _ C S _ P 3 1 3 M R M P 2 5 2 4 0 9 8 2 7...
Страница 22: ...2006 Oregon Scientific All rights reserved 086L004677 024 C...


