


www.greatel.net
- 44 -
Step 5: In the Hook Status Change field, enter a number from 20 to 1000. This is the hook status change time. If
less than the time set here, GT48 will ignore this status change.
5.7.7 Advanced IP Options
Step 1: Click the Advanced Config link on the left side of Figure 5-1. Then click IP Config. The IP Optional screen
displays:
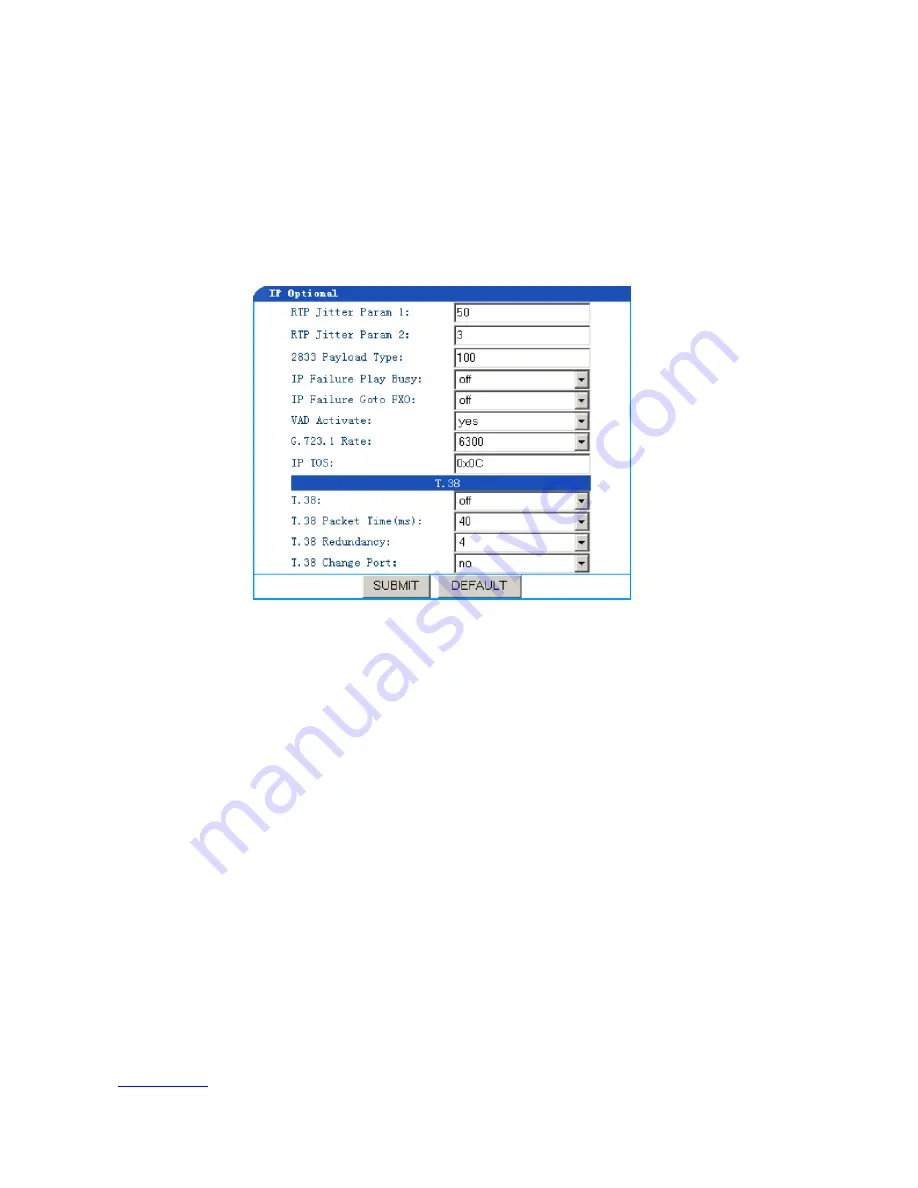
Figure 5-7g
Step 2: Leave the De-Jitter Buffer Maximum (frame number) to its default setting of 50. It is recommended that
you do not change this value.
Step 3: Leave the De-Jitter Buffer Minimum (frame number) to its default setting of 3. It is recommended that you
do not change this value.
Step 4: In the 2833 Packet Type field enter a value from 97 to 127. This parameter is used for transmitting 2833
packet type. The default load type is 100.
Step 5: In the Sending Busy Tone for Network Breakdown field select on or off to indicate to send or not busy
tones when IP network doesn’t connect.
Step 6: In the Switch to FXO for Network Breakdown field select on or off to indicate to switch or not all calls to
FXO port when IP network doesn’t connect. It is recommended that you set this parameter to on. If IP
network doesn’t connect, in order to protect router, all IP calls go to PSSTN through FXO.
Step 7: In the Generation of the mute compress and comfort noise field if you select yes, the speech packet
will not be sent out in the mute of the call, and noise is added to the speech stream to replace the mute. It
is recommended that you set this parameter to yes to save the network bandwidth.
Step 8: In the G.723.1 Rate (BPS) field enter either 5300 or 6300 according to specific applications.