background image

•  Screen Image retention

Do not display a still image (such as on a video game or when hooking up a PC to this PDP) on the plasma
monitor panel for more than 2 hours as it can cause screen image retention. This image retention is also
known as “screen burn”. To avoid such image retention, reduce the degree of brightness and contrast of this
screen when displaying a still image.

• Cell Defect

The plasma display panel consists of fine cells. Although the panels are produced with more than 99.9 percent
active cells, there may be some cells that do not produce light or remain lit.

• Height

The PDP can normally operate only under 2000m in height. It might abnormally function at a place over
2000m in height and do not install and operate there.

• Warranty

-Warranty does not cover any damage caused by image retention.
- Burn-in is not covered by the warranty.

User Instructions

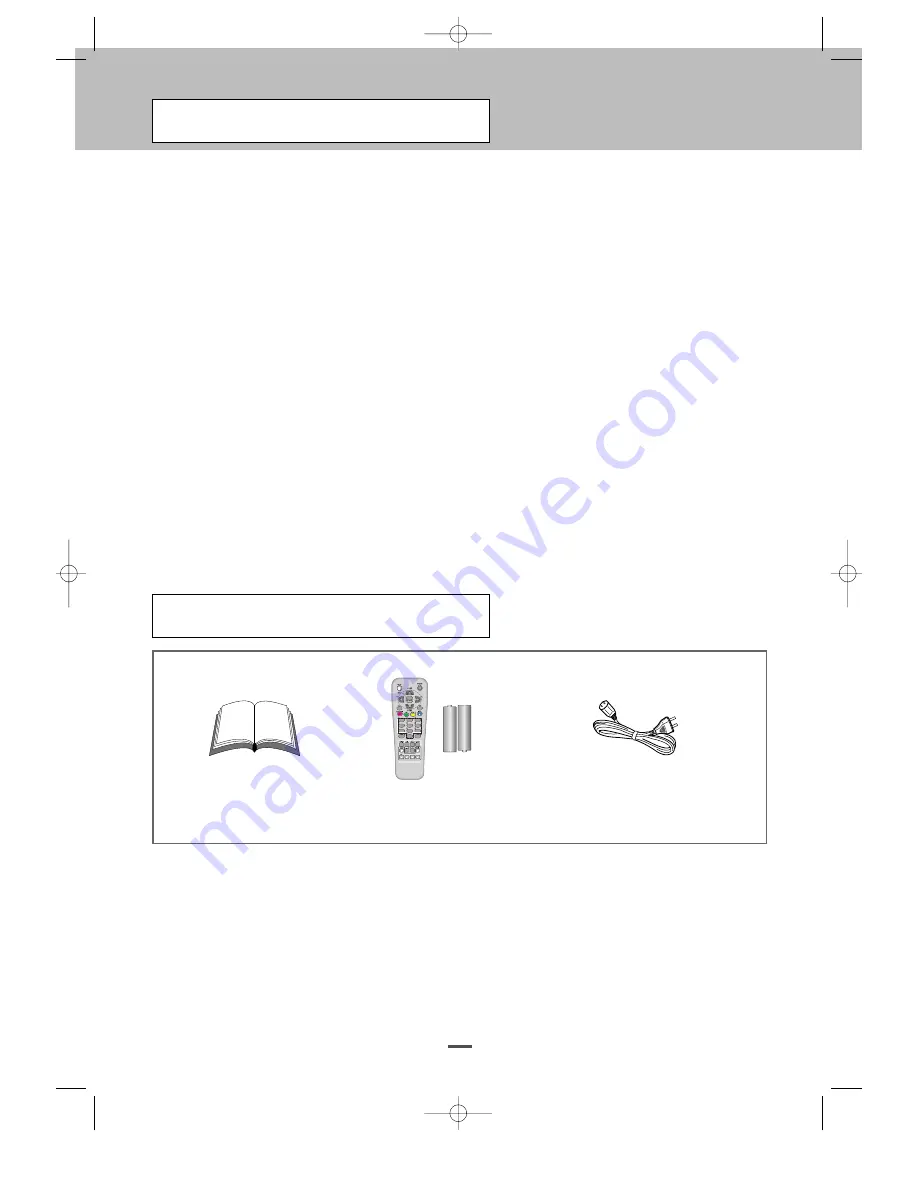
Checking Parts

3

Owner ’s Instructions 

Remote Control/AAA Batteries

Power CORD     

OP-42TN1U/42TN2U(GB)   2004.10.1 10:37 AM  ˘

` 3   mac001  1200DPI 100LPI

Содержание OP-42TN1U

Страница 1: ...TV PLASMA DISPLAY PANEL Owner s Instructions Before operating the unit please read this manual thoroughly and retain it for future reference Model OP 42TN1U OP 42TN2U OP 42TN1U 42TN2U GB 2004 10 1 10...

Страница 2: ...ying down or sitting the unit directly on the floor Ventilation The ventilation should not be impeded by covering the ventilation openings with items such as newspapers table clothes curtains etc Acci...

Страница 3: ...lay panel consists of fine cells Although the panels are produced with more than 99 9 percent active cells there may be some cells that do not produce light or remain lit Height The PDP can normally o...

Страница 4: ...NELS Storing Channels Automatically 13 Storing Channels Manually 14 USING YOUR DISPLAY Using the Fine Tune 15 Changing the Picture Standard 16 Freezing the Current Picture 16 Adjusting the Picture Set...

Страница 5: ...osed Caption Background 35 ADDITIONAL INFORMATION AND CONNECTIONS Connecting to the External Devices 36 Connecting to the S Video Input 37 Connecting to the DVI Input 37 Connecting to the RGB Input 38...

Страница 6: ...he menu Vol Press to increase or decrease the volume Also used to select or adjust items on the on screen menu CH Change channels Also used to move up or down in the On screen menu I Press to turn the...

Страница 7: ...vice or video disc players f S VIDEO Video inputs for external devices with an S Video output such as a camcorder or VCR g Component Video Y Pb Pr or Y Cb Cr and audio AUDIO L R inputs for Component h...

Страница 8: ...and FREQUENCY only PC Mode 6 NUMBER 0 9 Direct channel selection 7 SOUND Sound Mode selection 8 SIZE Sub Picture size selection 9 Multi PiP Multi PiP On Off 10 SLEEP Automatic switch off 11 POWER Tur...

Страница 9: ...and then pulling firmly to remove it Insert two R03 UM4 AAA 1 5V or equivalent batteries aking care to respect the polarities on the battery against on the remote control on the battery against on th...

Страница 10: ...e angle can be adjusted from 0 to 15 by 2 1 2 3 Connecting a Satellite Receiver or Decoder In order to watch television programmes broadcast via a satellite network you must connect a satellite receiv...

Страница 11: ...tomatically NOTE If you have not yet stored any channels No clear picture appears Refer to Storing Channels Automatically on page 13 or Storing Channels Manually on page 14 To switch your PDP off pres...

Страница 12: ...as VCR DVD Set Top box and the TV source broadcast or cable Press the INPUT button The options available in the Input group are displayed Select the signal source by pressing CH or CH button then pres...

Страница 13: ...lable in the TV Function1 group are displayed Press the CH button to select Auto Search in the TV Function 1 group Press the VOL or VOL button to start the search The search will end automatically Cha...

Страница 14: ...t Edit channel Add Remove By pressing VOL button select ADD for adding the current channel to the TV s memory or select Remove for erasing the current channel 1 2 3 4 5 6 7 5 50 5 50 5 50 5 50 5 50 Mo...

Страница 15: ...or VOL button The horizontal bar is displayed Move the horizontal bar s cursor left or right by pressing the VOL or VOL button to reach the required setting Press the VOL or VOL button until the pictu...

Страница 16: ...options simply by pressing the PICTURE Picture Mode button You can freeze the picture when watching a television programme Press the MENU button The main menu is displayed Press the VOL or VOL button...

Страница 17: ...ss the CH or CH button to select the option you want to change Press the VOL or VOL button to change the setting The horizontal bar is displayed Move the horizontal bar s cursor left or right by press...

Страница 18: ...Press the CH button to select the options in the Picture group Select the User by pressing the VOL or VOL button The User options are listed Press the CH button to select the options in the User grou...

Страница 19: ...button The main menu is displayed Press the VOL or VOL button to select Picture The options available in the Picture group are displayed Press the CH button to select the options in the Picture group...

Страница 20: ...main menu is displayed Press the VOL or VOL button to select Window The options available in the Window group are displayed Press the CH button to select the options in the Window group Press the CH...

Страница 21: ...ich allow you to control picture quality Press the MENU button The main menu is displayed Press the VOL or VOL button to select Setting The options available in the Setting group are displayed Press t...

Страница 22: ...pect ratio of the program is maintained the image is no longer tall enough to fill your screen so black gray bars are seen at the top and bottom of the screen Letterbox Subtitles If subtitles are inte...

Страница 23: ...you to adjust the Digital Zoom digit will appear at the bottom of the screen Press the VOL VOL or ZOOM ZOOM button to adjust the digital zoom When you are satisfied with the settings press the MENU b...

Страница 24: ...nent RGB DVI TV X X X X X X VIDEO1 2 X X X X X X S Video X X X X X X X X X X X X O O O X X X RGB O O O X X X DVI O O O X X X he he he he he hf hf hf hf hf he he he he he he he he he he Main picture se...

Страница 25: ...ss the CH button to select the options in the Setting group Select the Digital NR by pressing CH or CH button Press the VOL or VOL button to select the options The options are displayed in the followi...

Страница 26: ...ound group are displayed Press the CH button to select the options in the Sound group Select the Sound Mode by pressing CH or CH button Press the VOL or VOL button to select the options The sound effe...

Страница 27: ...ect Sound The options available in the Sound group are displayed Press the CH button to select the options in the Sound group Select the Sound Mode by pressing CH or CH button Press the VOL or VOL but...

Страница 28: ...yed Press the VOL or VOL button to select Sound The options available in the Sound group are displayed Press the CH button to select the options in the Sound group Select the Volume by pressing CH or...

Страница 29: ...VOL button to select Setting The options available in the Setting group are displayed Press the CH button to select the options in the Setting group Select the Sleep by pressing CH or CH button Selec...

Страница 30: ...Mode by pressing CH or CH button Press the VOL or VOL button to select the option Mono Stereo Dual I Dual II When you are satisfied with the settings press the MENU button NOTE You can also set these...

Страница 31: ...ect VOL Exit Menu TV Function 2 Stereo Mode Stereo Closed Caption Mode CC1 Closed Caption Off On Closed Caption Background Opaque Content Blocking Press the MENU button The main menu is displayed Pres...

Страница 32: ...st configure your secret number The U S has two rating systems for viewing content TV Parental Guidelines and movie ratings The TV Parental Guidelines work in conjunction with the Content Blocking to...

Страница 33: ...CH button to new the password NOTE If you forget the password input 555555 to initialize the password 1 2 Content Blocking On Off Repeat steps 1 4 from Set up Content Blocking Select Content Blocking...

Страница 34: ...can be set but this rating is not normally broadcast by TV station MPAA RATING Select the desired TV Rating among G PG PG 13 R NC 17 X and NR See the table below for details Voluntary movie rating sys...

Страница 35: ...isplayed Press the CH button to select the options in the TV Function2 group Select the Closed Caption Background by CH button Press the VOL button to select the option Transparent Opaque 1 2 3 4 5 Mo...

Страница 36: ...Devices 36 Rear of the TV Input Specification Connector Input Video Audio L R VIDEO1 VIDEO2 VCR Decoder Video game device Video disc player Satellite receiver DVD OP 42TN1U 42TN2U GB 2004 10 1 10 38 A...

Страница 37: ...io or video system to your television ensure that all elements are switched off Refer to the documentation supplied with your equipment for detailed connection instructions and associated safety preca...

Страница 38: ...he RGB Input Connecting to the Component Input 38 Personal Computer and AUDIO Input PC RGB DVD Componnent L R Pb Pr Y DTV receiver AUDIO The Component Input connectors are used for equipment with a DV...

Страница 39: ...el screen appears click on Display and a display dialog box will appear Select the Settings tab in the display dialog box The two key variables that apply the television PC interface are Resolution an...

Страница 40: ...000 Pixel Clock Frequency MHz 25 170 31 500 28 320 25 170 25 175 31 500 31 500 36 000 36 000 40 000 50 000 49 500 56 250 57 280 65 000 75 000 78 750 27 000 27 000 74 250 74 180 74 250 74 250 74 180 74...

Страница 41: ...e PC power is turned off or if the PC is disconnected If so press the INPUT button to enter the Video mode Also make sure that the PC is connected When connecting a notebook PC to the television make...

Страница 42: ...ta2 2 T M D S Data2 3 T M D S Data2 4 Shield 4 T M D S Data4 5 T M D S Data4 6 Clock DDC 7 Data DDC 8 Not Connected 9 T M D S Data1 10 T M D S Data1 11 T M D S Data1 3 Shield 12 T M D S Data3 13 T M D...

Страница 43: ...ssed the I button On Off and the POWER button Check the picture contrast and brightness settings Check the volume Check the volume Check whether the volume MUTE button on the remote control has been p...

Страница 44: ...Component Input RCA pin x 1 Y 1V p p 75 Pb Cb 0 7V p p 75 Pr Cr 0 7V p p 75 EDTV 525i 480i 625i 576i SDTV 625p 576p 525p 480p HDTV 750p 720p 1125i 1035i 1080i Audio Input RCA pin x 1 0 5V rms L R Vid...

Страница 45: ...onse 45 Hz 20 KHz External Speaker Optional Accessories The specifications are subject to change without notice Standard Owner s Instructions Remote Controller AAABatteries Power Cord Optional Table T...

Страница 46: ...ar installation If this equipment does cause harmful interference to radio or television reception which can be determined by turning the equipment off and on the user is encouraged to try to correct...

Отзывы: