Operating instructions SCORP
6 Operation
orbitalum tools
gmbh
(06.07)
MT_SCORP_BA_04_790014762_09.doc
13
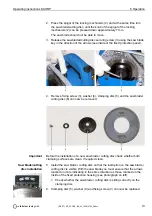
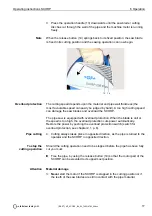
2. Press the spigot of the locking mechanism (2) and at the same time turn
the saw blade/cutting disc, until the knob of the spigot of the locking
mechanism (2) can be pressed down approximately 7 mm.
The saw blade should not be able to move.
3. Release the saw blades/cutting disc securing screw (3) using the saw blade
key in the direction of the arrows (see inside of the fixed protection panel).
4. Remove fixing screw (3), washer (4), clamping disc (5) and the saw blade/
cutting disc (6) can now be removed.
Before the installation of a new saw blade / cutting disc check whether both
clamping surfaces are clean. If required clean.
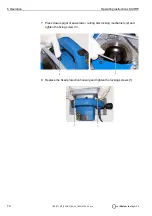
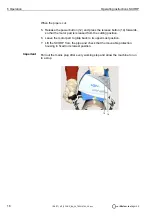
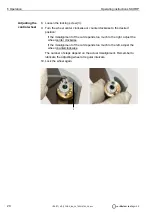
5. Install the saw blade / cutting disc so that the inscription on the saw blade /
cutting disc is visible. With the saw blade you must ensure that the arrows
marked on it are indicating in the same direction as those marked on the
inside of the fixed protection housing (see photograph on left).
Z
Check whether the saw blade / cutting disc is sitting correctly on the
clamping disc.
6. Clamping disc (5), washer (4) and fixing screw (3) can now be replaced.
Important
Saw blade/cutting
disc installation
2
3
3
4
5
6
Содержание SCORP 220 Plus
Страница 27: ......

