INSTALL DRAIN
5
1.
CAUTION
Plumbing and electrical installa-
tion should be performed ac-
cording to local regulations by a
licensed professional.
IMPORTANT
Do not remove the protective
cover from the Drain unit until af-
ter assembly.
x5
Countersunk Stainless Steel Screw
Choose the 5 holes that fits the noggins
best. There are holes at the distance of
300 mm, 600 mm and then outer cor-
ners and the middle.
2. Next step depends on Shower variant.
Follow steps valid for OS Drain
(
3. Valid for OS Drain
³
30mm
X
X
Z
Z
X
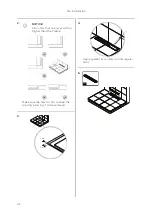
Finished floor height where it is level.
Z
Drain Unit is centered in the shower
space.
4.
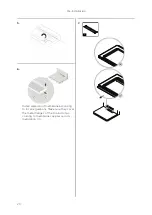
Connect Drain Unit to the sewerage sys-
tem as defined by local regulations.
5
Pre-installation
14


