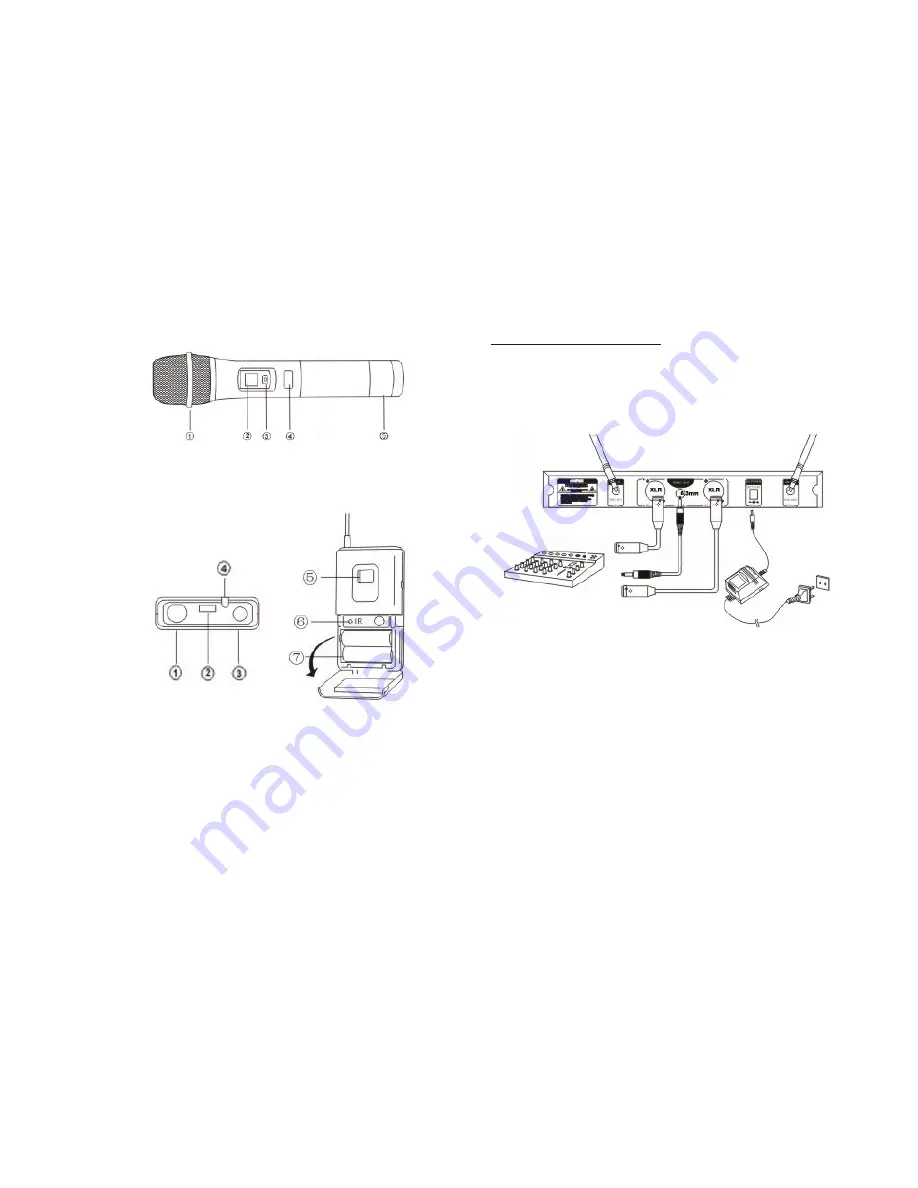
System Controls:
2. Hand Held Microphone:
3. Beltpack Transmitter:
1: Microphone head protector
2: Display panel
3: Power on/off’ button
4: IR Receiver
5: Battery cover
1: Mi
2: Power on/off’ button
3: Transmitter Antenna
4: Low Voltage Light
5: Display
6: IR Receiver
7: Battery compartment
System Set Up:
1. Receiver Cable Connections:
The Receiver can be connected to an amplifier or mixer to process the
microphone signal. 2 outputs are provided:
1 balanced (XLR) socket and
2. an unbalanced (6.3mm ~ 1/4”) socket. A 6.3mm cable is included so
you can use this socket to connect your Receiver.
a. Connect the output to the mixer or amplifier input using the 6.3mm cable
provided, or using an XLR cable that you will need to source.
b. Note that the 6.3mm output signal is a “mixed” signal carrying both
microphones together. If this output id used, then you do not need to use a
mixer before inputting the cable to the amplifier.
c. Connect the DC power adapter to the DC power socket on the rear
panel of the Receiver.
d. Attach the aerials provided to the Receiver.
Your system now just needs to be turned on & the system frequency set
(see next section) to be ready to use.
--- 4 ---
--- 5 ---


