


34
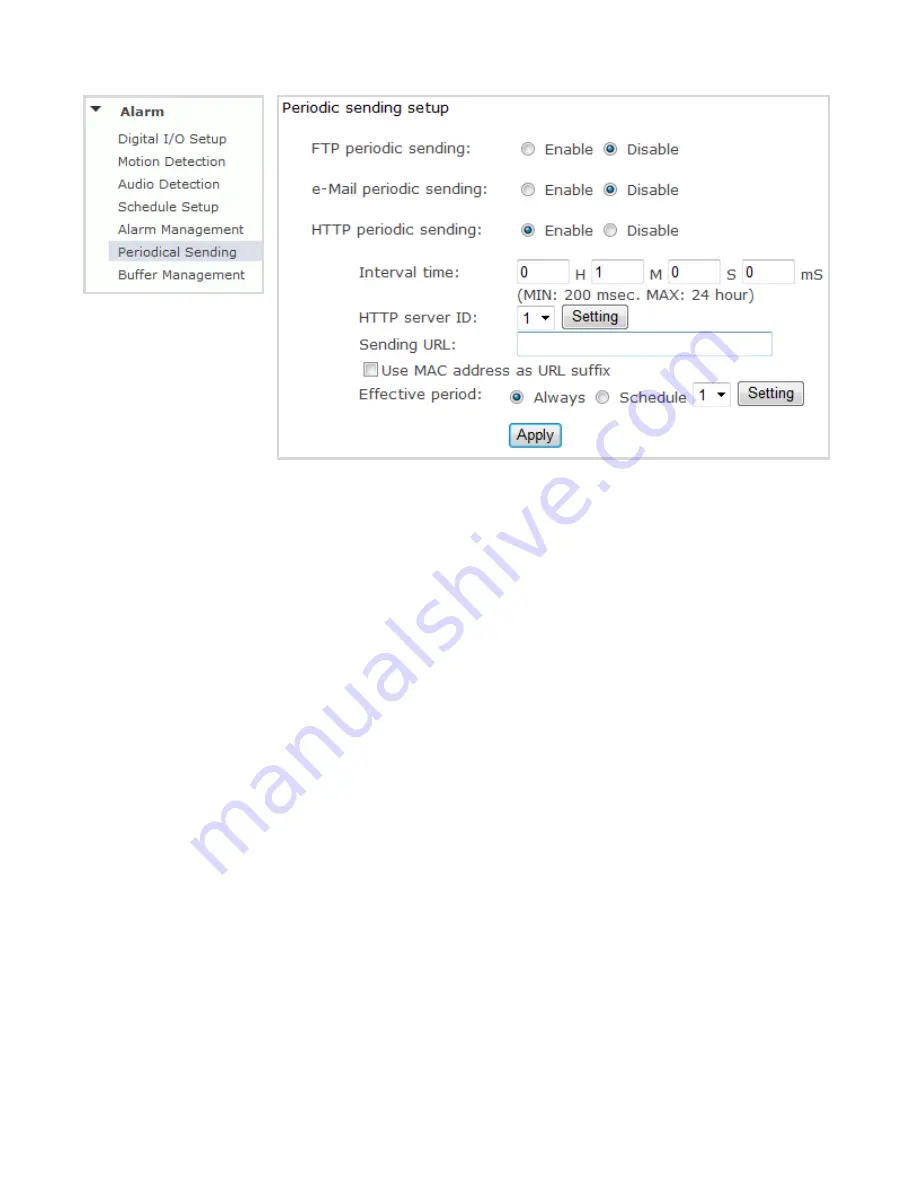
HTTP periodic sending
HTTP periodic sending -
Enable or disable HTTP upload periodically.
Interval time -
Type the interval at which you want to send the URL periodically.
HTTP server ID -
Select HTTP server ID, click
Setting
to set HTTP server.
Sending URL -
Type URL which can be sent to HTTP server..
Use MAC address as URL suffix -
Enable or disable this function.
Effective period -
Set Effective period. If select schedule, click
Setting
to set schedule.
Click
Apply
to confirm your setting.
Note:
The notifications use the camera’s
internal clock. Please make sure the camera’s Date and Time are correct.
Содержание IP226
Страница 3: ...3 Outdoor camera...
Страница 54: ...54 IPCAM 2012 11...


