-
20
-
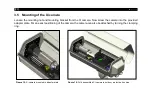
3.5 Mounting of the Xi camera
Loosen the mounting nut and mounting bracket from the Xi camera. Now screw the camera into the provided
adapter plate. For an exact positioning of the camera, the camera can also be attached by turning the clamping
ring.
Figure 15:
Xi camera mounted in adapter plate
Figure 16:
Fully assembled Xi camera in outdoor protective housing
Содержание Outdoor protective housing
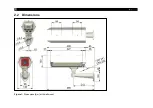
Страница 8: ... 8 2 2 Dimensions Figure 1 Dimensions mm with wall mount ...
Страница 9: ...Technical Data 9 Figure 2 Dimensions for wall mount ...
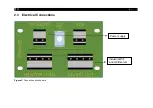
Страница 10: ... 10 2 3 Electrical Connections Figure 3 Connection circuit board Power supply Industrial PIF and USB server ...
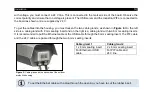
Страница 15: ...Installation 15 The USB server is now ready mounted Figure 9 Figure 9 USB server ready mounted ...
Страница 17: ...Installation 17 Step 2 Carefully remove the mounting plate Figure 11 Figure 11 Remove the mounting plate ...
Страница 26: ... 26 Figure 24 Remove air purge laminar ...
Страница 32: ... 32 Appendix A Declaration of Conformity ...
Страница 33: ......
Страница 34: ...optris Outdoor protective housing MA E2022 10 A ...

