background image

40

English

User Controls

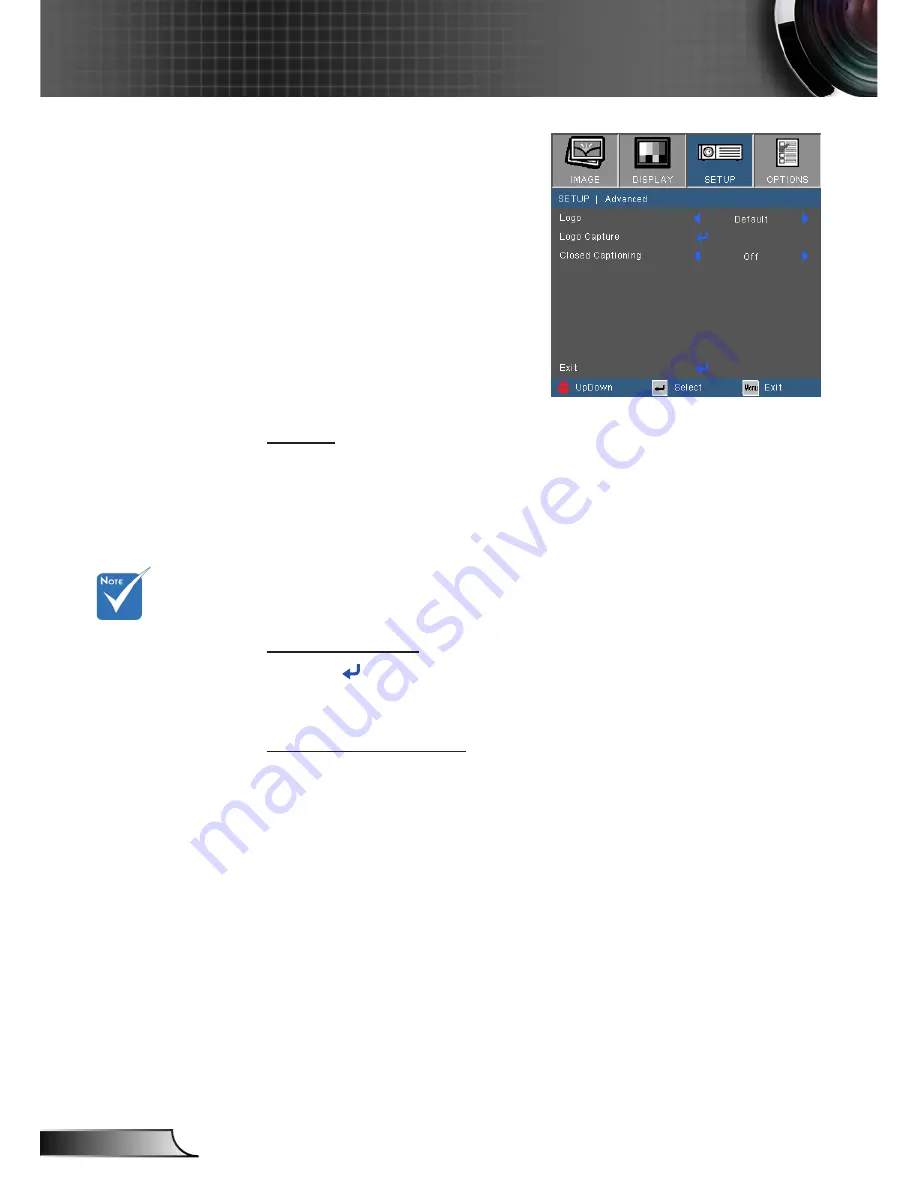
SETUP | Advanced

  Logo

Use this function to set the desired startup screen. If changes are 

made they will take effect the next time the projector is powered 

on.


Default: The default startup screen.


Neutral: Logo is not displayed on startup screen.


User: Use stored picture from “Logo Capture” function.

  Logo Capture

Press   

to capture an image of the picture currently displayed

on screen.

  Closed Captioning

Use this function to set the desired startup screen. If changes are 

made they will take effect the next time the projector is powered 

on.


Off: select “off” to turn off the closed captioning feature.


CC1:CC1 language: American English.


CC2:CC2 language (depending on the TV channel of the 

user):Spanish, French, Portuguese, German, Danish.

 

For successful logo 

capture, please 

ensure that the on-

screen image does 

not exceed the pro-

jector’s native resolu

-

tion. (XGA:1024x768  

or WXGA:1280x800).

Содержание EW400-M

Страница 1: ...ols 18 Control Panel Remote Control 18 Control Panel 18 Remote Control 19 On screen Display Menus 24 How to operate 24 Menu Tree 25 IMAGE 27 IMAGE Advanced 29 DISPLAY 31 DISPLAY 3D 34 SETUP 35 SETUP S...

Страница 2: ...do not place the projector on a crowded coffee table sofa bed etc Do not put the projector in an enclosure such as a book case or a cabinet that restricts air flow 2 Do not use the projector near wate...

Страница 3: ...the on screen display OPTIONS Lamp Settings menu after replacing the lamp module refer to page 48 Warning When switching the projector off please ensure the cooling cycle has been completed before dis...

Страница 4: ...long period of time Do not Block the slots and openings on the unit provided for ventilation Use abrasive cleaners waxes or solvents to clean the unit Use under the following conditions In extremely h...

Страница 5: ...he lamp power use room blinds to reduce ambient light levels Product Features SVGA 800x600 Native resolution XGA 1024x768 Native resolution WXGA 1280x800 Native resolution HD compatible 720p and 1080p...

Страница 6: ...Cord Package Overview Unpack and inspect the box contents to ensure all parts listed below are in the box If something is missing please contact your nearest customer service center 2 AAA Batteries Pr...

Страница 7: ...Ring 3 Speaker 4 Zoom Ring 5 Lens 6 IR Receiver 7 Input Output Connections 8 Power Socket 9 Tilt Adjustment Feet 10 Ventilation inlet 11 Ventilation outlet 3 8 1 4 9 7 10 5 6 2 10 11 The interface is...

Страница 8: ...glish Introduction Control Panel 2 3 1 7 1 Power LED 2 Lamp LED 3 Temp LED 4 Enter Help 5 Menu 6 Re Sync 7 Keystone Correction 8 Four Directional Select Keys 9 Source 10 Power Standby button 5 10 6 9...

Страница 9: ...nput Connector 7 3 5mm Microphone Input 8 Audio Output Connector 3 5mm Mini Jack 9 Audio Input connector 3 5mm mini jack 10 KensingtonTM Lock Port 11 VGA2 In YPbPr Connector PC Analog Signal Component...

Страница 10: ...nal Select Keys Mouse control 7 Switch turn on off mouse function 8 Re Sync 9 Mouse Right Click 10 Page Up 11 Page Down 12 Volume 13 Menu 14 Zoom 15 AV mute 16 Video 17 3D 18 VGA1 19 USB 20 Laser Poin...

Страница 11: ...cessories Optional accessory SERVICE C molex MOLEX molex MOLEX E 6 2 4 0 5 S P R 1 2 5 1 Power Cord 2 USB Cable 3 DVI HDMI Cable 4 RS232 Cable 5 VGA Cable 6 Audio Input Cable 7 Audio Output Cable 8 VG...

Страница 12: ...ccessory SERVICE C E 6 2 4 0 5 S P R 1 Power Cord 2 HDMI Cable 3 15 Pin to 3 RCA Component HDTV Adaptor 4 3 RCA Component Cable 5 Audio Cable Jack RCA 6 Audio Cable Jack Jack 7 Composite Video Cable 8...

Страница 13: ...me you use the projector you will be asked to select the preferred language and power saving mode 4 Turn on and connect the source that you want to display on the screen computer notebook video player...

Страница 14: ...assistance Powering off the projector 1 Press the button on the remote control or on the control panel to turn off the projector The following message will be displayed on the screen Press the button...

Страница 15: ...d with elevator feet for adjusting the image height 1 Locate the adjustable foot you wish to modify on the underside of the projector 2 Rotate the adjustable ring clockwise to raise the projector or c...

Страница 16: ...projector will focus at dis tances from 3 94 to 32 8 feet 1 2 to 10 0 meters Adjusting Projection Image Size SVGA XGA series Projection Image Size from 30 to 307 0 0 7 to 7 8 meters WXGA series Projec...

Страница 17: ...250 00 5 08 3 81 200 00 150 00 8 13 9 75 26 67 32 00 0 57 22 50 307 00 6 24 4 68 245 60 184 20 9 98 11 98 32 75 39 30 0 70 27 63 Diagonal length inch size of 16 10 Screen Screen Size W x H Projection...

Страница 18: ...ilable when OSD menu is not shown SOURCE Press SOURCE to select an input signal Menu Press Menu to launch the on screen display OSD menu To exit OSD Press Menu again Four Directional Select Keys Use t...

Страница 19: ...lly synchronizes the projector to the input source Four Directional Select Keys Use to select items or make adjustments to your selection PC Mouse Control Use for emulation of USB mouse via USB when y...

Страница 20: ...o source USB Display the USB device Switch USB mouse switch Turns mouse function on off Press twice to turn on the mouse function For the mouse function to work USB cable must be connected between the...

Страница 21: ...21 English User Controls Using the HELP button The HELP function ensures easy setup and operation Press the button on the control panel to open the Help Menu...

Страница 22: ...the Troubleshooting section on pages 64 68 for more details Help menu button functions only when no input source is detected If input source is detected and help button is pressed the following pages...

Страница 23: ...23 English User Controls...

Страница 24: ...use keys to select any item in the main menu While making a selection on a particular page press or Enter key to enter sub menu 3 Use keys to select the desired item and adjust the settings using key...

Страница 25: ...ne On Off 3D 3D Mode 3D Sync Invert On Off Exit Setup Language Projection Menu Location Screen Type 16 10 16 9 Signal Automatic On Off Phase VGA 0 31 Frequency VGA 5 5 H Position VGA 5 5 V Position VG...

Страница 26: ...Green White Advanced Direct Power On On Off Auto Power Off min 0 180 Sleep Timer min 0 995 Quick Resume On Off Power Mode Standby Active Eco Exit Lamp Settings Lamp Hours Lamp Reminder On Off Brightne...

Страница 27: ...when projecting onto a blackboard green Classroom This mode is recommended for projecting in a classroom User User s settings 3D Recommend setting for 3D mode enabled Any further ad justments by the u...

Страница 28: ...ack and white to fully saturated color Press the to decrease the amount of saturation in the image Press the to increase the amount of saturation in the image Tint Adjust the color balance of red and...

Страница 29: ...e vibrant colors in picture The range is from 0 to 10 If you prefer a stronger enhanced image adjust toward the maximum setting For a smoother more natural image adjust toward the minimum setting Colo...

Страница 30: ...m AUTO RGB RGB 0 255 RGB 16 235 or YUV Input Source Use this option to enable disable input sources Press to enter the sub menu and select which sources you require Press Enter to finalize the selecti...

Страница 31: ...n TV 480i p Native This format displays the original image without any scaling AUTO Automatically selects the appropriate display format When input is 4 3 the image is displayed as 4 3 When input is 1...

Страница 32: ...AUTO Automatically selects the appropriate display format 16 10 Screen 480i p 576i p 1080i p 720p PC 4 3 1066 x 800 center 16 10 1280 x 800 center LBX 1280 x 960 center then get the central 1280 x 80...

Страница 33: ...age on the projection screen H Image Shift Shift the projected image position horizontally V Image Shift Shift the projected image position vertically V Keystone Press the or to adjust image distortio...

Страница 34: ...timized settings for IR based 3D images 3D Sync Invert Press the On to invert left and right frame contents Press the Off for default frame contents IR options may vary according to model 3D Sync Inve...

Страница 35: ...n Front Desktop This is the default selection The image is projected straight on the screen Front Ceiling When selected the image will turn upside down Rear Desktop When selected the image will appear...

Страница 36: ...of RS232 commands Mute Choose the On to turn mute on Choose the Off to turn mute off Volume Adjust the volume from Audio MIC connector Press the to decrease the volume Press the to increase the volum...

Страница 37: ...in Phase Synchronize the signal timing of the display with the graphic card If the image appears to be unstable or flickers use this function to correct it Frequency Change the display data frequency...

Страница 38: ...requested to enter your password again Change Password First time 1 Press to set the password 2 The password has to be 4 digits 3 Use number button on the remote to enter your new password and then pr...

Страница 39: ...39 English User Controls If the incorrect password is entered 3 times the projector will automatically shut down If you have forgotten your password please contact your local office for support...

Страница 40: ...an image of the picture currently displayed on screen Closed Captioning Use this function to set the desired startup screen If changes are made they will take effect the next time the projector is pow...

Страница 41: ...exit the OSD menu the new setting will take effect on next open On Assign an IP address to the projector from an external DHCP server automatically Off Assign an IP address manually IP Address Select...

Страница 42: ...ss to access the Crestron control page How to use web browser to control your projector 4 BPlease see below for keyboard character keys space limitation Category Item Input Length characters Crestron...

Страница 43: ...This connection uses the following items click Internet Protocol TCP IP and then click Properties Step 5 Click Use the following IP address and type in as below 1 IP address 192 168 0 101 2 Subnet ma...

Страница 44: ...r including projector s online status system power lamp life network setting and hardware faults plus any custom attribute as defined by the Administrator The Administrator can add delete or edit room...

Страница 45: ...45 English User Controls 3 Edit Attribute 4 Edit Event For more information please visit http www crestron com www crestron com getroomview...

Страница 46: ...hing message Keypad Lock When the keypad lock function is On the control panel will be locked however the projector can be operated by the remote control By selecting Off you will be able to reuse the...

Страница 47: ...he countdown timer will start with or without a signal being sent to the projector The projector will automatically power off when the countdown has finished in minutes Quick Resume On If the projecto...

Страница 48: ...BRIGHT Choose BRIGHT to increase the brightness Eco Choose Eco to dim the projector lamp which will lower power consumption and extend the lamp life Eco When Eco mode is activated the brightness level...

Страница 49: ...ne PC When some emergencies happen the projector can send out alert information to administrator by email and web page It can read more than one USB device directly and show all the images in it This...

Страница 50: ...UI Click Admin the log in page shows up 3 Enter the password and click Login button and then main page is displayed The default password is admin when target system is brand new The maximum password i...

Страница 51: ...Alert Setup Alert Type This selection allows the admin to receive alerts when the projector is at fault SMTP setting and Email setting This page is to set up the details of mail sending ex mail serve...

Страница 52: ...led and then click Apply button DHCP Server Setup Enable Disable Start IP End IP Subnet Mask Default Gateway DNS server Wireless Setup This allows you to setup the projector as an access point or as a...

Страница 53: ...Crestron RoomView This is the control page of Flash UI Click Power to control power on off of projector Click Vol Mute Vol to control volume In the SourceList it includes all sources that the project...

Страница 54: ...of each projector in a building for Administrator to control User Password change user s password Default Language set the default language DHCP enable disable DHCP and the details of network card Adm...

Страница 55: ...trator to do related protection or operation Reset to Default Click Apply to reset system to the default settings Click Flash Upgrade to upgrade the Firmware from USB disk which has been inserted in p...

Страница 56: ...ed It supports 3 USB devices at the same time 2 Press Enter to enter Thumbnail mode different photos in differ ent folders can be chosen If only one USB is plug in it will show thumbnail list directly...

Страница 57: ...orted in the user interface Thumbnail Order Enter the Thumbnail Display Mode Slideshow Enter the Slide Show Mode Timer Use this function to set the slideshow interval Effect Show the effect of Slidesh...

Страница 58: ...s Enter into a PDF file it will display PDF document as full mode The following buttons are supported in the user interface Back to Thumbnail file browsing Hidden setting bar Fit Full switch Set page...

Страница 59: ...ma Presenter via mini Wifi USB dongle 1 2 1 Insert mini Wifi USB dongle into projector s USB port SERVICE C Mini WiFi USB Dongle Optional Accessory This projector is only compatible with Optoma s Mini...

Страница 60: ...vice 1 2 3 1 2 4 Download and Install Optoma Presenter Software 2 After installation in PC double click the program of Optoma Pre senter to enter main window Connect and search network display Select...

Страница 61: ...k Search button to search the projectors on network and select projectors to connect 2 1 2 Input User type and Password in log in interface 2 1 3 After log in Optoma Presenter will modify PC resolutio...

Страница 62: ...e Administrator has rights to make the changes When normal user login click this lock icon will result in no response Disconnect with target network display Connect the target network display via a we...

Страница 63: ...ptions of display port in which the highlight one is the current status click on one of them to change the display port Disconnect the PC from a network display The quality of the image via network co...

Страница 64: ...ng a PC For Windows 95 98 2000 XP Windows 7 1 Open the My Computer icon the Control Panel folder and then double click on the Display icon 2 Select the Settings tab 3 Verify that your display resoluti...

Страница 65: ...screen of the Notebook or PowerBook computer is not displaying your presentation If you are using a Notebook PC Some Notebook PCs may deactivate their own screens when a second display device is in us...

Страница 66: ...tched you will also need to adjust the aspect ratio by referring to the following Please setup the display format as 16 9 wide aspect ratio type on your DVD player Image is too small or too large Move...

Страница 67: ...If this happens the projector will not turn on until the lamp module has been replaced To replace the lamp follow the procedures in the Replacing the Lamp section on pages 69 70 LED lighting message S...

Страница 68: ...ck the operating angle of the remote control is within 15 both horizontally and vertically of one of the IR receivers on the projector Make sure there are not any obstructions between the remote contr...

Страница 69: ...wn for at least 30 minutes before changing the lamp Warning Lamp compartment may be hot Allow it to cool down before changing the lamp Warning To reduce the risk of personal injury do not drop the lam...

Страница 70: ...ly and carefully 5 To replace the lamp module reverse the previous steps 8 Turn on the projector and use Lamp Reset after the lamp module is replaced Lamp Reset i Press Menu ii Select OPTIONS iii Sele...

Страница 71: ...V Sync Hz VGA 640 350 31 50 70 V V VGA 640 350 37 90 85 V V VGA 720 350 31 50 70 V VGA 640 400 31 50 70 V VGA 640 400 37 90 85 V V VGA 720 400 31 50 70 V V VGA 720 400 37 90 85 V V 720 576 50 V 720 5...

Страница 72: ...V HD720 1280 x 720 120 V WXGA 1280 x 768 47 40 60 V WXGA 1280 x 768 70 V WXGA 1280 x 768 75 V WXGA 1280 x 768 85 V WXGA 800 1280 x 800 60 V V SXGA 1280 x 1024 64 00 60 V V SXGA 1280 x 1024 80 00 75 V...

Страница 73: ...68 MAC G4 640 480 60 31 35 i MAC DV 1024 768 75 60 00 i MAC DV 1152 870 75 68 49 NTSC M J 3 58MHz 4 43 MHz PAL B D G H I M N 4 43 MHz SECAM B D G K K1 L 4 25 4 4 MHz SDTV 480i p 576i p HDTV 720p 50Hz...

Страница 74: ...ish Appendices RS232 Pin Assignments RS232 Commands and Protocol Function List RS232 shell is grounded Pin no Spec from projector side 1 N A 2 RXD 3 TXD 4 N A 5 GND 6 N A 7 N A 8 N A 9 N A 1 2 3 4 5 6...

Страница 75: ...nt XX12 10 7E 30 30 31 32 20 31 30 0D Video XX12 13 7E 30 30 31 32 20 31 33 0D VGA 2 Component XX12 17 7E 30 30 31 32 20 31 37 0D Flash drive XX12 18 7E 30 30 31 32 20 31 38 0D Network Display XX12 19...

Страница 76: ...raditional Chinese XX70 14 7E 30 30 37 30 20 31 34 0D Simplified Chinese XX70 15 7E 30 30 37 30 20 31 35 0D Japanese XX70 16 7E 30 30 37 30 20 31 36 0D Korean XX70 17 7E 30 30 37 30 20 31 37 0D Russia...

Страница 77: ...30 30 31 30 34 20 35 0D White XX105 1 7E 30 30 31 30 35 20 31 0D Advanced Direct Power On On XX105 0 7E 30 30 31 30 35 20 30 0D Off 0 2 for backward compatible XX106 n 7E 30 30 31 30 36 20 a 0D Auto P...

Страница 78: ...31 0D Brightness OKn XX126 1 7E 30 30 31 32 36 20 31 0D Contrast OKn XX127 1 7E 30 30 31 32 37 20 31 0D Aspect Ratio OKn EW635 n 0 1 2 3 4 4 3 16 9 or 16 10 LBX Native AUTO EX635 n 0 1 2 3 4 4 3 16 9...

Страница 79: ...ctor meet the following specifications Screw type M4 3 Maximum screw length 11mm Minimum screw length 8mm Warning 1 If you buy a ceiling mount from another company please be sure to use the correct sc...

Страница 80: ...rd Hertfordshire WD18 8QZ UK 44 0 1923 691 800 www optoma eu 44 0 1923 691 888 Service Tel 44 0 1923 691865 service tsc europe com France B timent E 33 1 41 46 12 20 81 83 avenue Edouard Vaillant 33 1...

Страница 81: ...seoul 135 815 KOREA 82 2 34430005 Japan 3 25 18 info os worldwide com 0120 380 495 www os worldwide com Taiwan 5F No 108 Minchiuan Rd 886 2 2218 2360 Shindian City 886 2 2218 2313 Taipei Taiwan 231 R...

Страница 82: ...this device does cause harmful interference to radio or television reception which can be determined by turning the device off and on the user is encouraged to try to correct the interference by one...

Страница 83: ...ice may not cause harmful interference and 2 This device must accept any interference received including interference that may cause undesired operation Notice Canadian users This Class B digital appa...

Отзывы: