DV-10
6-5
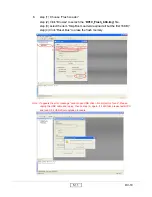
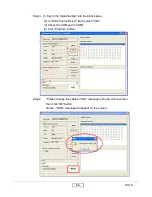
Step 5. When the DV-10 EDID program is finish, the “OK” message will appear
on the screen.
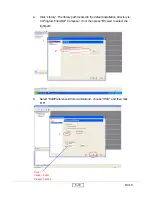
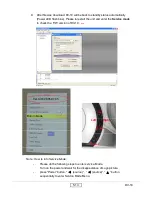
Step 6. (1) Make sure to check “Analog” and “Trans” in Read item
(2) press “Read” button.
(3)
EDID Informations
will show the result.
(4) Click “Reset” to do the next unit or “Exit” button to close the EDID
program.
1
2
3
4
Содержание DV10 MovieTime
Страница 9: ...DV 10 1 5 Throw Ratio 1 25 1 5 Projection Distance Image Width ...
Страница 13: ...DV 10 1 9 1 3 Compatible Modes Analog Note means compressed ...
Страница 16: ...DV 10 2 3 Step4 Uncrew two screws and unplug three wires shown in yellow to take off DVD Module ...
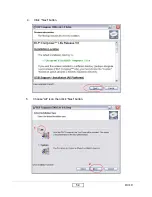
Страница 39: ...DV 10 5 4 4 Click Next button 1 2 5 Choose All icon then click Next button ...
Страница 40: ...DV 10 5 5 6 Click Next button 7 The program is executing Initializing status ...
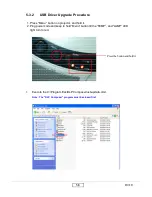
Страница 42: ...DV 10 5 7 4 Type any key to continue Then wait about a minute 5 Click OK The USB driver updated successfully ...
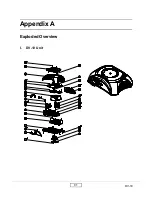
Страница 57: ...DV 10 7 1 Appendix A Exploded Overview I DV 10 Unit ...
Страница 59: ...DV 10 7 3 II Top Cover Module ...
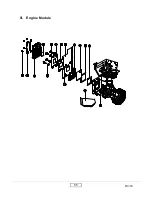
Страница 61: ...DV 10 7 5 III Engine Module ...
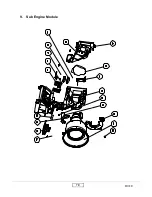
Страница 64: ...DV 10 7 8 V Sub Engine Module ...
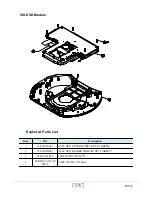
Страница 69: ...DV 10 7 13 VIIII DVD Cover Module ...
Страница 71: ...DV 10 7 15 X DVD Loader Module ...
Страница 73: ...DV 10 7 17 XI Lamp Module ...
Страница 75: ...DV 10 7 19 XII Engine Base ...

