DVR Server Manual ver.5.05/rel.092507
28
Recording Schedule Setup
(setting for cameras of local board cards and IP Modules.)
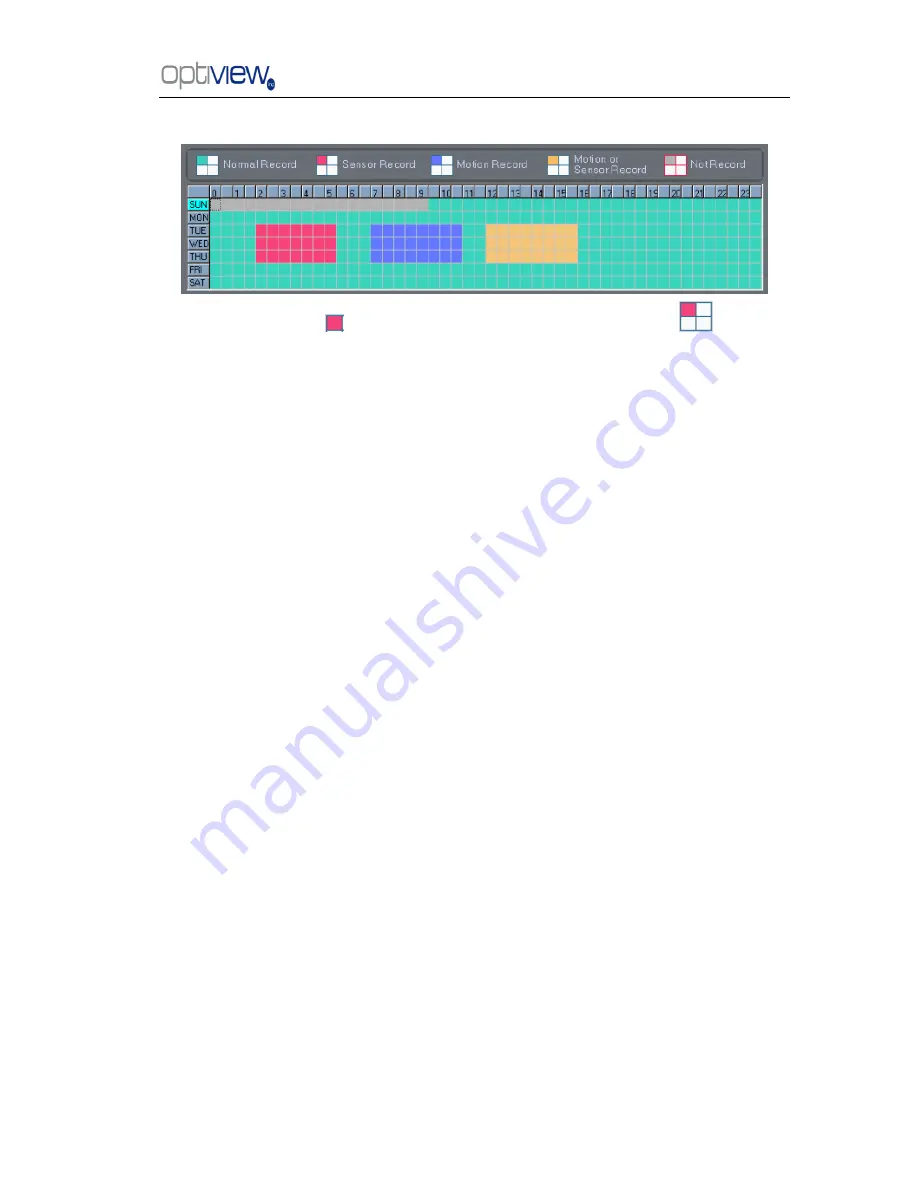
Tips: One block of pane
means half an hour. First, click record mode icon
, then click
schedule diagram, hold down the mouse and move it to select the corresponding area to
record. (Drag & Drop).
1.
Normal Record (Green): DVR System is always recording video. (e.g. Sun. Fri. Sat.)
2.
Motion Detect (Blue): DVR System begins to record video only when it detects moving objects.
(e.g. Mon.)Click "Motion Detect" icon, then select your schedule time by drag & drop. For example,
the above picture means: on Monday it is set to motion detect record, on Sunday it is set to normal
record, but on TUE, WED and THU from 3:30 to 11:00 it is set to sensor record, from 14:00 to
22:30 it changes to both motion detect record mode and sensor detect record mode, the remaining
time is set normal record.
3.
Sensor Record (Red): DVR System begins to record video only when there is a sensor alarm.
(3:30 to 11:00 in Tue. Wed. Thu.)
Note: The time setup must be correspond with Check Alarm setups in Sensor setup otherwise it will
not work properly.
4.
Motion or Sensor Record (yellow): Combine with above
2
and
3
function.
5.
Not Record (gray): DVR System does not record video.


