15
USING POWER-SAVE MODE
14
To maximize the life of your DVR, you should power-down the DVR when it
is not in use. Simply press
CBL
and then
TV
on your remote control, or
press
Power
on the front panel of the DVR.The Power light turns off; but,
because the DVR is still plugged in, your scheduled recordings still occur.
Between 1:00 a.m. and 6:00 a.m. daily, your DVR will automatically enter
Power-Save mode unless you press a key on the remote control or a key on
the DVR front panel at least once every 2 hours. In Power-Save mode, the
set-top is powered-down, but all scheduled recordings still occur. When the
DVR enters Power-Save mode, your TV displays a grey screen with a
“Press Any Key” message.
Note
: Cablevision controls whether or not the automatic Power-Save mode is
activated on your DVR for iO TV.
At 1:10 a.m., the DVR displays a 5-minute warning banner, indicating that
the DVR is about to enter power-save mode. When this banner appears,
do one of the following:
• To allow the DVR to enter Power-Save mode, do nothing when the warning
banner appears. The DVR will automatically power-down. After your DVR
powers down, press any key on your remote control, or press
Power
on the
front panel of your DVR to start watching TV again.
• To prevent the DVR from entering Power-Save mode, simply press any key
on your remote or any key on the front panel of the DVR when the warning
banner appears. The DVR will not attempt to enter power-save mode again
until another 2 hours of inactivity has passed.
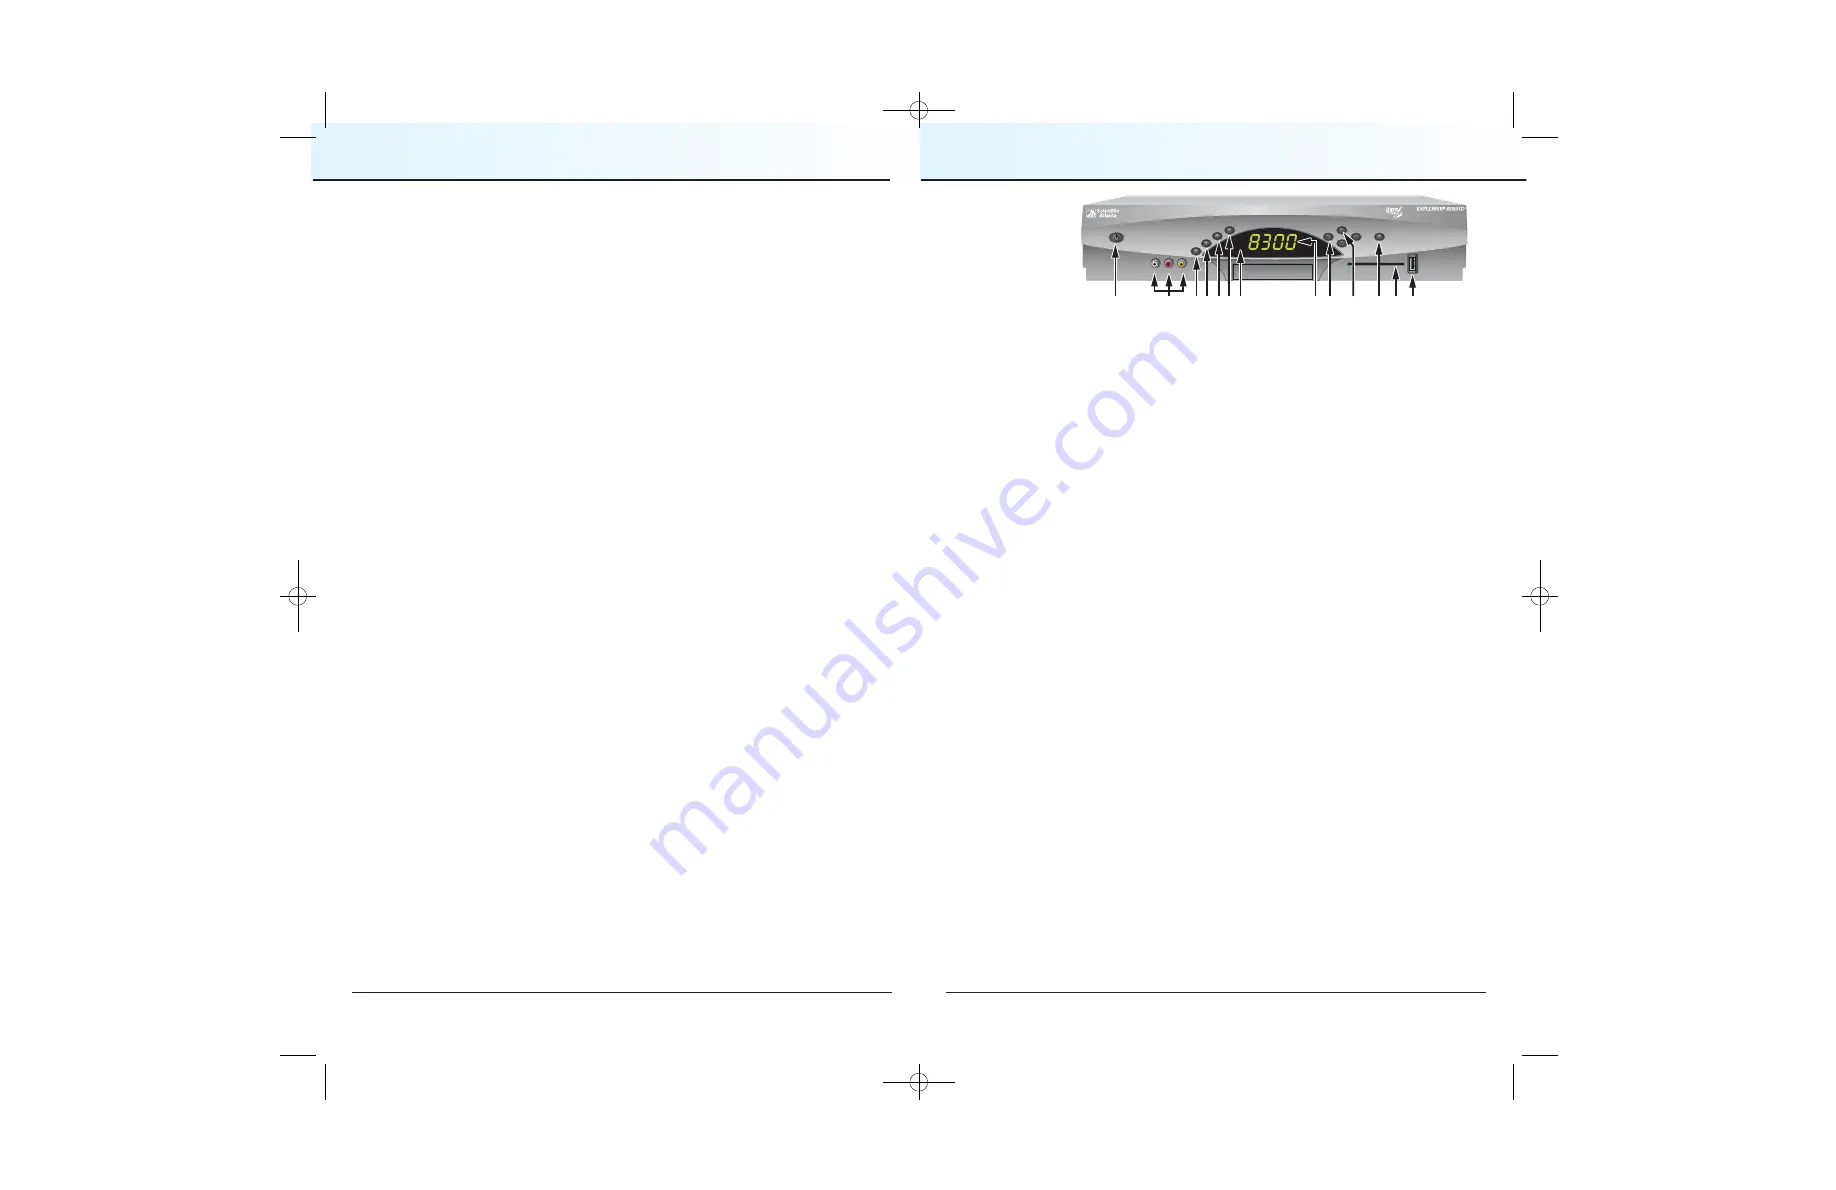
Provides power to the digital cable box. The light to the left of the
POWER key illuminates when the power is on. To receive nightly
programming updates, turn off the box when not in use
Connects to video and left/right (L/R) audio outputs of an external
device (e.g., video camera or game system) to display on the TV
Displays the list of recorded programs
Exits menus, the on-screen guide and program information
Displays channel and program details for channel currently selected
Displays the Main Menu for access to Channel Guide, On Demand,
Enhanced TV and iO Games
Receives the infrared signal from the remote control
Displays the selected channel number and time of day.
The LED also displays the following:
•
Message
•
HDTV (if applicable)
•
Power
•
Output Resolution (1080i, 720p, 480p, 480i)
•
RECORD
•
AUTO - Automatically outputs native scan
rates that your TV can accept
Increases and decreases volume
Scrolls up and down through the channels
Displays highlighted on screen selection
The slot into which Smart Card is inserted.
DO NOT REMOVE
CARD UNLESS INSTRUCTED!
Reserved for future use
THE FRONT PANEL OF DVR FOR iO TV AND HD-DVR FOR iO TV
1 Power
2 Video and
Audio Input
3 List
4 Exit
5 Info
6 Guide
7 IR Sensor
8 LED Display
9 VOL+ and VOL-
10 CH+ and CH-
11 Select
12 Smart Card
Slot
13 USB Port
LIST
AUDIO
VIDEO
L
R
EXIT
INFO
GUIDE
CH +
CH Ñ
SELECT
POWER
VOL +
VOL Ñ
1
2
11
13
12
3 4 5
9
6 7
T11110
8
10
CV2008-878 DVR V3.0:08-878 DVR V3.0 10/3/08 4:49 PM Page 14


