


C H A P T E R 6 : M E A S U R E M E N T E X A M P L E S
31
After the initialization process has been finished, start the OptiCall™
program from the Windows™ Start menu
Start|Programs|Opera|OptiCall
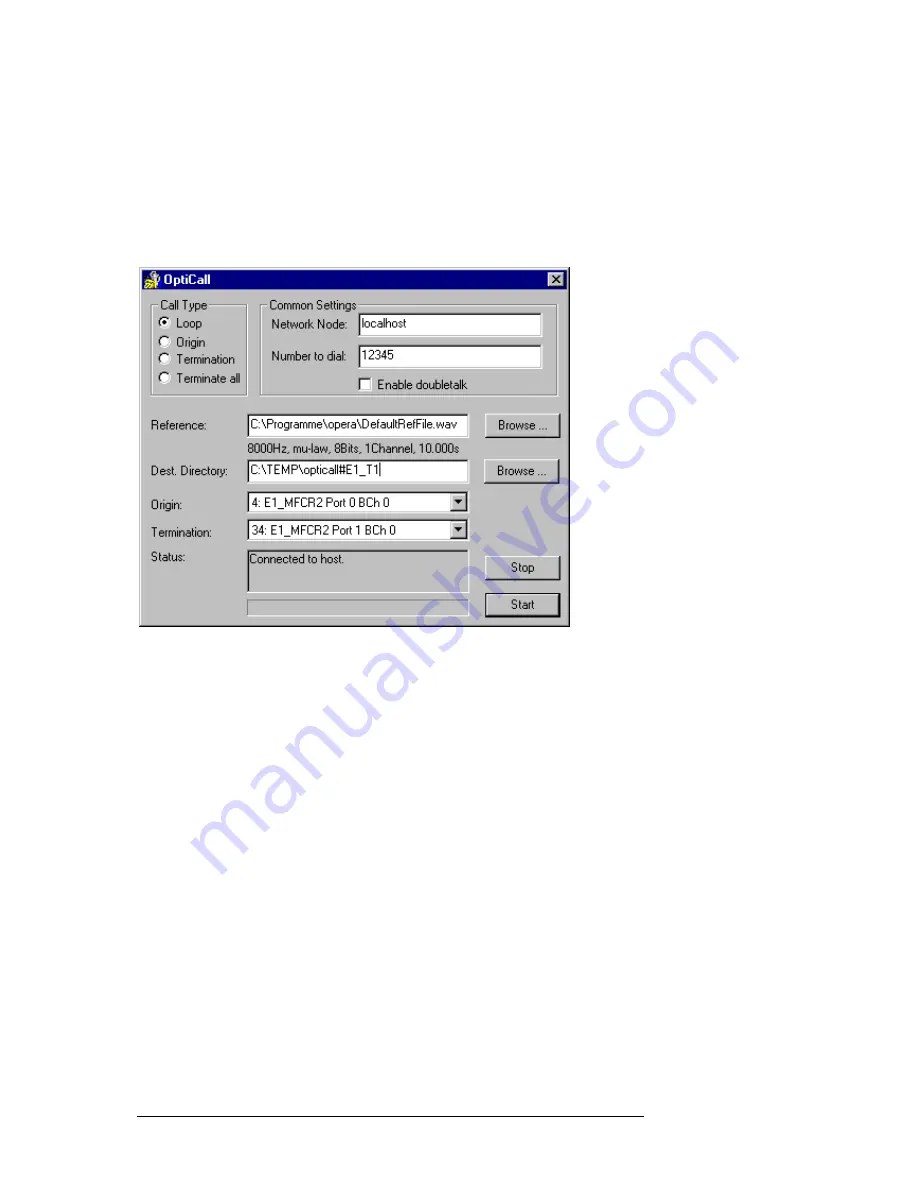
(you may also click on the icon on the desktop). As shown in Figure 6.3,
select the loop mode button in the OptiCall™ dialog. Enter the desired phone
number which has to comprise five digits according to the protocol
subversion chosen.
Figure 6.3: Settings in the OptiCall™ dialog.
Select the file that contains a speech sample that will be sent through the
network, in the field
Reference
. In this example we use the WAVE file that is
located in the installation directory of your OPERA™ system,
"DefaultRefFile.wav".
Finally, enter the destination directory where the test files shall be saved to.
Also enter the root file name for your test files after the character #, e.g.
"D:\test#E1_T1”. In the “Origin” list box, select the entry “4: E1_MFCR2 Port
0 BCh 0”. Select “34: E1_MFCR2 Port 1 BCh 0” as the terminating device.
Please note, that depending on the hardware configuration of the selected
OPERA host computer, the index numeration in the list boxes of OptiCall™
may be different than stated in this example. The OPERA™ host computer is
selected in the Network Node entry field of the OptiCall™ dialog.
After having pressed the start button, the connection will be established. The
speech sample will be sent and the test samples will be saved to the location
we have defined above.
After the test call has terminated, there will be two test files stored in the
specified destination directory. "E1_T1-Line4.wav" is the relevant file if you
want to use
PSQM
or
PESQ
, "E1_T1-Line34.wav" is the relevant file if an
analysis of
Echo
shall be performed with OPERA™.


