background image


System Requirements for Setup 


Hardware requirements 


Local  display  and  remote  display  should  have  same 

graphic resolution. 


You  have  a  graphic  controller  card  with  a  DVI  port  in  your 

Windows/Mac (Mac is option), or SUN system. It should support 

the  maximum  graphic  resolution  feature  of  the  display  to  be 

connected. 


In  case  of  using  a  computer,  no  special  memory  size,  CPU 

speed and chipsets are required. 


Proper initial trial of the entire platform with its application using 

a short length copper cable is recommended prior to install with 

the optical link. 


Software requirements 


No  special  needs,  if  the  DVI  graphic  controller  and  display 

peripheral  are  operational  with  the  platform’s  OS  and 

application. 


AC/DC Power Adapter Technical Advisory


The power of M5-1003 is designed to supply to each module of 
Transmitter and Receiver modules by plugging to each of the power 
plugs.  


1-2 System Requirements for Setup


Installation 
 

Important: Please use the installation procedure below.  Improper or no 
operation may result if the start-up sequence is not correctly followed. 


Step 1 

Carefully unpack the contents of the shipping group.  

 
Step 2  

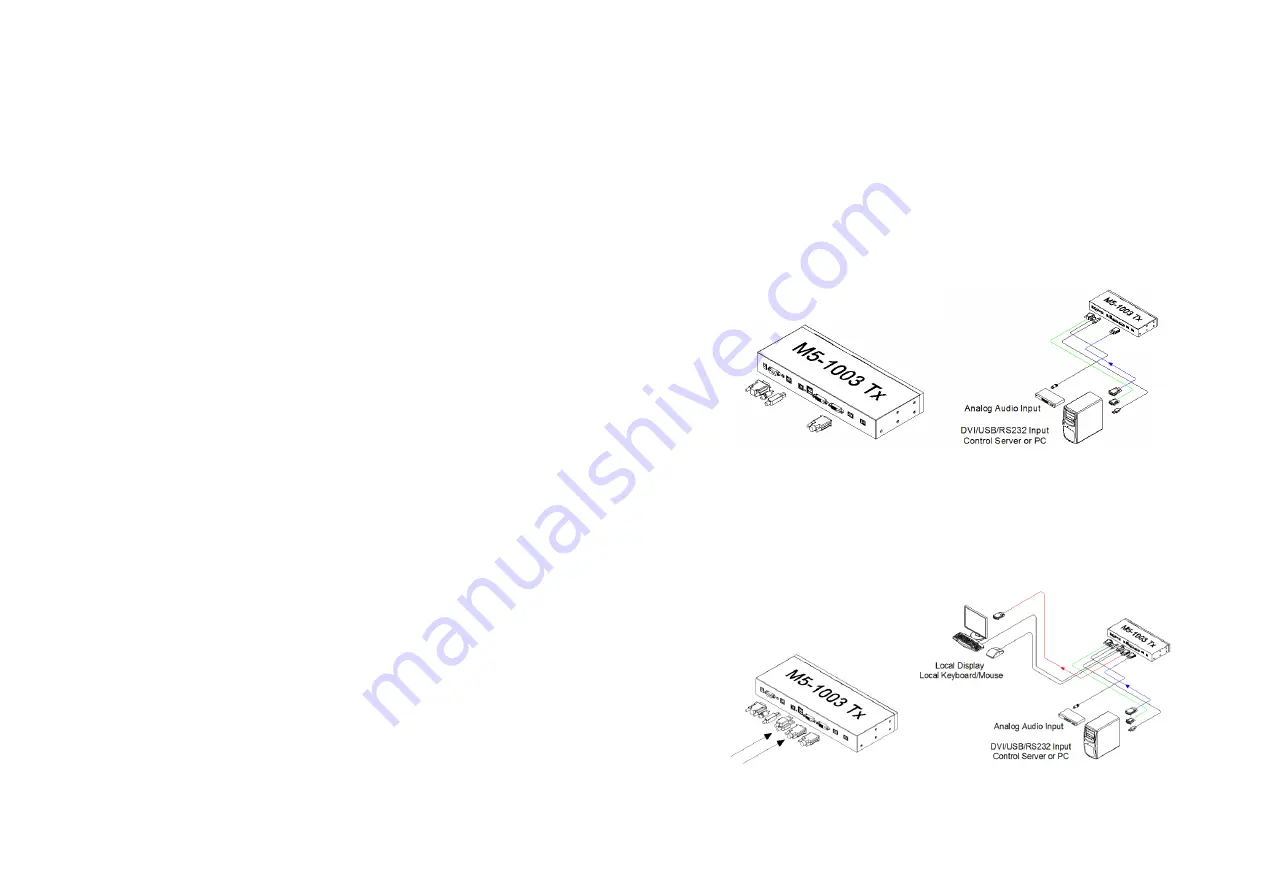
With  system  power  turned  off,  connect  the  Transmitter  module  to  the  DVI 
receptacle  of  PC  or  other  video  source  equipment  by  a  DVI  copper  cable.  If 
necessary,  connect  the  RS-232  cable  and  the  audio  cable  to  D-sub  9-pin 
connector and audio jack.  


Figure 2 

– Connection of DVI, USB, RS-232 and Audio Cable to Transmitter Module 

 
Step 3  

Connect the Transmitter module to the display, keyboard and mouse for local 
control.  You  may  skip  Step  3  if  you  don

’t  need  local  control.  In  this  case, 

please see instructions on page 1-6 for Self-EDID programming. 


Figure 3 

– Connection of Local Display and Keyboard/Mouse 


1-3 Installation


Содержание DVI/USB/RS-232 and Audio Optical Extender

Страница 1: ...Headquarters Opticis Co Ltd 304 Byucksan Technopia 434 6 Sangdaewon Dong Chungwon Ku Sungnam City Gyeonggi Do 462 716 South Korea Tel 82 31 737 8033 8 Fax 82 31 737 8079 www opticis com For order sup...

Страница 2: ...will assist you in installing and operating the product Product Description M5 1003 offers extremely long extension of DVI USB serial control data and audio up to 2 km over single mode fiber cables w...

Страница 3: ...ned to supply to each module of Transmitter and Receiver modules by plugging to each of the power plugs 1 2 System Requirements for Setup Installation Important Please use the installation procedure b...

Страница 4: ...to operate under the Laser Class 1 classified by CDRH FDA for eye safety 1 5 Operation Guide Step 4 Connect the Receiver module to the remote display keyboard and mouse If necessary connect the RS232...

Страница 5: ...M button of the transmitter with a narrow pin After three times blinking of Self EDID LED it will stay on Self EDID LED EDID PRGM Button Figure 9 Position of EDID PRGM Button and Self EDID LED Step 4...

Страница 6: ...al Support and Service For commercial or general product support contact your reseller For technical service contact Opticis by email techsupp opticis com or visit its website at www opticis com 1 8 T...

Страница 7: ...s Warranty Information 1 One Year Warranty Opticis warrants this Digital Video Audio and Serial I O Optical Extender to be free from defects in workmanship and materials under normal use and service f...

Отзывы: