


LCD Display Setting introduction
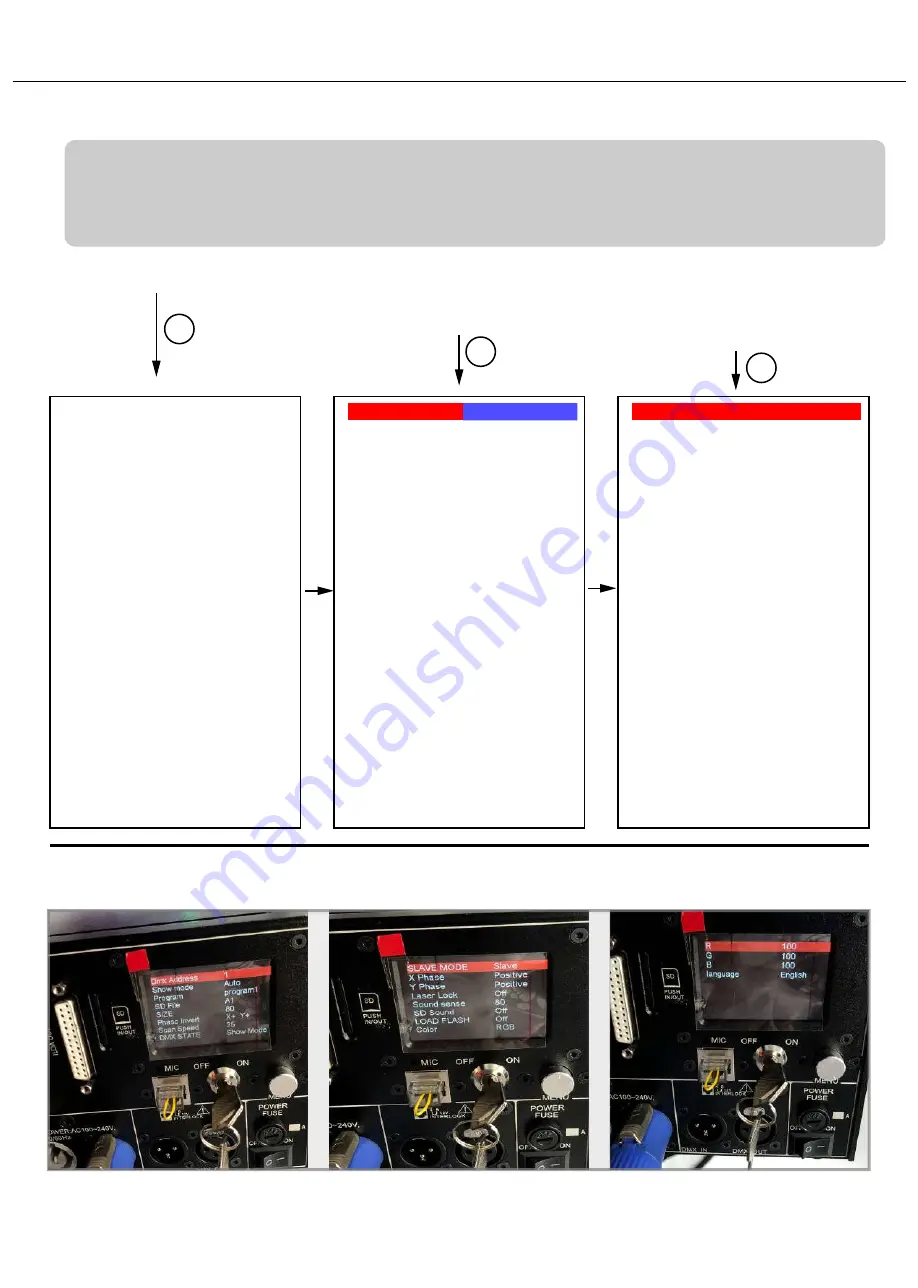
DMX Address 1
Show Mode ILD
Program Program 1
SD file No SD
SIZE 80
Phase Invert X+ Y+
Scan Speed 30
DMX STATE Show Mode
Slave Mode Slave
X Phase Positive
Y Phase Positive
Laser Lock Off
Sound sense 80
SD Sound Off
LOAD FLASH Off
Color RGB
R 100
G 100
B 100
Language English
Actual view of the LCD display gets lighten on, you need to rotate the menu knob to choose the needed status then
make the preferable settings.
DMX Address 1
Show Mode ILD
Program Program 1
SD file No SD
SIZE 80
Phase Invert X+ Y+
Scan Speed 30
DMX STATE Show Mode
Slave Mode Slave
X Phase Positive
Y Phase Positive
Laser Lock Off
Sound sense 80
SD Sound Off
LOAD FLASH Off
Color RGB
R 100
G 100
B 100
Language English
DMX Address 1
Show Mode ILD
Program Program 1
SD file No SD
SIZE 80
Phase Invert X+ Y+
Scan Speed 30
DMX STATE Show Mode
Slave Mode Slave
X Phase Positive
Y Phase Positive
Laser Lock Off
Sound sense 80
SD Sound Off
LOAD FLASH Off
Color RGB
R 100
G 100
B 100
Language English
Note:
All the contents listed on the LCD display can be freely changed to the preferable status. The most important
step is to “double-click” the menu knob to SAVE the preferred status when all selections/settings get done.
(The other settings should be operated step by step as DMX setting reference as the guidance following)
e.g. Default Status
Click the DMX column once and
manually rotate the menu knob
to change the DMX address(1-17 for
options)
Double-click the menu knob
to save the preferred status.(When
this step done, the background
of the status will turn to red)
1
2
3
Important Remark:
While there’s no ILDA signal input and if you don’t need the devices to run in AUTO mode, you can make the setting on “DMX STATE” from
“Show-Mode” switching to “Black OutI” , then will bypass the “AUTO mode”.
11


