13
E102056#1
7.6 Balancing
7.6.1 Side balance
Lay the wings on a table top and try to balance them. They should always fall to different sides. If this does
not happen add a little weight to the lighter wing tip. Glue small pieces of lead to the wing tip.
7.6.2 Fix the wings to the fuselage with a diagonally stretched rubber band.
7.6.3 Finding the centre of gravity
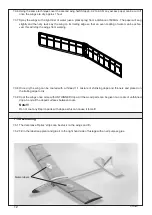
Hold the the plane with two fingers placed under the wing by the main spar or place it on the handles of an
open pair of pliers set in a vice
Add lead shot to the weight chamber (starting at the front chamber) until the model lies flat with its nose
slightly downward.
Your model is now ready to fly
7.7 Flying
7.7.1 The Wind Flyer 2 is designed for flying only in light or no wind conditions only. For your first flight choose an
absolutely still day and a lightly sloping flying field
7.7.2 If you fly in any wind always launch the model into the wind.
Hold the model between two fingers just behind the tow hook and launch it forward into the wind. This will
need some practice!
Note:
Of course you must have checked the balance first
7.7.3 If the model 'pumps up and down' in flight add a 15 x 25mm card strip under the trailing edge of the wing.(
The angle of attack is mad e smaller)
Keep repeating this stage until a smooth flight path is achieved
7.7.4 If the model dives add card strips under the leading edge of the wing ( the angle of attack is made larger)
Repeat this step until a smooth flight path is achieved
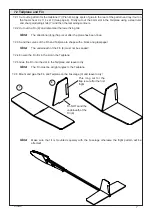
7.7.5 If the model flies in a curve a flap needs to be to cut in the wing on the side that the flight curves
- Make an 8mm deep cut in the trailing edge of the wing, 25mm and 105mm from the wing tip. Then cut a
2mm deep line between them. (See wing diagram)
Note:
do not cut the lengthways line all the way through!
- Now bend this flap carefully down until the model flies straight
- Once the flight pattern is correct this flap can be fixed in position with a few spots of glue.
7.7.6 If the model flies into a curve without banking then a rudder flap needs to be cut on the tail fin
- When the fin was made, there was a place for an upper and lower cut to make the rudder
Now make a 1mm connecting cut between these cuts on the fin and bend the flap in the required direction
until the flight path straightens.
Note:
Only score this connecting line do not cut all the way through the fin.
- Once you are satisfied the rudder can be fixed with a few spots of glue.
7.7.7 For a towline start you need 25-50 metres of line.
If you have never launched a model with a towline it is better if you find someone with experience who will,
glad to help you.
We wish you lots of fun with your Wind Flyer 2
Содержание 102.056
Страница 14: ...14 E102056 1...
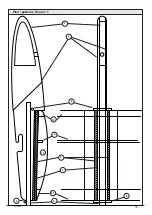
Страница 15: ...15 E102056 1 Plan patterns Scale 1 1 1 2 3 11 9 12 5 4 10 6 6 6...
Страница 16: ...16 E102056 1...
Страница 17: ...Plan patterns Scale 1 1 17 E102056 1 Pattern for the nose 1 Win d Flyer 2 Win d Flyer 2 Hochstarthaken...
Страница 18: ...18 E102056 1...
Страница 20: ...20 E102056 1...
Страница 22: ...22 E102056 1...
Страница 24: ...24 E102056 1...


