background image


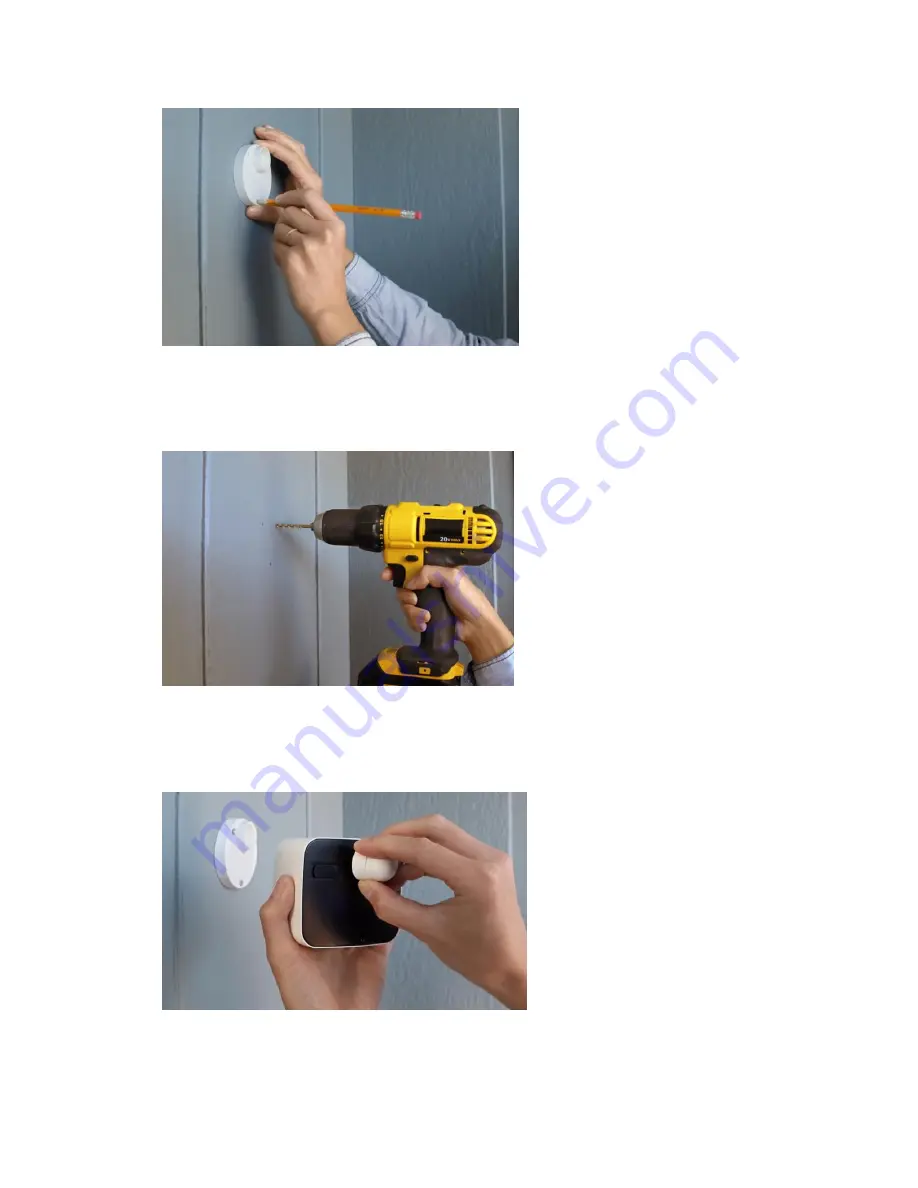
Find a clean spot where you would like to connect the wall mount. Use a pencil to mark three dots 
through the screw slots.  


Drill the three dots and insert the provided anchors into the holes. Put the wall mount against the wall and 
use a screwdriver to insert the screws. Make sure the protruding side faces towards the camera 
attachment. 


Содержание Smart Cam

Страница 1: ...Ooma Smart Cam User Manual...

Страница 2: ...ne Physical Installation of your Smart Cam 3 Faces Facial Recognition Understanding Facial Recognition How Faces Works Using Faces 4 Live Streaming and Viewing Recorded Events Viewing the Camera s Pag...

Страница 3: ...ra s Name Camera Status Battery Remaining Firmware Version MAC Address 7 Personalizing Your Ooma Smart Cam Profile Settings Sharing Login Credentials 8 Managing Your Ooma Smart Cam Account Upgrading t...

Страница 4: ...1080p with a high refresh rate The Smart Cam has night vision capability that yields crystal clear recordings regardless of lighting conditions Onboard battery and Storage The Ooma Smart Cam contains...

Страница 5: ...o stream video to your Ooma Smart Cam cloud account Your iOS or Android device will alert you through the Smart Cam app when a new video clip is uploaded so you will be aware of every unexpected movem...

Страница 6: ...with your account Tap the Start Pairing option in the app The application will automatically detect your camera and will guide you through connecting it to the internet 4 If you have another camera to...

Страница 7: ...wing angle Do not block the camera s field of view Make sure that no walls tables or objects are too close to the camera If an object is within 2 5 inches of the sides or front of your camera it can r...

Страница 8: ...n on your App or Support Website https support ooma com camera to access our complete video tutorials What equipment do you need to install the Smart Cam Ooma Smart Cam Wall mount and magnetic bolt Sc...

Страница 9: ...se a pencil to mark three dots through the screw slots Drill the three dots and insert the provided anchors into the holes Put the wall mount against the wall and use a screwdriver to insert the screw...

Страница 10: ...perfect for use as security protection anywhere Make sure you have the universal thread to your third party mount otherwise it can damage the camera thread Installing the Smart Cam Indoors Ooma Smart...

Страница 11: ...individual faces Once a face has been recognized it can be named or tagged inside the Ooma Smart Cam app Recognition of faces improves as you train the camera over the course of a few weeks For best...

Страница 12: ...recognition accuracy when the person is next seen by the camera c If this is a person you don t want identified in future click the trash icon in the upper right corner of the pop up window The camer...

Страница 13: ...only known faces or for all faces 1 Open the Ooma Smart Cam app on your mobile device 2 Navigate to the Feeds Events page 3 Tap the gear icon in the upper right corner of the screen then tap the Notif...

Страница 14: ...ras connected to your account This page allows you to view your recordings as well as to download share and delete events The Feeds Events page Viewing the Camera s Livestream You can view a livestrea...

Страница 15: ...viewing along with later playback from the timeline Two Way Talk Two Way Talk enables you to communicate remotely with people who appear on your camera s feed 1 Open the Ooma Smart Cam app on your mob...

Страница 16: ...nage and download recordings from Ooma Smart Cam s timeline 1 Open the Ooma Smart Cam app on your mobile device Three gray dots Share or Save Full Event 2 Navigate to the Events Timeline then select t...

Страница 17: ...nt to be disturbed by notifications Auto Privacy Mode Auto Arm Disarm Mode Geofencing Ooma Smart Cam supports geofencing to automatically arm and disarm cameras based on the location of the user s mob...

Страница 18: ...p up confirmation window If you have multiple Ooma Smart Cam cameras synced to your account you must enable Auto Privacy Mode for each one Managing Notifications Ooma Smart Cam allows users to determi...

Страница 19: ...5 Toggle the switch at the bottom of the page to create a Notification Schedule which will turn off notifications at set times of day such as when you re home at night Timeline Filtering Timeline fil...

Страница 20: ...the bottom of the page Local Network Streaming Local Network Streaming allows users to bypass an external internet connection to create instant livestreams if their mobile device is connected to the s...

Страница 21: ...ge audio settings launch the Ooma Smart Cam app and tap the gear icon of the camera whose settings you wish to update Toggle the Audio Enabled switch on or off Changing the Camera s Name To change you...

Страница 22: ...e camera whose firmware you wish to check The firmware version is listed on the camera s Details page MAC Address To view your camera s MAC address launch the Ooma Smart Cam app and tap the gear icon...

Страница 23: ...Ooma Smart Cam account o Update your password o See what version of the app you are using o See which Premium plan you have subscribed to o Sign out of your account Sharing Login Credentials For priva...

Страница 24: ...days 90 Days Instant video capture X X X Livestreaming X X X Video history X X X Works during power and internet outages X X X Instant alerts motion sound anti tamper X X X Onboard storage X X X Insta...

Страница 25: ...tore App Store 3 Tap your email and Apple ID 4 Tap View Apple ID and enter your password 5 Tap Subscriptions then select Ooma Smart Cam For Android 1 Launch the Google Play Store app 2 Tap Menu then M...

Страница 26: ...the camera is IP65 Weather Resistant and is specially designed for outdoor usage The camera should not however be submerged in water This can damage the camera 6 Does Ooma Smart Cam work without an in...

Страница 27: ...r clear display in pitch dark Wireless Audio 802 11 b g n 2 4 Ghz WEP WPA and WPA2 support Bluetooth Low Energy BT 4 2 Half duplex two way audio with speaker and microphone Noise Cancellation Power Ca...

Страница 28: ...27 Operating temperature 20C to 45C IP 65 UL FCC and IC and CE certified...

Отзывы: