background image

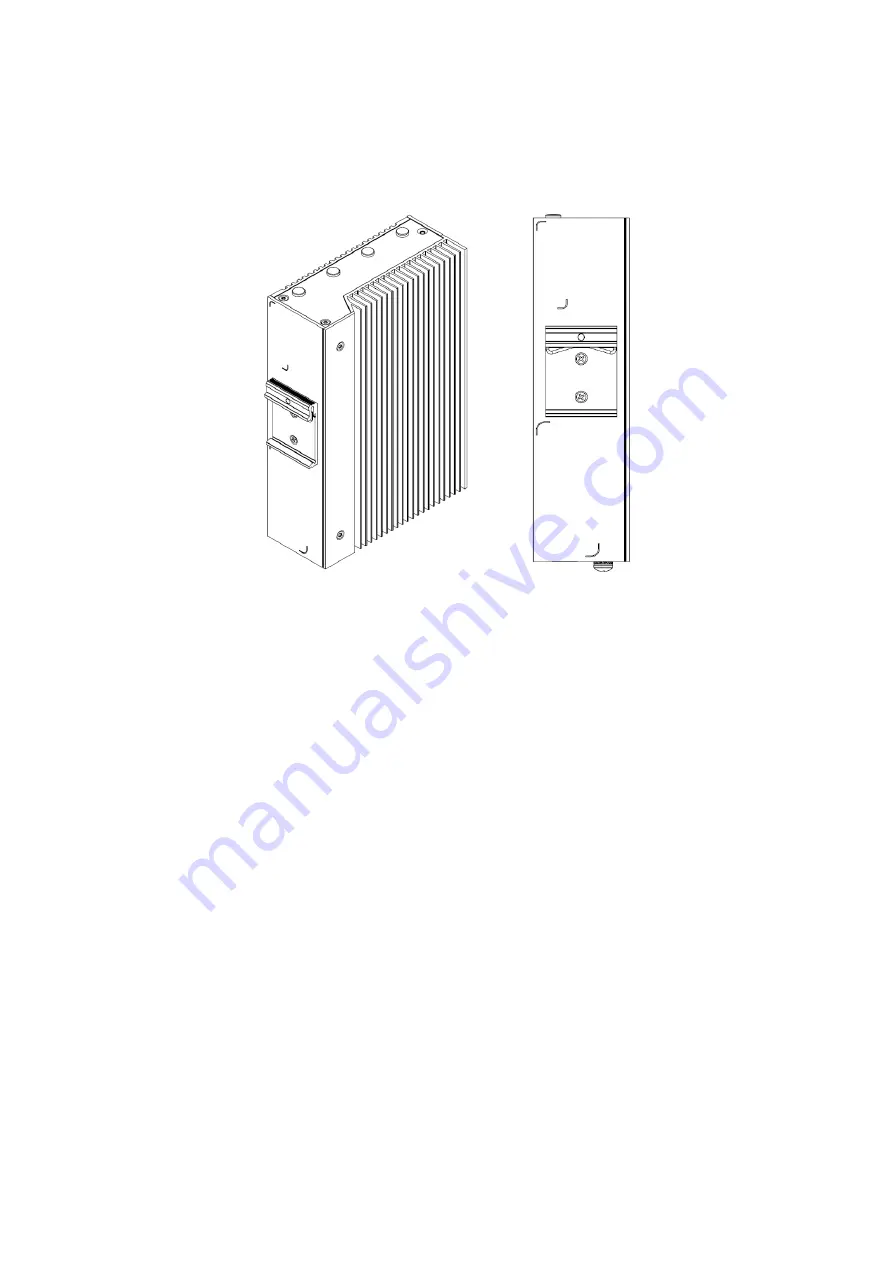
3.2 - DIN Rail Mounting - Edge (MTD102)

Step 1:

Attach DIN Clip to the back of the chassis using the provided screws. To assemble, locate the

two holes in the back of the chassis that line up to the two countersunk holes on the DIN clip.

Screw type: M3x0.5 FH 120 Degree

Length: 6 mm

Step 2:

The orientation of the DIN clip is interchangeable between the two options. Determine the

preferred orientation of the system and install the screws to the DIN clip accordingly.

Step 3:

Install the system onto a DIN rail in the desired location.

23

Содержание K410

Страница 1: ...K410 K430 Product Manual ...

Страница 2: ...view 5 1 1 System Introduction 5 1 2 Accessories 5 1 3 Product Specifications 6 1 4 Exterior Dimensions 8 1 4 1 Karbon 410 Dimensions K410 8 1 4 2 Karbon 430 Dimensions K430 8 1 5 System Block Diagram 9 2 I O Definitions 10 2 1 Front I O Definition 10 Power Button Power LED 10 SIM Card 10 USB 2 0 11 USB 3 2 11 ModBay COM Expansion 11 ModBay DIO Expansion 11 LED Functionality 12 2 2 Bottom I O Defi...

Страница 3: ...OS EEPROM 18 Power Switch Header 18 RTC Battery Header 18 TPM header 18 Onboard Power Header 19 High Speed Daughter Board 19 B Key 1 19 B Key 2 20 SIM 1 20 SIM 2 20 RTC Battery 20 3 Mounting Instructions 21 3 1 Wall Mounting MTW101 21 3 2 DIN Rail Mounting Edge MTD102 22 3 3 DIN Rail Mounting Bottom MTD103 23 3 3 VESA Mounting VMPL 1056 24 4 Power Management 25 4 1 Wake Up Events 25 3 ...

Страница 4: ...ion 27 6 Appendices 28 6 1 Appendix A Power Consumption 28 6 2 Appendix B BIOS Manual 30 6 3 Appendix C System Thermal Results 31 6 4 Appendix D Expansion Port Pinout 32 6 4 1 M 2 B Key 32 6 4 2 M 2 E Key 33 6 4 4 mPCIe 34 6 5 Appendix F Safety Information 35 6 5 1 Safe Use and Installation Instructions 35 6 5 2 Précautions et guide d installation 36 6 6 Appendix G Errata 37 4 ...

Страница 5: ...d design 40 to 70 C operating temperature range 9 48 V power input and the absence of any moving parts dramatically improve the lifespan and reliability of the system 1 2 Accessories Terminal block kit Power CAN bus Rubber Feet 4 If you purchased additional items such as mounting brackets power supplies or cables they will be located in the system box or within the outer shipping carton All driver...

Страница 6: ... to motherboard mPCIe and M 2 8 LED array Power Storage Ignition Watchdog 4 User Configurable Motherboard Headers TPM 2 0 module header PoE module header DC power header RTC battery holder Daughterboard Expansion N A M 2 3042 52 2260 80 B key PCIe x1 USB 3 0 USB 2 0 SIM M 2 2242 60 80 B key PCIe x1 USB 3 0 USB 2 0 Daughterboard I O N A 3FF Micro SIM mapped to M 2 3042 52 Daughterboard Headers N A ...

Страница 7: ...ts requirements of IEC 60945 Ed 4 Maritime Navigation and Radiocommunication Equipment and Systems Meets requirements of IEC 62368 1 Audio Video Information And Communication Technology Equipment Part 1 Safety Requirements Radio Specifications when equipped with INT 9260 Wifi BT device for indoor use Frequency Bands 2 4GHz and 5GHz bands Operating Frequency 2400 2485 MHz 5150 5250 MHz 5250 5350 MH...

Страница 8: ...Version of firmware soft ware Software Intel PROSet Wireless WiFi Software 20 x and following versions for WIFI BT Antenna Specifications PIFA 2dBi 2dBi Gain for 2 4 and 5GHz RP SMA connector 8 ...

Страница 9: ...1 4 Exterior Dimensions 1 4 1 Karbon 410 Dimensions K410 1 4 2 Karbon 430 Dimensions K430 9 ...

Страница 10: ...1 5 System Block Diagram 10 ...

Страница 11: ...ds while the system is running will cause a hard reset of the system The system can be woken by a single press of the power button from any state The LED backlight will indicate the system status A solid blue light indicates that the system is powered in the S0 state A flashing blue light indicates the system is in the sleep state The LED is off in S5 and deep sleep states SIM Card A 3FF Micro SIM...

Страница 12: ...two USB 3 2 Gen 2 Type A ports on the front panel of the K400 platform These ports are capable of linking at 10Gbps transfer rates ModBay COM Expansion The K400 platform supports an optional COM DB9 add in card OnLogic MOD109 The serial port mode and voltage between Off 5V 12V on Pin 9 on K400 can be selected in the BIOS configuration The serial ports support RS 232 RS 422 and RS 485 configuration...

Страница 13: ...In1 QEP0B 6 Out1 PWM1 7 In2 QEP0I 8 Out2 PWM2 9 In3 QEP1A 10 Out3 11 In4 QEP1B 12 Out4 13 In5 QEP1I 14 Out5 15 In6 16 Out6 17 In7 18 Out7 19 CANL 20 CANH ModBay DIO Pinout LED Functionality LED On Off Blink Pulse HDD Internal storage drive activity with supported devices Power Device is on Device is off Device is asleep Automotive Ignition Ignition input to device is on Ignition input to device is...

Страница 14: ...platform by Dinkle 2EHDRM 03P Mating part Dinkle 2ESDVM 03P or equivalent 5 08mm pitch terminal plug The system is operational from 9V 48V The maximum rated current of the connector is 15A per pin Use a wire gauge that is rated for the operational current The ignition pin may be used to turn the system on when configured The timing 14 ...

Страница 15: ...umentation on the OnLogic support site The internal CAN signals are unterminated the CAN device should be externally terminated 3 pin CAN Bus Dinkle EC350V 03P terminal block Pin Definition 1 GND 2 CAN L 3 CAN H CAN Bus Pinout LAN 1 2 There are two LAN Ports on the K400 platform that support up to 1 Gbps link speeds over standard shielded CAT5e or CAT6 cables The connector is the industry standard...

Страница 16: ...Mb s data rate LAN Activity Light Definition DisplayPort The Karbon 400 platform utilizes Intel s Integrated processor graphics that power the onboard DisplayPort with support for resolutions up to 4096x2304 at 60Hz The port also supports Multi Stream Transport MST which allows for triple independent display output using a certified MST hub The DisplayPort connector supports CEC protocol 16 ...

Страница 17: ...3 Top I O Definition Antenna SMA Ports The Karbon 410 and 430 both have four SMA ports for antennas on the top of the system The Karbon 430 includes two additional SMA ports on the front of the system 17 ...

Страница 18: ... selected in the BIOS and is set to the mPCIe slot by default Please refer to the BIOS user manual Appendix B for more information A full pinout table for this expansion slot is provided in Appendix D M 2 E Key An M 2 E Key slot on the Karbon 400 motherboard provides support for E Key form factor expansion cards Only 2230 form factor cards are supported The E Key connector supports PCIe Gen 3 x1 a...

Страница 19: ...o be updated please refer to Appendix B for reflashing instructions Power Switch Header The on board power switch header can be used to control the power state of the Karbon 400 platform in parallel with the front panel power button Mating power switch cables should be a twisted pair wire with floating shield to assure proper immunity to EMI RFI The mating connector is a standard 2 54mm female hea...

Страница 20: ...tate Pin Function 1 5V 2 GND 3 GND 4 12V High Speed Daughter Board The Karbon 430 system supports an additional daughter board for additional high speed storage and connectivity options The daughter board is pictured below M 2 B Key 1 The upper B Key slot is provided to allow support for B Key form factor PCIe and USB expansion cards Supported cards include 3042 3052 2260 2280 form factors The B K...

Страница 21: ...port SIM 1 The externally accessible 3FF SIM 1 slot is provided for networking capabilities on the B Key 1 slot SIM 2 The internally accessible 3FF SIM 2 slot is provided for networking capabilities on the B Key 1 slot This slot is on the bottom side of the Expansion card and is only accessible by removing the daughterboard from the chassis RTC Battery The RTC battery on the Karbon 400 expansion c...

Страница 22: ...to ensure that the brackets are oriented correctly and that the part of the brackets in contact with the mounting surface is positioned away from the system to ensure a small air gap is maintained between the mounting surface and the system Install the four supplied screws Step 3 Fasten system to the mounting surface hardware not provided The mounting bracket systems are required to secure 3x the ...

Страница 23: ... chassis that line up to the two countersunk holes on the DIN clip Screw type M3x0 5 FH 120 Degree Length 6 mm Step 2 The orientation of the DIN clip is interchangeable between the two options Determine the preferred orientation of the system and install the screws to the DIN clip accordingly Step 3 Install the system onto a DIN rail in the desired location 23 ...

Страница 24: ... the brackets in contact with the mounting surface is positioned away from the system to ensure a small air gap is maintained between the mounting surface and the system Install the four supplied screws Step 3 Take the two plastic DIN clips and align the two outer holes with the two outer holes in the middle of each of the wall mount brackets Screw type M3x0 5 PH Length 6 mm Step 4 The orientation...

Страница 25: ...provided screws Align the four holes on the VESA mounting plate with the corresponding holes on the chassis bottom Screw type M3x0 5 FH 120 Degree Length 4 mm Step 2 Attach system to a corresponding VESA MIS D 75 or MIS D 100 mounting pattern using the supplied M4x0 7 slotted standoffs 25 ...

Страница 26: ... safe DC voltage system not damaged 57V Ignition pin operating voltage 8 48V Ignition pin max safe voltage system not damaged 57V The specified DC levels are the absolute maximum values for function and safety of the system The protection circuitry allows for brief transient voltages above these levels without the system turning off or being damaged A transient voltage suppressor on the power inpu...

Страница 27: ...llowing two conditions 1 this device may not cause interference and 2 this device must accept any interference including interference that may cause undesired operation of the device Le présent appareil est conforme aux CNR d Industrie Canada applicables aux appareils radio exempts de licence L exploitation est autorisée aux deux conditions suivantes 1 l appareil ne doit pas produire de brouillage...

Страница 28: ... for each system configuration is record below System Component Config 1 Low K410 Config 2 Mid K410 Config 3 High K430 CPU Atom x6211E 2C 2T 6W Atom x6425E 4C 4T 12W Atom x6425E 4C 4T 12W Memory 8GB DDR4 So DIMM 2x 16GB DDR4 So DIMM 2x 16GB DDR4 So DIMM LAN 2x Intel I210 2x Intel I210 2x Intel I210 Storage 1 mPCIe SATA none 128Gb SATA 128Gb SATA Storage 2 M 2 B Key 128Gb SATA 1TB NVMe 1TB NVMe M 2...

Страница 29: ...0 19 Config 2 Mid K410 Power Consumption 9V avg W 48V avg W Windows Idle 14 4 17 3 CPU system Stress 21 5 22 7 CPU System Graphics Stress 26 6 27 2 S3 2 82 3 31 S5 1 11 1 39 Deep S5 0 04 0 19 Config 3 High K430 Power Consumption 9V avg W 48V avg W Windows Idle 19 7 21 4 CPU system Stress 26 7 30 0 CPU System Graphics Stress 33 2 34 2 S3 6 44 7 30 S5 1 13 1 39 Deep S5 0 04 0 19 29 ...

Страница 30: ...ns and individual settings please refer to the OnLogic support site Instructions for updating the BIOS can also be found on the support site Please refer to the link below for detailed instructions https www onlogic com support documentation k400 technical resources 30 ...

Страница 31: ...ystem performance was reviewed to look for any indication of performance issues or for components operating outside of their rated temperature range Samples of data collected during one of these thermal evaluations for this platform are shown below The sample data was collected during a test of the K410 chassis with the x6425E processor 64 GB of DDR4 RAM and an NVMe storage drive Of note in these ...

Страница 32: ...10 W_DISABLE2 26 27 GND NC 28 29 PERn1 USB3 1 Rx UIM RESET 30 31 PERp1 USB3 1 Rx UIM_CLK 32 33 GND UIM_DATA 34 35 PETn1 USB3 1 Tx UIM_PWR 36 37 PETp1 USB3 1 Tx NC 38 39 GND NC 40 41 PERn0 SATA B NC 42 43 PERp0 SATA B NC 44 45 GND NC 46 47 PETn0 SATA A NC 48 49 PETp0 SATA A PERST 50 51 GND CLKREQ 52 53 REFCLKn PEWAKE 54 55 REFCLKp NC 56 57 GND NC 58 59 NC NC 60 61 NC NC 62 63 NC NC 64 65 NC SIM_DET...

Страница 33: ...Y 26 27 KEY KEY 28 29 KEY KEY 30 31 KEY RESERVED 32 33 GND RESERVED 34 35 PETp0 RESERVED 36 37 PETn0 RESERVED 38 39 GND RESERVED 40 41 PERp0 RESERVED 42 43 PERn0 RESERVED 44 45 GND RESERVED 46 47 REFCLKp0 RESERVED 48 49 REFCLKn0 SUSCLK 32kHz 50 51 GND PERST0 52 53 CLKREQ0 W_DISABLE2 54 55 PEWAKE0 W_DISABLE1 56 57 GND NC 58 59 RESERVED NC 60 61 RESERVED NC 62 63 GND RESERVED 64 65 RESERVED NC 66 67...

Страница 34: ... UIM_RESET 14 15 GND UIM_SPU 16 17 KEY KEY 18 17 NC GND 18 19 NC W_DISABLE1 20 21 GND PERST 22 23 PERn0 3 3V 24 25 PERp0 GND 26 27 GND 1 5V 28 29 GND SMB_CLK 30 31 PETn0 SMB_DATA 32 33 PETp0 GND 34 35 GND USB 2 0_D 36 37 GND USB 2 0_D 38 39 3 3V GND 40 41 3 3V NC 42 43 GND NC 44 45 NC NC 46 47 NC 1 5V 48 49 NC GND 50 51 W_DISABLE2 3 3V 52 34 ...

Страница 35: ...ith liquids The chassis can be cleaned with a cloth 9 Allow at least 2 inches of space around all sides of the device for proper cooling If the device is mounted to a vertical surface then recommended device orientation is so that heatsink fins allow air to rise unobstructed Alternative orientations may result in reduced operational temperature range 10 This device is intended for indoor operation...

Страница 36: ...ez au moins 5 cm d espace autour de tous les côtés de l appareil pour un refroidissement correct Si l appareil est monté sur une surface verticale l orientation recommandée est telle que les ailettes du dissipateur de chaleur permettent à l air de monter sans obstruction Les orientations alternatives peuvent entraîner une réduction de la plage de température de fonctionnement 10 Cet appareil est c...

Страница 37: ...rCx2 sys driver framework Most existing serial utilities only support the Serial sys driver framework requiring the use of Windows APIs to use the RS422 485 serial device RS232 serial mode uses the Serial sys driver framework Workaround A UART Sub Device driver is available for download and provides a mapping layer to the Serial sys driver framework This driver does not support setting the DTR DTS...

Страница 38: ...der normal operating conditions the function of the motherboard should not be affected Customers who rely on chassis ground isolation are recommended to isolate the chassis from earth ground externally Resolution Steps to mitigate the issue will be taken in PCB B01 00005R6 by eliminating the short The changes are present in F01 x0005R6 38 ...

Отзывы: