17
Es
Asegúrese de hacer estos ajustes cuando use
el reproductor por primera vez.
Notas:
• Antes de conectar la alimentación, verifique
que las conexiones entre el reproductor y
otros aparatos estén bien hechas. Además,
conecte la alimentación de los aparatos
conectados al reproductor antes de
conectar la alimentación del reproductor.
• Cuando use un TV de pantalla plana o un
proyector frontal compatibles con la función
de Control, active el Control with HDMI en
el aparato conectado antes de encender el
reproductor.
1 Encienda el TV y cambie la entrada.
Vea el manual de instrucciones del TV para
las instrucciones de uso del mismo.
2 Conecte la alimentación del reproductor.
Pulse
z
(ON/STANDBY)
.
Verifique que se visualice el menú
Setup
Navigator
.
* Si no se visualiza el menú Setup
Navigator
►
Pulse
HOME MENU
para visualizar el
Home Menu, seleccione General setting
→
System
→ Setup Navigator, y a continuación
pulse
ENTER
.
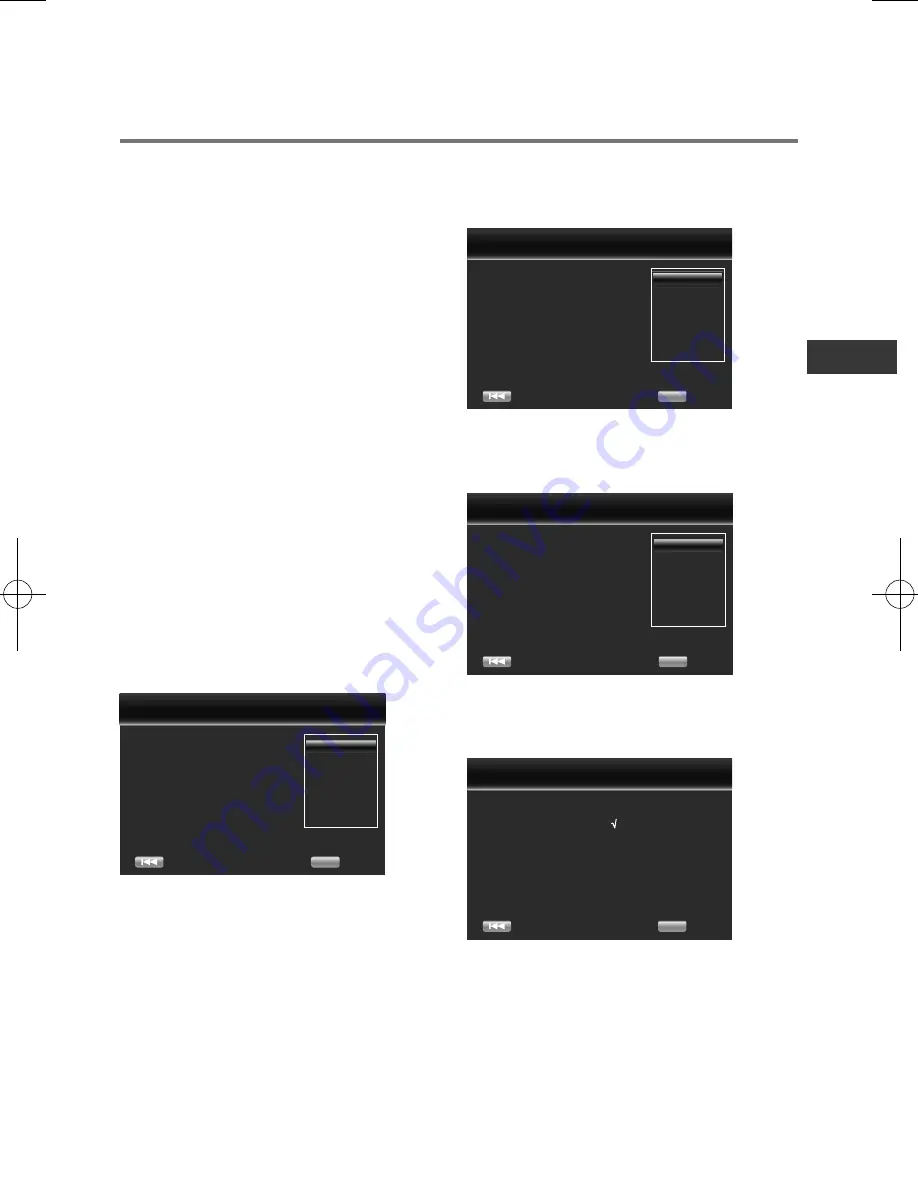
3 Seleccione el idioma de la OSD.
Use ▲/▼ para seleccionar y luego pulse
ENTER
.
Choose
Previous
an OSD language before starting.
The language selected will be applied not only here
but aslo in other OSD windows, menus etc.
English
Deutsch
French
Italiano
Spanish
Hungarian
OK
Next
page
2/5
Setup Navigator
4 Seleccione y configure los terminales de
salida de audio y vídeo.
Use ▲/▼
para seleccionar y luego pulse
ENTER
. Consulte la página 32.
Auto
480p/576p
720p
1080i
1080p
1080/24p
Choose
Previous
a resolution that fit your TV.
Change will be applied immediately, you have 15s to
determine whether to save the setting or rollback to
prior resolution. Better performance will be provided
by a HDMI connection!
OK
Next
page
:
3/5
Setup Navigator
5 Seleccione la relación de aspecto de su
TV.
Use ▲/▼
para seleccionar y luego pulse
ENTER
. Consulte la página 32.
Choose
Previous
an aspect retio that fit your TV.
Change will be applied in next page, you should
determine whether to save the setting or rollback to
prior aspect ratio.
16:9 Full
16:9 Normal
4:3 Pan&Scan
4:3 Letterbox
OK
Next
page
:
4/5
Setup Navigator
6 Cierre el menú Setup Navigator.
Pulse
ENTER
.
Para rehacer los ajustes desde el principio,
seleccione Go Back.
Setting
Previous
wizard is to be finished!
Now press "ENTER" key to go to Home Menu. Please enjoy it.
OK
Finish
page: 5/5
Setup Navigator
Capítulo 3
Operaciones a realizar
Ajustes utilizando el menú Setup Navigator
SN29402235_BD-SP353_EnFrEsItDeNlSv_1510xx.indb 17
2015/10/20 14:36:50
Содержание BD-SP353
Страница 310: ...46...
Страница 311: ...47 Sv...


