Precautions for Correct Use
Maintenance
• Always turn OFF the power and ensure safety before performing maintenance.
• Clean the lens with a lens-cleaning cloth or air brush.
• When attaching the lens module, if any large dust particles, or other foreign matter gets on
the imaging element, please blow it off with a blower brush (for camera lens). Please avoid
breathing, or blowing on it.
• Do not use thinner, alcohol, benzene, acetone, kerosene, etc. for cleaning the lens module.
Optical Axis and Field of View
• The optical axis center may vary slightly from product to product. When installing, be sure to
check the center position of the image on the monitor. Due to the nature of the material, the
center of the optical axis of this product may change by several pixels due to changes in the
ambient temperature.
• Please select the model after checking the field of view and camera installation distance on
the optical chart. Also, the field of view may vary slightly from product to product. When in-
stalling, be sure to check the image on the monitor.
Other
• Continually switching the focus after the initial adjusting and setting of focus at installation
time could adversely affect performance over time due to heat generation or internal part
wear.
• Attaching the lens module to the Smart Camera does change its vibration resistance specifi-
cation.
• When using the lens module in an environment requiring waterproofing, please use water-
proof hood FHV-XHD-LEM.
• Excessive vibration or shock may cause focus to be shifted. Please take care to avoid it.
• After attaching the lens module, do not touch the lens module part. It may result in damage to
the product.
• Attach the lens module to the Smart Camera using its locking screws. Do not attempt to re-
move the locking screws from the lens module as they are not intended to be completely re-
movable.
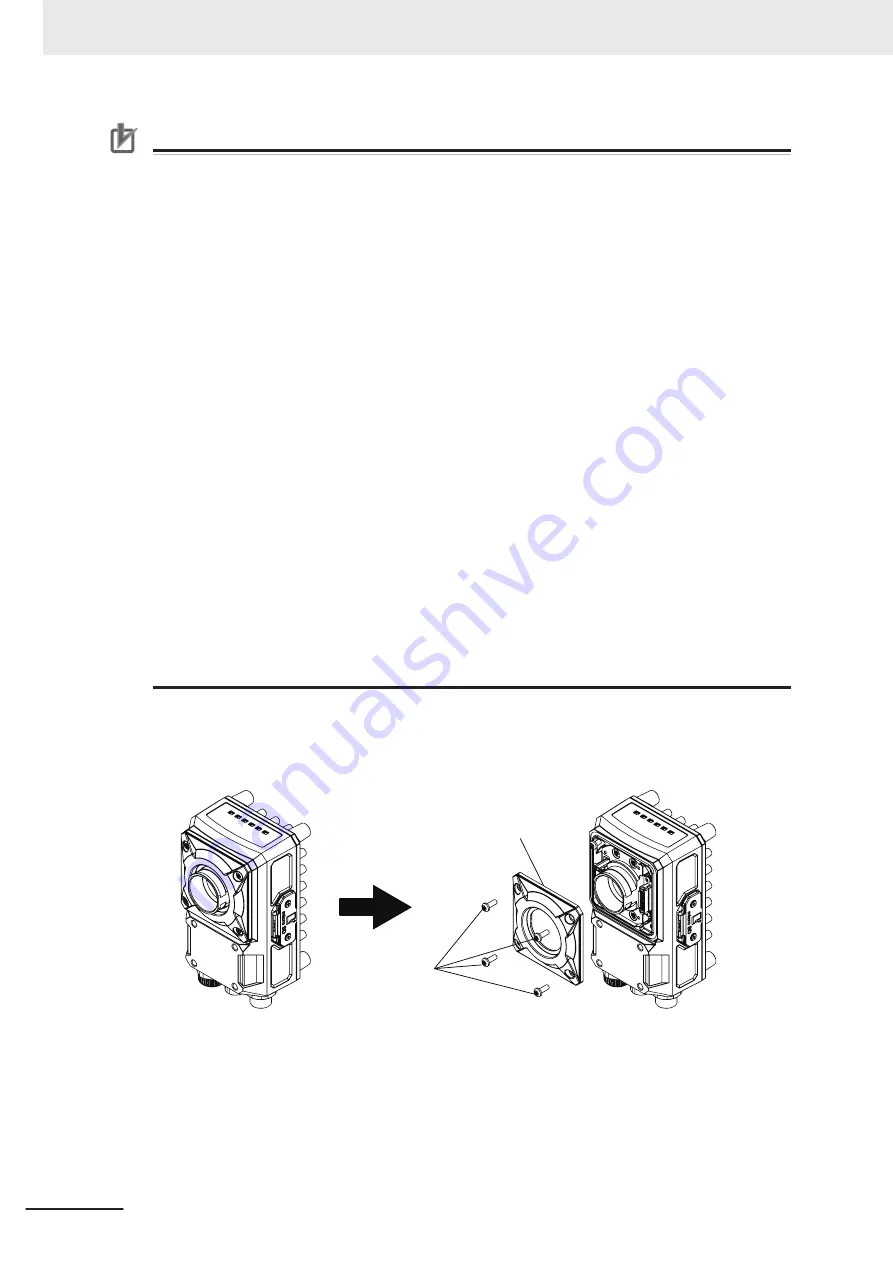
Please attach the module following these procedures.
1
Remove the C mount cover from the Smart Camera.
M3x8 screws
C mount cover
2
Attach the lens module to the Smart Camera body.
5 Installation
5 - 6
FHV Series Smart Camera Setup Manual (Z408-E1)
Содержание FHV Series
Страница 1: ...Vision Sensor FHV Series Smart Camera Setup Manual FHV7H Z408 E1 01...
Страница 8: ...6 FHV Series Smart Camera Setup Manual Z408 E1...
Страница 32: ...Sections in This Manual 30 FHV Series Smart Camera Setup Manual Z408 E1...
Страница 97: ...4 Handling and Installation Environ ment 4 1 Warning 4 2 4 1 FHV Series Smart Camera Setup Manual Z408 E1 4...
Страница 138: ...6 Power Supply and I O Interface 6 20 FHV Series Smart Camera Setup Manual Z408 E1...
Страница 158: ...7 Software Setup 7 20 FHV Series Smart Camera Setup Manual Z408 E1...
Страница 159: ...I Index I 1 FHV Series Smart Camera Setup Manual Z408 E1 I...
Страница 163: ......


