OmniPrint OM190 Скачать руководство пользователя страница 5


3-3  Connecting the Power Adapter 
 

This  printer  requires  an  external  power  supply.  Be  sure  to  use  a  power  supply  that 
matches the specifications.  
 

1.  Make sure the power switch is OFF. 
2.  Insert the output plug of the power adapter into the DC jack of the printer. 
3.  Plug the adapter or the power supply’s cord into an outlet. 
4.  For best results use one of the following Omniprint adapters: 

 
OMPS190-915-NA 

(120VAC input)  


OMPS190-915-EU 

(220-240VAC input) 


OMPS190-915-SMPS  (90-240VAC input) 


Output: 9VDC 1.5A, 2.1mm x 5.5mm female plug, Center positive


3-4  Connecting the Interface Cable 
 

You  need  an  appropriate  serial  interface  or  parallel  interface  cable  to  connect  your 
computer to the printer. 

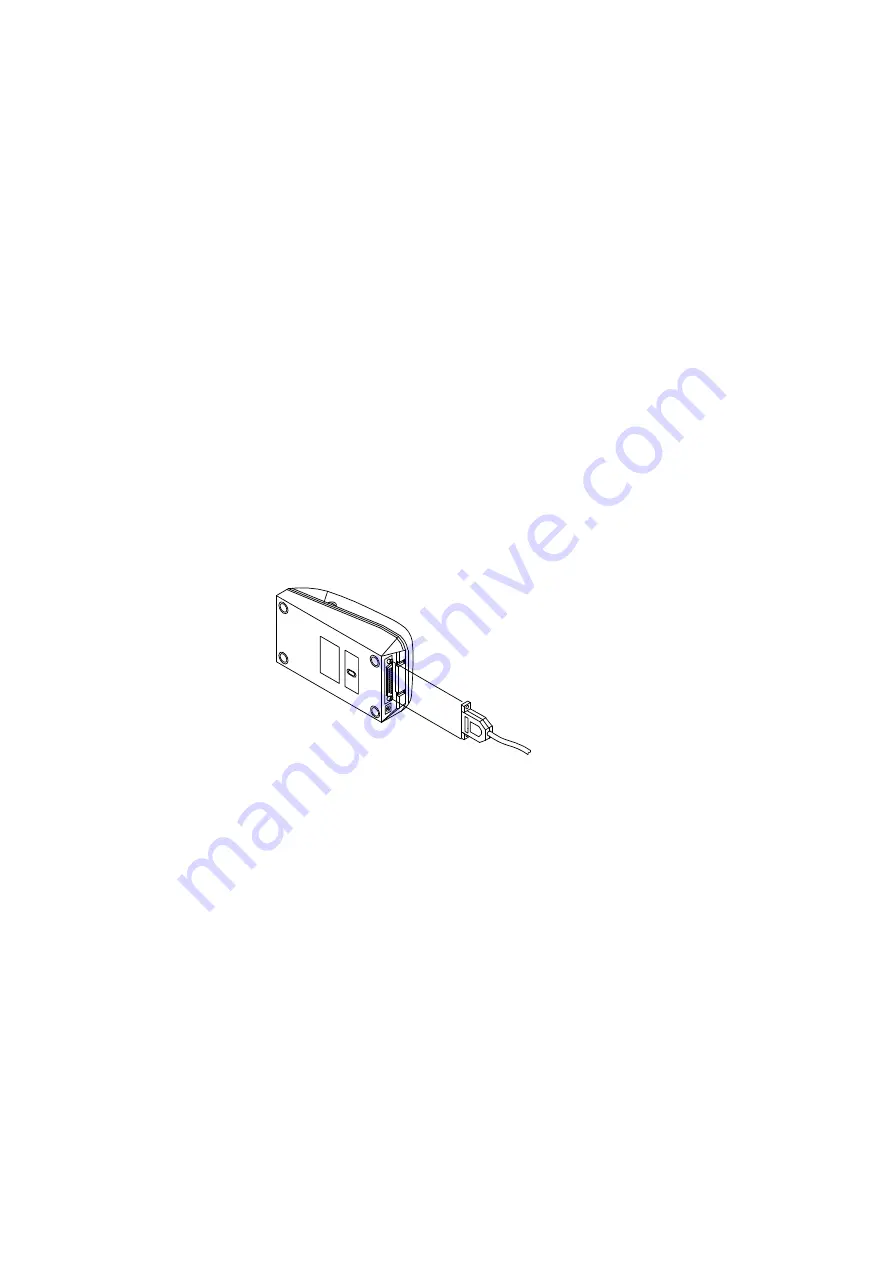
3-4-1   Serial Interface Cable: OM19X-S 
 

1.  Make sure that both the printer and computer are turned off. 
2.  The  serial  printer  comes  with  a  DB-25  female  connector.  Plug  the  DB-25  male 

end of the cable into the printer connector, as shown above.  

3.  Use a screw driver to fasten the cable screws to the two nut screws installed on 

the printer connector.  

4.  Connect the other end, DB9-F connector, to your computer. 
5.  Use Omniprint part number:  


CBL-625F-25M (DB-25 male on the host side) 
CBL-69F-25M  (DB-9 male on the host side) 


Содержание OM190

Страница 1: ...OMNIPRINT OM190 192 IMPACT PRINTER USER S MANUAL Revision 02 Version 2 0 March 12 2017 Omniprint Inc 1923 E Deere Ave Santa Ana CA 92705 TEL 949 833 0080 FAX 949 833 0040 Website www omniprintinc com...

Страница 2: ...n replacement Serial RS 232C Multiple international character set Auto power off features User selectable options stored in non volatile ram Watch dog software shuts off power to the print head and ca...

Страница 3: ...Paper Width 57 5 0 5 mm Diameter 60 mm Max No of copies Original 1 copy Power supply 9 VDC 10 2 0 A Dimensions mm 178 L x 105 W x 82 H Reliability MCBF 1 5 million lines 0 9 million lines Weight 400 g...

Страница 4: ...tance Printer Paper Roll Power Supply Ribbon installed Manual and Interface Cable Printer Paper roll Power Adapter Interface Cable 3 2 Selecting a Place 1 Protect your printer from excessive heat such...

Страница 5: ...2 1mm x 5 5mm female plug Center positive 3 4 Connecting the Interface Cable You need an appropriate serial interface or parallel interface cable to connect your computer to the printer 3 4 1 Serial...

Страница 6: ...te s knob in the direction of the arrow to take up any slack in the ribbon 4 Insert the ribbon between the printer head and platen as shown above and push the cassette down until it snaps in place 5 T...

Страница 7: ...ing the plastic tab on the right and insert the roll so that the holes in the core align with the axes of the paper roll holder Make sure that the two holders are completely inside the core so that th...

Страница 8: ...8 Roll paper Cover top Paper cover Bottom cover Roll paper Top cover On Off Control panel Interfaceconnector DCJack 4 External Appearance Paper roll holder...

Страница 9: ...sly SEL BUTTON The SEL button is used to change the printer setting Please refer to the SET UP section for details STATUS LED The dual color LED Green and Red is located inside the ON button and light...

Страница 10: ...correctly 1 While holding down the FEED button turn the printer on 2 The printer prints the current configuration settings including the model name and the firmware revision 3 Pressing FEED button on...

Страница 11: ...he table below 4 Pressing the SEL button will cause the setting of a parameter to change in the sequence shown below 5 Once the desired setting is selected it can be saved by pressing the SEL button w...

Страница 12: ...Black Standard cartridge ERC 22 P Purple or B Black Long Life Cartridge 3 Interface Cable 6 feet long shielded cable with molded connectors CBL 625F 25M Serial cable w DB 25F host side CBL 69F 25M Ser...

Страница 13: ...G IS PRINTED Make sure a ribbon cartridge is installed properly that is not worn out Please note that the ribbon needs to be in front of the paper If the printout is faint turn the knob on the cartrid...

Страница 14: ...bit 1 bit Data bit 7 or 8 bit Parity Odd Even None Stop bit 1 bit 2 bits Signal Polarity MARK Logic 1 10V SPACE Logic 0 10V Input Control DTR signal Mark Data transmission not possible Space Data tran...

Страница 15: ...based on the current line spacing IF LF CR IS SENT CR WILL BE IGNORED TO AVOID DOUBLE FEEDING CR 0DH This command prints the data in the print buffer and feeds one line If a LF is sent immediately aft...

Страница 16: ...int buffer and feed n lines ESC n 1BH 7BH n In standard mode turns upside down printing mode on or off When the LSB of n is 0 upside down printing mode is turned off When the LSB of n is 1 upside down...

Страница 17: ...0 No error On 40 64 Error occurred 7 Off 00 0 Not Used Fixed to Off Error status n 3 Bit Off On Hex Decimal Status 0 Off 00 0 Not used Fixed to Off 1 On 02 2 Not used Fixed to On 2 Off 00 0 No mechani...

Страница 18: ...18...

Страница 19: ...19 APPENDIX 1 INTERNATIONAL CHARACTERS SET APPENDIX 2 PRINTABLE CHARACTER SET...

Страница 20: ...20 APPENDIX 3 EXTERNAL DIMENSIONS...

Отзывы: