


Reproduction of part or all of the contents of this document in any form is expressly prohibited other than for individual use only. All text, images and labels are property of nimax Gmbh.
11.1. Connecting SkySafari® App to Push+. Make sure you followed all the steps mentioned above in 11. this is
really important as without this information SkySafari® will not be able to work with Push+. It is very important
at the point to exit the app and re-start it.
Important!
After the settings in 11. are done please exit the App and re-start it so that SkySafari® assumes the recent
changes to the settings!
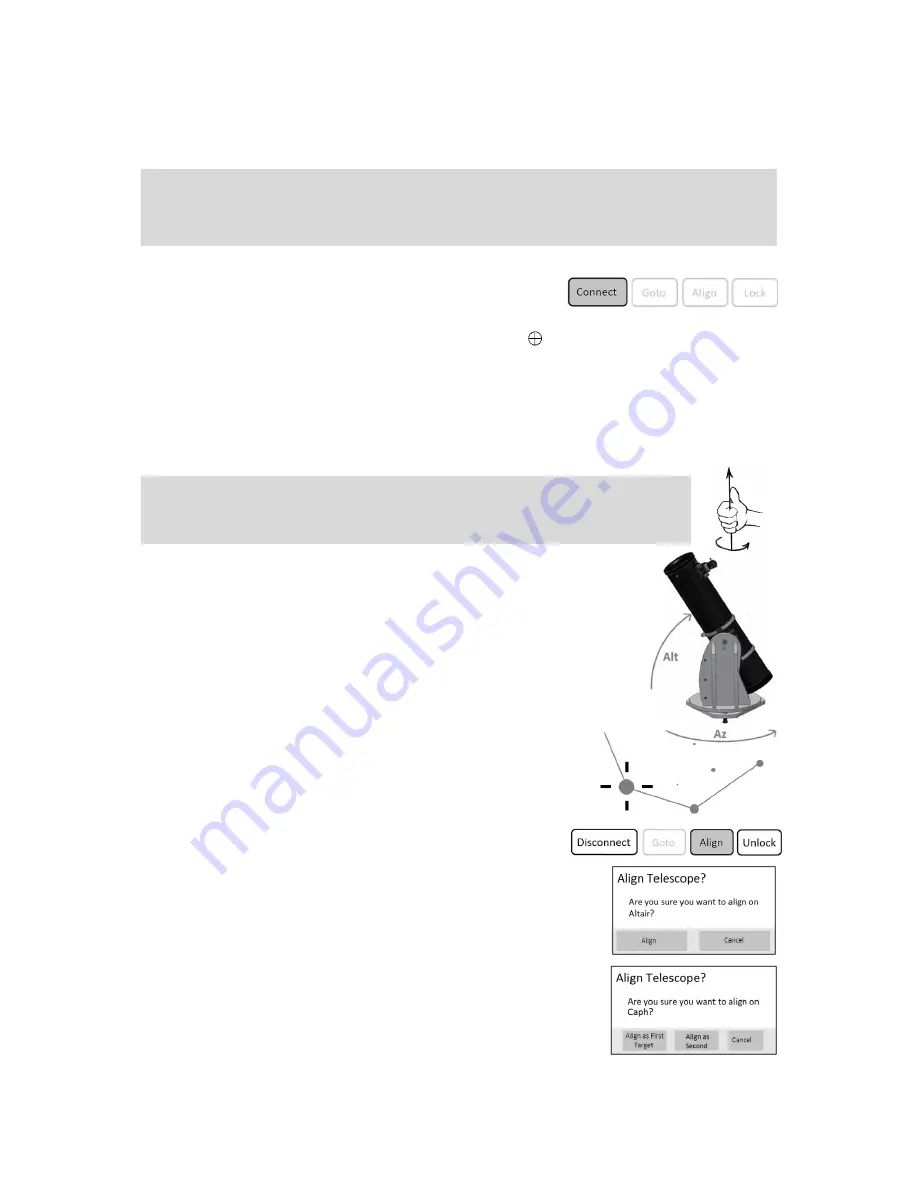
11.1.1. Connect. Tap “Connect” to connect the telescope to Push+.
Connection may take some seconds. When connection is established
the red LED stops blinking and remains powered ON.
11.1.2. Cross hair. As soon as connection is established a cross hair
will randomly appear on the screen. If
you move the telescope on both axes, you will see this cross hair moving accordingly. This is a good sign; it
means both encoders are working. When calibrated, the cross hair will point to a certain region in the sky. This
region will match the field of view as seen through the telescope eyepiece.
11.1.3. Choosing calibration stars. Alignment is done with one-star or two-stars. We recommend the two-star
alignment as it provide a much better pointing accuracy. The two-star separation should be no more than 30
degrees but no less than 10 degrees - both in Altitude (Alt) and Azimuth (Az). Avoid using alignment stars close
to the horizon and zenith.
Step 1
Centre a bright star - a star that you know or recognize from a constellation - in the
centre of eyepiece field of view. Follow the rule mentioned above – final movements
always Up and Left. It is important to centre the star in the eyepiece field of view with
some accuracy, we recommend using a cross hair eyepiece for this procedure.
Step 2
Match the star to the one shown on the device’s screen. Just swipe the screen so that
the sky rotates and zoom in our out to look for that particular object. Make sure you
know the object matches the one looked through the eyepiece – a common
mistake is aligning the wrong object. Tap on the star. A small cross will show
on top of the star.
Step 3
Tap “Align” to use that star.
“Align Telescope?”
For a one-alignment star, this is enough. Tap “Align”.
The selected star also named “First Target” or “First Alignment Star” was used
for calibration. You will now see the cross hair moving across the screen
pointing approximately to the same direction as the telescope.
For additional pointing accuracy, we recommend using a second alignment
star.
Select a second star and align, make sure it is not more than 30 degrees apart
from the “First Target”.
Alignment should be successful. You are now ready to point to objects using
your Push+.
Rule. Always Up and Left- for consistent results we recommend that the final fine
adjustments to the object centring in the telescope’s eyepiece to be made Up – in Alt and
Left – in Az
.


