background image

Instruction Manual

DIGITAL CAMERA

  Thank you for purchasing an Olympus digital camera. Before you start to use your new camera, please read these 

instructions carefully to enjoy optimum performance and a longer service life. Keep this manual in a safe place for 
future reference.

  We recommend that you take test shots to get accustomed to your camera before taking important photographs.

  In the interest of continually improving products, Olympus reserves the right to update or modify information 

contained in this manual.

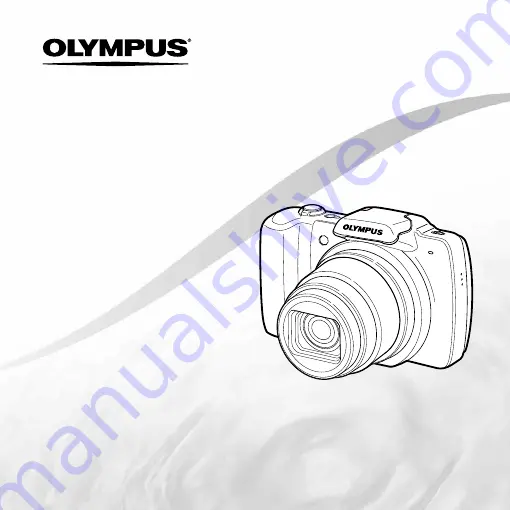
  This manual covers the SZ-10 and SZ-20. The camera illustrations on this manual is of SZ-10. Unless otherwise 

speci

fi

 ed, the explanation about these illustrations is provided for SZ-10 and SZ-20.

SZ-10/SZ-20

Содержание SZ-10

Страница 1: ...ture reference We recommend that you take test shots to get accustomed to your camera before taking important photographs In the interest of continually improving products Olympus reserves the right t...

Страница 2: ...ettings p 3 Step 5 Printing Direct printing PictBridge p 55 Print Reservations DPOF p 58 or Digital camera Strap Lithium Ion Battery LI 50B USB cable AV cable USB AC adapter F 2AC OLYMPUS Setup CD ROM...

Страница 3: ...ect Buttons Frequently used functions can be accessed using the direct buttons Zoom lever p 21 24 Shutter button p 20 60 R button record movies p 20 q button switching between shooting and playback p...

Страница 4: ...t Cancel X Y M D Time Y M D Y M D Operation guides displayed at the bottom of the screen indicate that the m button A button or zoom lever can be used MENU OK Sel Image Erase Cancel 4 30 4 30 Operatio...

Страница 5: ...The function menu is used to choose the shooting mode and provides access to frequently used shooting settings 14M 4 4 0 0 0 0 AUTO WB AUTO WB AUTO ISO AUTO ISO Program Auto Program Auto P P 3D 3D To...

Страница 6: ...e 14M OK Set 1 2 3 1 2 MENU Exit Reset Reset Digital Zoom Off Digital Zoom Off Compression Normal Shadow Adjust Auto AF Mode ESP Face iESP ESP Image Size 14M MENU OK Set Back 1 2 3 1 2 Reset Reset Dig...

Страница 7: ...r p 41 AF Illuminat p 41 Rec View p 42 Pic Orientation p 42 Icon Guide p 42 Date Stamp p 42 a A Movie menu Image Size p 39 Image Quality p 39 IS Movie Mode p 41 R Movie sound recording p 43 14M 4 4 0...

Страница 8: ...s 1 Memory Format Format p 48 Backup p 48 Eye Fi p 48 USB Connection p 49 q Power On p 49 KeepzSettings p 49 Pw On Setup p 49 2 s Settings 2 Sound Settings p 50 File Name p 50 Pixel Mapping p 51 s Mon...

Страница 9: ...Zoom lever p 21 24 4 Connector cover p 14 16 5 Multi connector p 14 16 52 55 6 HDMI micro connector p 52 7 Strap eyelet p 10 8 Battery card compartment lock p 13 9 Battery card compartment cover p 13...

Страница 10: ...ween shooting and playback p 20 22 49 5 A button OK p 4 6 Wheel controller p 4 INFO button changing information display p 22 25 D button erase p 24 7 E button camera guide menu guide p 26 8 m button p...

Страница 11: ...e balance p 36 8 ISO p 36 9 Drive p 37 10 Recording with sound movies p 43 11 Date stamp p 42 12 World time p 54 13 Image stabilization still images Digital image stabilization movies p 41 14 Metering...

Страница 12: ...ure value p 20 14 ISO p 36 15 Exposure compensation p 35 16 White balance p 36 17 Compression still images p 39 68 Image quality movies p 39 69 18 Image size p 39 68 69 19 File number 20 Date and time...

Страница 13: ...partment cover 3 Charging the battery and setting up using the supplied CD Connect the camera to the computer to charge the battery and use the supplied CD for setup User registration using the suppli...

Страница 14: ...on screen instructions on your computer If nothing is displayed on the camera screen even after connecting the camera to the computer the battery may be exhausted Leave the camera connected to the com...

Страница 15: ...RAM with DirectX 9 or later See online help for information on using the software 5 Install the camera manual Click the Camera Instruction Manual button and follow the on screen instructions Macintos...

Страница 16: ...r 2 1 3 AC outlet USB cable supplied Multi connector Connector cover 2 Indicator lamp On Charging Off Charged The battery is not fully charged at shipment Before use be sure to charge the battery unti...

Страница 17: ...rs and minutes and Y M D date order and then press the A button For precise time setting press the A button as the time signal strikes 00 seconds To change the date and time adjust the setting from th...

Страница 18: ...area directly 2 Number of storable pictures still images Continuous recording length movies in the internal memory and cards p 68 69 To remove the card 1 2 Press the card in until it clicks and comes...

Страница 19: ...ing menu functions such as exposure compensation white balance etc as needed 1 Press the n button to turn on the camera P mode indicator M 4 4 P P 0 0 0 0 AUTO WB AUTO WB AUTO ISO AUTO ISO 00 34 00 34...

Страница 20: ...R movies p 43 to Off 3 Press the shutter button halfway down to focus on the subject When the camera focuses on the subject the exposure is locked shutter speed and aperture value are displayed and th...

Страница 21: ...oom range Other The magnification ratio changes depending on the image size setting 1 On selected for Digital Zoom Image size Zoom bar 14M SZ 10 16M SZ 20 Digital zoom range Other The magnification ra...

Страница 22: ...d shooting information changes in the order shown below each time the button is pressed Shooting mode display p 11 14M 4 4 P P 0 0 0 0 AUTO WB AUTO WB AUTO ISO AUTO ISO 00 34 00 34 MENU MENU P P P 14M...

Страница 23: ...mages continuously Press the A button to stop the continuous playback and then use HI to view the images frame by frame To play back movies To play back movies Select a movie and press the A button Du...

Страница 24: ...vancing and rewinding one frame at a time 1 Turn the wheel controller to advance or rewind by one frame at a time Keep turning the wheel controller for continuous advance or rewind Resuming playback P...

Страница 25: ...in the order shown below each time the button is pressed 00 00 4 30 4 30 4 30 4 30 1 1000 F3 0 2 0 AUTO WB AUTO ISO P FILE 100 0004 00 00 10 10 3D 3D 10 10 00 00 11 02 26 11 02 26 11 02 26 NORM 14M N...

Страница 26: ...k direction Press FGHI to pause playback and scroll the image in the direction of the pressed button Pause Press the A button Restart scrolling Press the A button Stop playback Press the m button Play...

Страница 27: ...earch by situation Search from shooting playback scene Search from keyword Search from the camera keyword Learn about the camera Information is shown about recommended functions and basic operating me...

Страница 28: ...14M NORM 00 34 00 34 The icon changes depending on the scene that the camera automatically selects In some cases the camera may not select the desired shooting mode When the camera cannot identify th...

Страница 29: ...er pictures can be taken Using Using V V Beauty Beauty 1 Point the camera toward the subject Check the frame appearing around the face detected by the camera and then press the shutter button to take...

Страница 30: ...ined by the camera The user only composes the shots so that the target marks and pointers overlap and the camera automatically releases the shutter SZ 20 Panorama images are automatically combined jus...

Страница 31: ...Move the camera slowly while keeping it straight and stop the camera where the pointer and target mark overlap The camera releases the shutter automatically OK MENU Save Cancel AUTO AUTO To combine on...

Страница 32: ...sible for up to 10 frames 3 Repeat Step 2 until the number of desired frames is taken and then press the A button or m button when finished Refer to the PC software help guide for details on how to ma...

Страница 33: ...th Manual 1 Press the shutter button to shoot the first frame 2 Move the camera in the same way as Auto to decide the position and then press the shutter button The first shot image is displayed on th...

Страница 34: ...sh Auto Flash Auto MENU MENU 3 Use HI to select the setting option and press the A button to set Option Description Flash Auto The flash fires automatically in low light or backlight conditions Redeye...

Страница 35: ...on and press the A button to set Option Description Y Off The self timer is deactivated Y 12 sec The self timer lamp turns on for approx 10 seconds then blinks for approx 2 seconds and then the pictur...

Страница 36: ...O 100 ISO ISO 100 1 400 F3 0 1 400 F3 0 400 ISO 400 ISO ISO 200 ISO 200 MENU MENU 2 Use HI to select the setting option and press the A button to set Option Description ISO Auto The camera automatical...

Страница 37: ...button is pressed The camera takes sequential shots at approximately 1 6 frames sec The camera takes sequential shots at approximately 7 frames sec for up to 3 frames The camera takes sequential shots...

Страница 38: ...o the default settings Reset Restoring the shooting functions to the default settings Reset I Shooting menu 1 X Reset Submenu 2 Application Yes Restores the following menu functions to the default set...

Страница 39: ...592 1 4288x2416 2 Suitable for playing pictures on a widescreen TV and for printing on A3 or 11 x17 16 9F 1920x1080 Suitable for playing pictures on a widescreen TV and for printing on A5 or 5 x7 Comp...

Страница 40: ...some subjects the frame may not appear or may take some time to appear 2 If the frame blinks in red the camera cannot focus Try refocusing on the subject To focus on a moving subject To focus on a mov...

Страница 41: ...Submenu 2 Application Off The image stabilizer is deactivated This is recommended for shooting when the camera is fixed in place on a tripod or other stable surface On The image stabilizer is activat...

Страница 42: ...of the camera during shooting is not recorded with images Images shot with the camera in a vertical position are not rotated during playback On Information about the vertical horizontal orientation of...

Страница 43: ...Recording sound when shooting movies movies R R A Movie menu X R Submenu 2 Application Off No sound is recorded On Sound is recorded When set to On only the digital zoom can be used during movie reco...

Страница 44: ...Start Starts the slideshow 1 The Collection that has been created with the ib PC software and imported back from a computer can play back During a slideshow press I to advance one frame H to go back...

Страница 45: ...480 This saves a high resolution image as a separate image with a smaller size for use in e mail attachments and other applications E 320 x 240 1 Use HI to select an image 2 Use FG to select an image...

Страница 46: ...kin MENU OK Set Back Avg Soft Soft Hard Brightening areas that are dark Brightening areas that are dark due to backlight or other reasons due to backlight or other reasons Shadow Adj Shadow Adj q Play...

Страница 47: ...k are erased To erase all images All Erase To erase all images All Erase 1 Use FG to select All Erase and press the A button 2 Use FG to select Yes and press the A button Saving print settings to the...

Страница 48: ...d comply with the instructions Use the Eye Fi card in compliance with the laws and regulations of the country where the camera is used In locations such as on an airplane where the Eye Fi communicatio...

Страница 49: ...proper operation is not guaranteed in the following cases Computers with USB ports installed using an expansion card etc Computers without a factory installed OS and home built computers Turning on t...

Страница 50: ...pictures File Name s Settings 2 X File Name Month 1 to C A October B November C December Day 01 to 31 Pmdd Folder name Folder name File name DCIM 100OLYMP 999OLYMP Pmdd0001 jpg Pmdd9999 jpg Automatic...

Страница 51: ...brightness of the monitor s s s Settings 2 X s To adjust the monitor brightness To adjust the monitor brightness 1 Use FG to adjust the brightness while viewing the screen and then press the A button...

Страница 52: ...over in the direction of the arrow Connection via HDMI cable 1 On the camera select the digital signal format that will be connected 480p 576p 720p 1080i 2 Connect the TV and camera 3 Turn on the TV a...

Страница 53: ...following the operation guide that is displayed on the TV With some TVs operations cannot be performed with the TV remote control even though the operation guide is displayed on the screen If operati...

Страница 54: ...The time in the travel destination time zone the time zone selected for z in submenu 2 x 1 Select the home time zone x z 1 2 Select the travel destination time zone z 1 In areas where daylight saving...

Страница 55: ...nual For details on the available paper types loading paper and installing ink cassettes refer to the printer s instruction manual Printing images at the printer s standard settings Easy Print In the...

Страница 56: ...heet are set to the printer s standard 5 Use FG to select the Borderless or Pics Sheet settings and press the A button Submenu 4 Application Off On 1 The image is printed with a border around it Off T...

Страница 57: ...me 2 Use FG to select OK and press the A button 8 If necessary repeat Steps 6 and 7 to select the image to be printed make the detailed settings and set Single Print 9 Press the A button Print MENU OK...

Страница 58: ...ith this camera will erase the reservations made by the other device DPOF print reservations can be made for up to 999 images per card Single frame print reservations 1 Display the setup menu Setup me...

Страница 59: ...select Reset and press the A button Resetting the print reservation data for selected images 1 Follow Steps 1 and 2 in p 58 2 Use FG to select and press the A button 3 Use FG to select Keep and press...

Страница 60: ...longed camera use the internal temperature may increase resulting in automatic shutdown If this occurs remove the battery from the camera and wait until the camera has sufficiently cooled The camera s...

Страница 61: ...he image on a computer If the image still cannot be viewed the image file is corrupted Error message Corrective action The Image Cannot Be Edited Problem with selected image Use photo retouch software...

Страница 62: ...ture of a shadowy subject Using the AF illuminator makes focusing easier AF Illuminat p 41 Taking a picture of subjects where autofocus is difficult In the following cases after focusing on an object...

Страница 63: ...s not affected by background light Taking pictures using Fill In p 34 flash A subject against backlight is brightened Taking pictures of a white beach or snow scene Set the mode to q Beach Snow p 29 T...

Страница 64: ...se they deplete the battery power Repeatedly pressing the shutter button halfway Repeatedly using the zoom Set Power Save p 53 to On Playback Editing tips Playback Playing images in the internal memor...

Страница 65: ...replaced with the incorrect battery type Dispose of the used battery following the instructions p 72 Power consumption by the camera varies depending on which functions are used During the conditions...

Страница 66: ...electrical shop or travel agent Do not use travel voltage converters as they could damage your charger and USB AC adapter Eye Fi card Use commercially available Eye Fi cards The Eye Fi card may become...

Страница 67: ...Even if Memory Format Format Erase Sel Image or All Erase is performed the data in the card is not completely erased When disposing of the card damage the card to prevent the disclosure of personal da...

Страница 68: ...used The figures in the table below are the number of the storable pictures when using the internal memory formatted Memory Format Format p 48 Still pictures Still pictures IMAGE SIZE COMPRESSION Num...

Страница 69: ...min 24 sec M 2 min 21 sec 2 min 30 sec 40 min 10 sec 42 min 45 sec 9 320x240 L 2 min 21 sec 2 min 30 sec 40 min 10 sec 42 min 45 sec 1 The continuous recording length is up to 29 minutes in the HD qua...

Страница 70: ...oduct mount the product securely on a stable tripod stand or bracket Power Source Connect this product only to the power source described on the product label Lightning If a lightning storm occurs whi...

Страница 71: ...ring batteries to prevent them from coming into contact with any metal objects such as jewelry pins fasteners etc Never store batteries where they will be exposed to direct sunlight or subjected to hi...

Страница 72: ...Always charge a battery when using it for the first time or if it has not been used for a long period When operating the camera with battery power at low temperatures try to keep the camera and spare...

Страница 73: ...ssly approved by the manufacturer may void the user s authority to operate this equipment This equipment has been tested and found to comply with the limits for a Class B digital device pursuant to Pa...

Страница 74: ...and shall pay for shipment of the Products to the Olympus Service Center Olympus shall not be obligated to perform preventive maintenance installation deinstallation or maintenance Olympus reserves t...

Страница 75: ...ranties made by any person including but not limited to dealers representatives salespersons or agents of Olympus which are inconsistent or in conflict with or in addition to the terms of this limited...

Страница 76: ...ing instructions supplied with it during the applicable national warranty period and has been purchased from an authorized Olympus distributor within the business area of Olympus Europa Holding GmbH a...

Страница 77: ...r or loss of data is excluded Compelling regulations by law remain unaffected by this a b c d e f g h i j Notes regarding Guarantee maintenance 1 This Guarantee will only be valid if the Guarantee Cer...

Страница 78: ...product or for any loss resulting from delay in repair is excluded a b c d e f g h i j Notes 1 This Warranty is in addition to and does not affect the customer s statutory right 2 lf you have any quer...

Страница 79: ...PERSONAL AND NONCOMMERCIAL USE OF A CONSUMER TO i ENCODE VIDEO IN COMPLIANCE WITH THE AVC STANDARD AVC VIDEO AND OR ii DECODE AVC VIDEO THAT WAS ENCODED BY A CONSUMER ENGAGED IN A PERSONAL AND NON COM...

Страница 80: ...device 1 2 33 CCD primary color filter 1 2 3 CMOS primary color filter Lens Olympus lens 5 0 to 90 mm f3 1 to 4 4 Olympus lens 4 2 to 52 5 mm f3 0 to 5 9 On 35 mm film Equivalent to 28 to 504 mm Equiv...

Страница 81: ...4 2 x 2 6 x 1 5 in 102 4 mm x 64 0 mm x 30 4 mm 4 0 x 2 5 x 1 2 in Weight 215 g 7 6 oz including battery and card 186 g 6 6 oz including battery and card Lithium ion battery LI 50B Lithium ion batter...

Страница 82: ...operation 20 C to 60 C 4 F to 140 F storage Dimensions 50 0 mm W X 54 0 mm H X 22 0 mm D 2 0 X 2 1 X 0 9 in Weight Approx 46 0 g 1 6 oz F 2AC 1A Approx 42 0 g 1 5 oz F 2AC 2A Approx 44 0 g 1 6 oz F 2...

Страница 83: ......

Страница 84: ...VR136501...

Отзывы: