background image

18

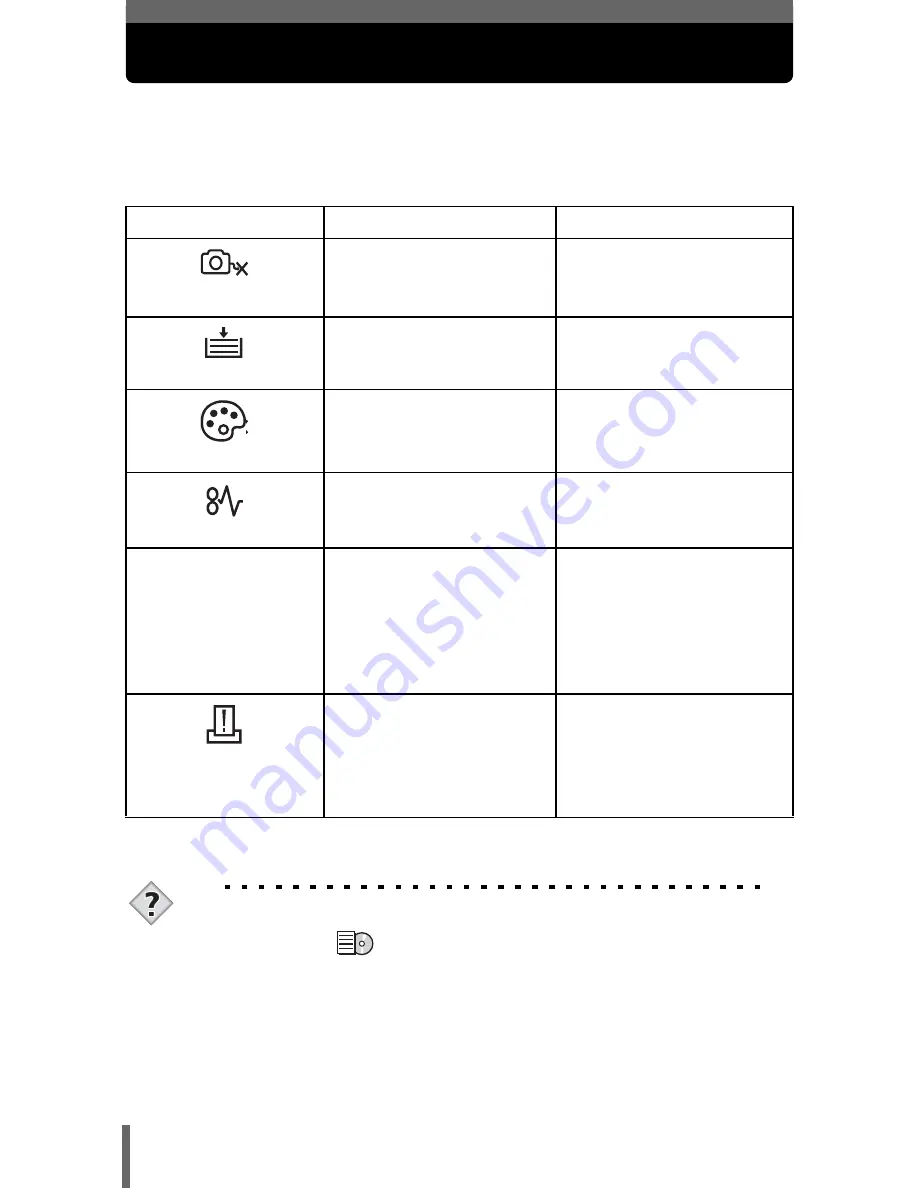
If an error code is displayed

If an error code appears on the camera’s monitor during direct print setting 
or printing, see the following table.
For more details, refer to the printer’s instruction manual.

TIPS

• If an error code other than those shown above is displayed, refer to 

“Error codes” (

 P.117).

Monitor indication

Possible cause

Corrective action

NO CONNECTION

The camera is not 
connected to the printer 
correctly.

Disconnect the camera 
and connect it again 
correctly.

NO PAPER

There is no paper in the 
printer.

Load some paper in the 
printer.

NO INK

The printer has run out of 
ink.

Replace the ink cartridge 
in the printer.

JAMMED

The paper is jammed.

Remove the jammed 
paper.

SETTINGS CHANGED

The printer’s paper 
cassette has been 
removed or the printer 
has been manipulated 
while making settings on 
the camera.

Do not manipulate the 
printer while making 
settings on the camera.

PRINT ERROR

There is a problem with 
the printer and/or 
camera.

Turn off the camera and 
printer. Check the printer 
and remedy any 
problems before turning 
the power on again.

Содержание STYLUS 300

Страница 1: ...AL mju 300 400 DIGITAL z In the interest of continually improving products Olympus reserves the right to update or modify information contained in this manual DIGITAL CAMERA MANUAL FOR DIRECT PRINTING...

Страница 2: ...t originally provided with your camera What is PictBridge It is the standard for connecting digital cameras and printers of different makers and printing out pictures directly Indications used in this...

Страница 3: ...puter 5 Direct printing function 6 2 Direct printing 7 Using the direct printing function 7 Connecting the camera to a printer 8 Printing pictures 9 PRINT mode MULTI PRINT mode 9 ALL PRINT mode 13 ALL...

Страница 4: ...rror messages are displayed on the monitor The choice of languages changes as shown below after updating Before updating Menu List P 124 to 127 After updating Top menu Tab Function Setting MODE MENU S...

Страница 5: ...mera s USB connector The camera turns on automatically When the camera turns on the lamp on the right of the viewfinder lights up 3 The selection screen for the USB connection shown right is displayed...

Страница 6: ...ures can be printed directly from the camera By connecting the camera directly to a printer that supports PictBridge with the USB cable you can print pictures stored on the card inside the camera with...

Страница 7: ...ferent makers and printing out pictures directly STANDARD All printers that support PictBridge have standard print settings Selecting STANDARD on the settings screens P 10 to 16 images are printed acc...

Страница 8: ...the camera s USB connector The camera turns on automatically The monitor turns on and the selection screen for the USB connection is displayed 3 Press to select PRINT then press ONE MOMENT is displaye...

Страница 9: ...n multiple layout format PRINT mode MULTI PRINT mode P 9 ALL INDEX Prints an index of all the pictures stored on the card ALL INDEX mode PRINT ORDER mode P 15 PRINT ORDER Prints the pictures according...

Страница 10: ...paper size set in step 2 and the capabilities of your printer 5 Press to select the picture you want to print Press the zoom button toward W to display the pictures in index format You can then selec...

Страница 11: ...ailable options vary depending on the type of printer Items outside the capability of the printer are not available Sets the number of prints You can select up to 10 prints DATE If you select WITH pic...

Страница 12: ...CEL then press OK Printing starts CANCEL The settings are canceled and the monitor returns to the PRINT MODE SELECT screen When printing is finished the monitor returns to the PRINT MODE SELECT screen...

Страница 13: ...ge Print information setting screen is displayed 4 Press to select the item you want to set then press Press to select the item then press If PRINT INFO cannot be set with your printer go to step 6 Th...

Страница 14: ...een When printing is finished the monitor returns to the PRINT MODE SELECT screen Exiting direct printing P 17 zTo cancel printing Pressing during print data transfer displays the screen for selecting...

Страница 15: ...inter SIZE or BODERLESS may not be able to be selected When the PRINT PAPER screen is not displayed SIZE and BORDERLESS are set to STANDARD Go to Step 4 3 Use to select framed or unframed then press O...

Страница 16: ...ng during print data transfer displays the screen for selecting whether to continue or cancel printing To cancel printing press to select CANCEL then press In ALL INDEX mode the printer automatically...

Страница 17: ...ting disconnect the camera from the printer 1 In the PRINT MODE SELECT screen select The message shown right is displayed 2 Remove the USB cable from the camera The camera turns off 3 Remove the USB c...

Страница 18: ...nect the camera and connect it again correctly NO PAPER There is no paper in the printer Load some paper in the printer NO INK The printer has run out of ink Replace the ink cartridge in the printer J...

Страница 19: ...dating the firmware take the action described below The printer fails to connect Possible cause Corrective action Ref Page PC was selected on the monitor after connecting to the printer with a USB cab...

Страница 20: ...20097 Hamburg Germany Tel 49 40 23 77 3 0 Fax 49 40 23 07 61 Letters Postfach 10 49 08 20034 Hamburg Germany European Technical Customer Support Please visit our homepage http www olympus europa com o...

Отзывы: