60
EN
Playback functi
ons
4
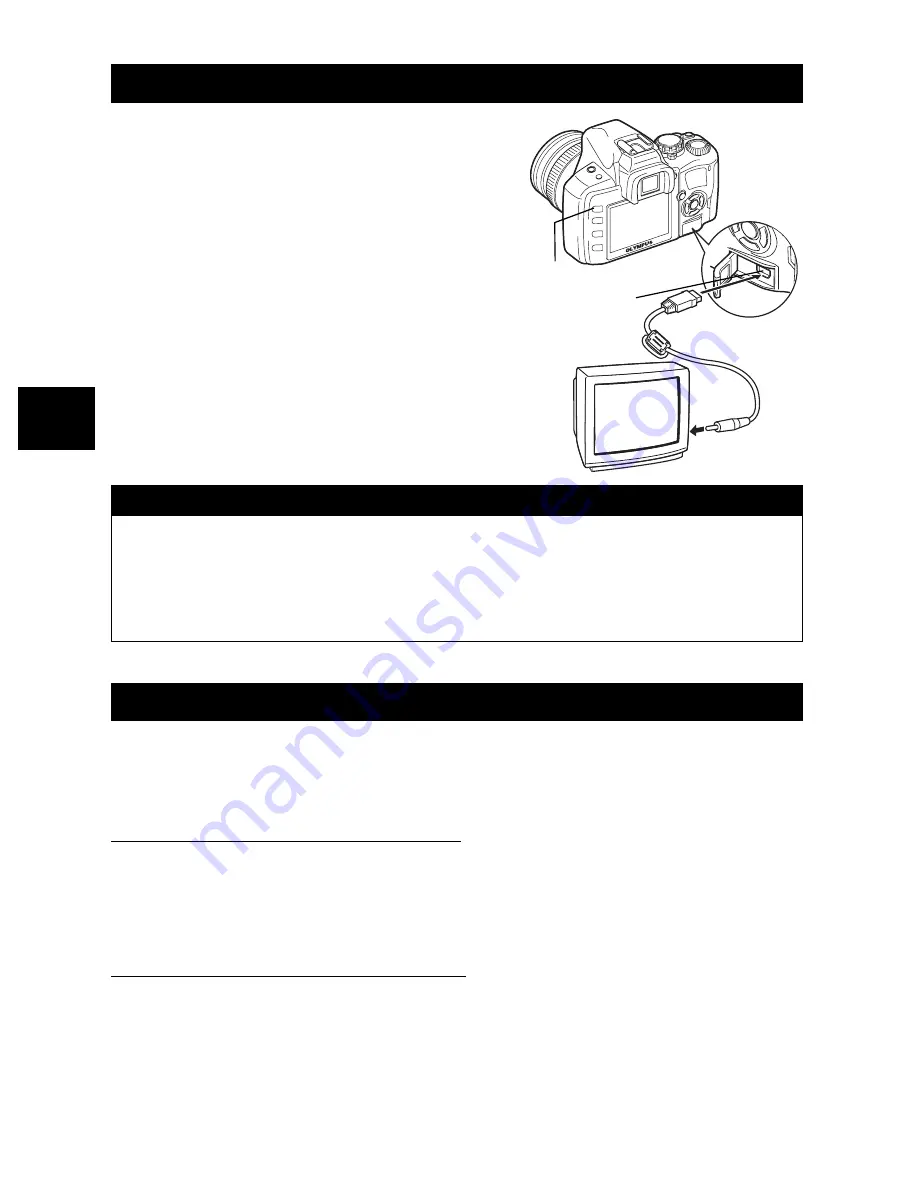
Use the video cable provided with the camera to
play back recorded images on your TV.
1
Turn the camera and TV off, and
connect the video cable as
illustrated.
2
Turn on the TV and set it to the
video input mode. For details on
switching to the video input
mode, refer to the TV’s manual.
3
Turn the camera on and press the
q
(playback) button.
Recorded images can be edited and saved as new images. Available editing functions depend
on the image format (image record mode). A JPEG file can be printed as is without modification.
A RAW file, on the other hand cannot be printed as is. To print a RAW file, use the RAW edit
function to convert the RAW data format to JPEG.
Editing images recorded in RAW data format
The camera performs image processing (such as white balance and sharpness adjustment) on
images in the RAW data format, then saves the data to a new file in the JPEG format. While
checking recorded images, you can edit them to your liking.
Image processing is performed based on the current camera settings. If you want to use
different settings when editing, change the current camera settings beforehand.
Editing images recorded in JPEG data format
[BLACK & WHITE]
Creates black and white images.
[SEPIA]
Creates sepia-toned images.
[REDEYE FIX]
Reduces red-eye phenomenon during flash shooting.
[SATURATION]
Sets the color depth.
[
Q
]
Converts the image file size to 1280 x 960, 640 x 480 or 320 x 240.
Playback on TV
x
Notes
• To connect the camera to a TV, use the provided video cable.
• Make sure that the camera’s video output signal type is the same as the TV’s video signal
type.
g
“Selecting the video signal type before TV connection” (P. 71)
• The camera’s monitor turns off automatically when the video cable is connected to the
camera.
• The image may appear off-center depending on the TV screen.
Editing still images
Multi-connector
q
button
Video cable
Video input
terminal


