background image

Section 7  TROUBLESHOOTING

7-6

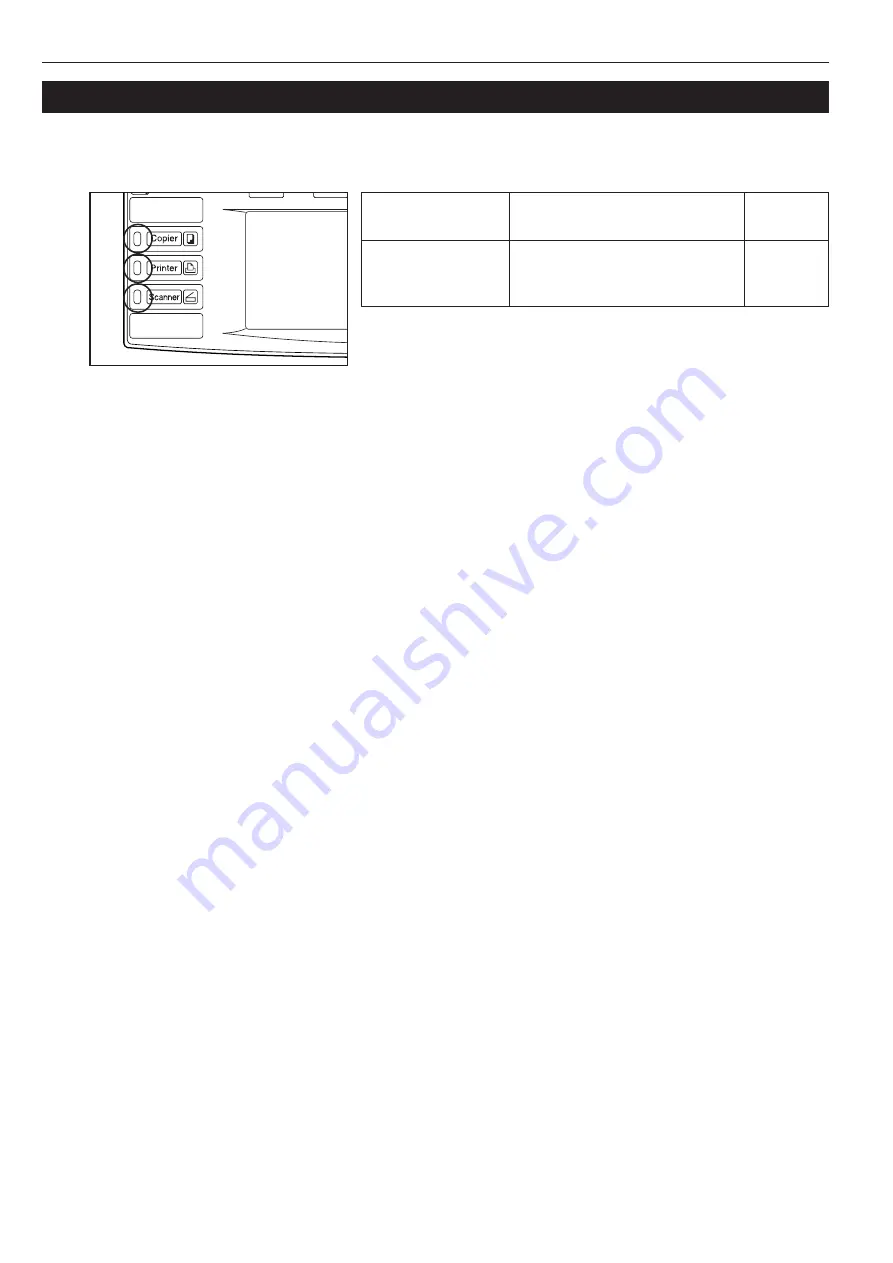
2. If one of these indicators lights or flashes

If one of the indicators to the left of the [Copier] key, the [Printer] key, or the [Scanner] key either lights orange or flashes orange, carry out the
appropriate procedure indicated below.

Indication

Lights orange or flashes
orange

Procedure

Check the appropriate response to the
message, and perform the
corresponding procedure.

Reference

page

Содержание Omega D 630

Страница 1: ...Operation Guide Please read the Operation Guide before using the copier Keep it close to the copier for easy reference Omega D 630 ...

Страница 2: ...es since the device was last used as well as an Off Mode where the device automatically turns itself off after there is no activity within a set amount of time When the copier includes printer and fax functions the printer and fax must enter a Low Power Mode where power consumption is automatically reduced after a certain amount of time elapses since they were last used and they must also support ...

Страница 3: ...s that the related section includes safety warnings Specific points of attention are indicated inside the symbol General warning Warning of danger of electrical shock Warning of high temperature The symbol indicates that the related section includes information on prohibited actions Specifics of the prohibited action are indicated inside the symbol Warning of prohibited action Disassembly prohibit...

Страница 4: ...etc original 5 1 3 Making 2 sided copies from one sided originals 5 2 2 Copying two page originals onto separate sheets Page separation Split copy modes 5 4 1 Page separation Split copy from book originals 5 4 2 Page separation Split copy from 2 sided originals 5 4 3 Fitting the image of either two or four originals onto a single copy page Combine Merge Copy modes 5 6 1 2 in 1 5 6 2 4 in 1 5 6 4 A...

Страница 5: ...cessor as there is a danger that your fingers or other objects may become caught or pinched and this can result in injury Label 1 High voltage inside NEVER touch parts in this area because there is a danger of electric shock Label 2 High temperature inside Do not touch parts in this area because there is a danger of getting burned Label 5 DO NOT attempt to incinerate the toner bottle or the waste ...

Страница 6: ...S Environmment CAUTION Avoid placing the copier on or in locations which are unstable or not level Such locations may cause the copier to fall down or fall over This type of situation presents a danger of personal injury or damage to the copier Avoid locations with humidity or dust and dirt If dust or dirt become attached to the power plug clean the plug to avoid the danger of fire or electrical s...

Страница 7: ...place metallic objects or containers with water flower vases flower pots cups etc on or near the copier This of situation presents a danger of fire or electrical shock should they fall inside DO NOT remove any of the covers from the copier as there is a danger of electrical shock from high voltage parts inside the copier DO NOT damage break or attempt to repair the power cord DO NOT place heavy ob...

Страница 8: ...en or destroy the toner bottle or the waste toner box Other precautions After use ALWAYS dispose of the toner bottle and the waste toner box in accordance with Federal State and Local rules and regulations Store all consumables in a cool dark location If the copier will not be used for an extended period of time remove the paper from the cassette return it to its original package and reseal it PRE...

Страница 9: ...h guide release levers Pinch these levers and adjust the guide plate to fit the length of the paper that is to be loaded in that drawer cassette 0 Multi bypass tray Set copy paper on this tray when you want to copy onto small paper sizes or onto special types of paper Insert guides Align these guides to fit the width of the paper that is to be set on the multi bypass tray Multi bypass extension Pu...

Страница 10: ... to open the Document Processor Ejection extension Open this extension when using larger sized originals such as 8 1 2 x 14 11 x 17 B4 and A3 fi Total counter This counter displays the total number of copies made on the copier up to this point fl Fixing unit handle Operate this handle out if a paper misfeed occurs inside the copier Transfer unit handle Operate this handle out if a paper misfeed occu...

Страница 11: ...isfeed occurs inside the copier Copy eject tray Finished copies are ejected and stored on this tray ˇ Waste toner box Á Waste toner box cover Open this cover when replacing the waste toner box Handles for transport Pull these bars out two on both the left and right sides of the copier in order to use them as handles ...

Страница 12: ...pier key indicator lamp Press this key to light the lamp in that key when you want to use the copier functions of this machine Printer key indicator lamp Press this key when you want to use the optional printer functions of this machine The lamp in that key will light when the machine is in the printer operation mode The indicator to the left of the key will either light green or orange or will fl...

Страница 13: ...tion will automatically engage and the copier will return to the same settings as those after warm up initial mode settings However the copy exposure mode and the image quality mode will not change Copies can continually be made using the same settings copy mode number of copies and exposure mode if the next batch of copying is started before the auto clear function engages Automatic drawer casset...

Страница 14: ...ogram Function 11x81 2 81 2x11 11x81 2 11x81 2 11x81 2 APS Bypass Plain Plain Color Plain 11x81 2 11x81 2 11x81 2 3 6 5 9 7 8 2 1 4 0 Merge copy AMS Reduce Enlarge APS Image quality Reduce Enlarge Exposure mode Auto Exposure Ready to copy Set Paper Size Bypass Color Recycled Plain Plain Plain Sort Finished Sort Off Sort On Basic User choice Program Function APS Bypass Plain Plain Colour Plain 3 6 ...

Страница 15: ...copies without sorting them Sort ON key Touch this key when you want to make copies in the sort mode Sort Finish key Touch this key when you want to access the Sort Finish screen See page 5 9 Registration keys Touch the appropriate key when you want to access the corresponding function or mode Any function or mode in the Function tab can be registered to be displayed as one of the registration key...

Страница 16: ...xposure mode Image quality Sort Finished Ready to copy Select size orig Auto selection Large of originals Form overlay Up Down Set Paper size Register key Touch this key when you want to register the currently selected function or mode under a registration key Back key Touch this key when you want to return the settings for the currently selected mode back to their previous values Close key Touch ...

Страница 17: ...ge 6 10 respectively Among the special paper that can be use with this copier there is a wide range in paper quality and construction especially in those types of paper noted below For that reason there is a greater possibility of problems occurring during copying with these type of paper Whenever you do use such special paper as noted here it is recommended that you first make a test copy and ver...

Страница 18: ... the drawer cassette Folds etc can cause paper jams DO NOT load more paper than is indicated by the sticker located on the inside of the drawer cassette shown as 1 in the illustration When you are loading paper into the drawer cassette make sure that the side that was facing upward when you opened the package is still facing upward NOTE When you load paper into the drawer cassette the side facing ...

Страница 19: ...s Make sure that the paper is set securely against the paper length and width guide plates If there is a gap between the paper and any guide plate readjust the guide plates to fit the paper snugly 3 Loading paper into drawers cassettes No 2 and No 3 Up to 500 sheets of standard copy paper 75 g m2 80 g m2 or color paper can be loaded into drawers cassettes No 2 and No 3 Inch specifications Each dra...

Страница 20: ...to protect it against moisture 4 Setting paper on the multi bypass tray Up to 100 sheets of standard copy paper 75 g m2 80 g m2 of a size between 11 x 17 A3 and 5 1 2 x 8 1 2 A6R can be set on the multi bypass tray at one time When copying onto special paper be sure to use the multi bypass tray NOTE The types of special paper and the number of sheets that can be set on the multi bypass tray at one...

Страница 21: ...eading edge of the paper is curled at all straighten it out before setting it on the multi bypass tray If the paper is curled at all straighten it out before setting it on the multi bypass tray The amount of paper curl should be under 10 mm for standard copy paper and 5 mm for postcards Depending upon the paper quality paper might not be fed properly into the multi bypass tray Make sure there are ...

Страница 22: ...lose the right cover NOTE If you will not be using the copier for a prolonged period of time remove all paper from the Side Feeder and seal it in its original packaging in order to protect it against moisture 5 Loading paper into the Side Feeder an optional drawer cassette Up to 4000 sheets of 11 x 8 1 2 or A4 size standard copy paper 75 g m2 80 g m2 can be loaded into the optional Side Feeder 1 H...

Страница 23: ...folded portions before setting them in the Document Processor Failure to do so may cause originals to misfeed 2 2 2 2 2Originals that can be set in the Document Processor Sheet originals Paper weight One sided originals between 35 g m2 160 g m2 Two sided originals between 50 g m2 120 g m2 Size Max 11 x 17 or A3 Min 5 1 2 x 8 1 2 or A5R Number of sheets 100 sheets under 11 x 8 1 2 or A4 size 75 g m...

Страница 24: ...nal table and the original eject table to prevent them from falling off the Document Processor when it is opened 2 Set the original face down on the platen and align it with the appropriate original size indicator lines on the left side of the platen 3 Hold the Document Processor handle and close the Document Processor Leave the Document Processor open whenever you are using an original that is ov...

Страница 25: ... Adding toner key to have the procedure for adding toner displayed on the touch panel Inch specifications Adding toner Combine AMS Reduce Enlarge Orig image quality Reduce Enlarge Exposure mode Auto Exposure Ready to copy Set Paper Size Sort Finished Sort Off Sort On Basic User choice Program Function Add toner 11x8 1 2 APS Bypass Plain Plain Colour Plain 11x81 2 11x81 2 11x81 2 Metric specificati...

Страница 26: ...h the M on the main body of the copier 7 Wait until all of the toner is out of the bottle 8 Tap the sides of the bottle about 10 times or so in order to get all of the remaining toner out IMPORTANT DO NOT tap the top bottom of the bottle as there is a danger that toner might spill CAUTION DO NOT attempt to incinerate the toner bottle or the waste toner box Dangerous sparks may cause burns CAUTION ...

Страница 27: ...en lower left cover 2 Take out the waste toner box 3 Replace with a new waste toner box 4 Close cover Metric specifications Check waste toner box 1 Open lower left cover 2 Take out the waste toner box 3 Set a new waste toner box 4 Close cover 1 If the optional Document Finisher is installed on your copier open the front cover to the Document Finisher pull the release lever towards you and detach t...

Страница 28: ... in its original position and close the front cover to the Document Finisher 3 2 1 CAUTION DO NOT attempt to incinerate the toner bottle or the waste toner box Dangerous sparks may cause burns CAUTION DO NOT attempt to force open or destroy the toner bottle or the waste toner box After use ALWAYS dispose of the toner bottle and the waste toner box in accordance with Federal State and Local rules a...

Страница 29: ... 3 Selecting the desired functions Select from among the copier s various modes and functions Enlarging reducing the copy image Page 4 5 Interrupt copying Page 4 8 Making 2 sided copies from various types of originals Page 5 1 Copying each image of open faced books magazines etc or 2 sided originals onto separate sheets Page 5 4 Fitting the image of either two or four originals onto a single copy ...

Страница 30: ...right If you want to make the exposure lighter touch the left exposure adjustment key to move the arrow under the exposure scale to the left If you want the copy exposure to be adjusted automatically touch the Auto Exposure key until it is highlighted The contrast of the original will be detected and the most suitable exposure level selected automatically Ready to copy Set Paper Size Back Close Ex...

Страница 31: ...de to copy original mixed text photo Photo Add a dimensional effect of photo Text Copy pencil fine line clearly Image quality orig Ready to copy Inch specifications Metric specifications 7 Setting the number of copies to be made Use the keypad to change the number of copies to be made that is displayed on the touch panel to the actual number that you want to make Up to 999 copies can be made at on...

Страница 32: ...to 250 copies can be stored on the copy eject tray 9 CAUTION If the copier will not be used for a short period of time overnight etc turn the main switch OFF O If it will not be used for an extended period of time vacations etc remove the power plug from the outlet for safety purposes during the time the copier is not in use ...

Страница 33: ...ure mode Auto Exposure Ready to copy Set Paper Size Sort Finished Sort Off Sort On Basic User choice Program Function Inch specifications Metric specifications 2 Select the size of paper that you want to copy onto by touching the appropriate paper size key Touch the AMS key The corresponding magnification ratio will be displayed 3 Press the Start key to begin the copying procedure Inch specificati...

Страница 34: ... 100 100 400 200 154 129 121 78 77 64 50 25 51 2x81 2 11x17 81 2x11 11x17 51 2x81 2 81 2x14 11x81 2 81 2x14 11x17 11x17 81 2x11 11x17 81 2x14 11x17 51 2x81 2 81 2x14 81 2x11 Inch specifications Metric specifications APS Bypass Plain Plain Color Plain 11x81 2 11x81 2 11x81 2 AMS Reduce Enlarge Exposure mode Auto Exposure Ready to copy Set Paper Size Sort Finished Sort Off Sort On Basic User choice ...

Страница 35: ...ing the key or the key as appropriate 4 Press the Start key to begin the copying procedure Reduce Enlarge Standard Zoom Ready to copy Back Register XY zoom Close Keys AMS Set Paper size 100 25 400 100 100 400 200 154 129 121 78 77 64 50 25 51 2x81 2 11x17 81 2x11 11x17 51 2x81 2 81 2x14 11x81 2 81 2x14 11x17 11x17 81 2x11 11x17 81 2x14 11x17 51 2x81 2 81 2x14 81 2x11 Reduce Enlarge Standard Zoom R...

Страница 36: ...ore 1 Press the Interrupt key to light the lamp in the Interrupt key Interrupt mode OK will be displayed 2 Remove the originals that were currently being copied and put them aside 3 Set the new originals and perform the desired copy procedure A 3 2 1 A 3 2 1 4 When copying is completed press the Interrupt key once again and replace the newly copied originals with the ones removed before Then press...

Страница 37: ...s 2 sided copies can be made from a variety of originals including open faced books etc or 2 sided originals 1 Making 2 sided copies from a 2 sided original With this mode a 2 sided original is copied and the front and back sides of the copy paper are used so that the copy looks just like the original IMPORTANT Inch specifications Only paper sizes between 11 x 17 and 5 1 2 x 8 1 2 can be used in t...

Страница 38: ...klet Sort Finished Border Erase Exposure mode Orig image quality Ready to copy Select orig size Auto Selection Batch scanning Up Down Set Paper size 11x81 2 Metric specifications Select paper 2 sided Split Merge copy Reduce Enlarge Margin Imag shift Page numbering Function Basic User choice Program Cover Mode Booklet Erase Mode Exposure mode Image quality Sort Finished Ready to copy Select size or...

Страница 39: ...ck direction Set book original top side direction to back Set Paper size Finished Back Edge Left top Corner Check direction Check direction of original Register Left Right binding Top binding Back Close Set Paper size Register Finished BookR Book BookR Duplex Back Close Check direction Set book original top side direction to back Set Paper size Finished to copy Register Original Left Right binding...

Страница 40: ...2 sided original are each copied onto a separate sheet of paper 1 Set the originals to be copied 2 Touch the Function tab The content of the Function tab will be displayed 3 Touch the 2 sided Separation 2 sided Split key The 2 sided Separation 2 sided Split screen will be displayed Inch specifications 2 sided Separation Select paper Combine Reduce Enlarge Margin Centering Forms Overlay Page Functi...

Страница 41: ...riginals Metric specifications for 1 sided or 2 sided originals for open faced originals 7 Press the Start key Scanning of the originals will start If you set the originals in the Document Processor copying will start automatically If you set an original on the platen a message will appear telling you to set the next original In this case go to the next step 8 Replace the first original with the n...

Страница 42: ... mode when you want to copy two originals onto one sheet This mode can also be used in conjunction with the 2 sided copy modes in order to copy four originals onto one sheet When setting the originals on the platen be sure to set the originals in the correct order 1 and then 2 2 4 in 1 Use this mode when you want to copy four originals onto one sheet This mode can also be used in conjunction with ...

Страница 43: ...g size Auto Selection Batch scanning Up Down Set Paper size 11x81 2 Metric specifications Select paper 2 sided Split Merge copy Reduce Enlarge Margin Imag shift Page numbering Function Basic User choice Program Cover Mode Booklet Erase Mode Exposure mode Image quality Sort Finished Ready to copy Select size orig Auto selection Large of originals Form overlay Up Down Set Paper size 4 Touch the 2 in...

Страница 44: ...tart automatically If you set an original on the platen a message will appear telling you to set the next original In this case go to the next step 8 Replace the first original with the next one and press the Start key Scanning of that next original will start 9 Once you have finished scanning all of the originals touch the Scanning finished key Copying will start ...

Страница 45: ...r Combine Reduce Enlarge Margin Centering Forms Overlay Page Function Basic User choice Program Cover Mode Booklet Sort Finished Border Erase Exposure mode Orig image quality Ready to copy Select orig size Auto Selection Batch scanning Up Down Set Paper size 11x81 2 Metric specifications Select paper 2 sided Split Merge copy Reduce Enlarge Margin Imag shift Page numbering Function Basic User choic...

Страница 46: ...Section 5 OTHER CONVENIENT FUNCTIONS 5 10 ...

Страница 47: ...n copiers Sets the size of paper that is loaded in drawers cassettes No 2 and No 3 If you want the size to be detected automatically select Auto Detection Automatic size detection If you want to manually set the size of paper select Standard sizes If you select Auto Detection You can also select the desired unit of measurement Inch or Centimeter If you select Standard sizes You can then select the...

Страница 48: ...y time Time difference Description Sets the current date and time Sets a designated time difference Available settings Year 2000 2099 Month 1 12 Day 1 31 Time 00 00 23 59 12 00 12 00 Factory setting Year 00 Month 01 Day 01 Time 00 00 00 00 Reference page 6 5 6 6 ...

Страница 49: ...enter the 4 digit management code The factory default setting is 6300 Inch specifications Enter the administrator number Close Metric specifications Enter the administrator number Close 4 If the entered code matched the registered one the Machine default screen will be displayed Inch specifications Default setting Machine default Auto drawer switching Paper size 2nd drawer Paper size 3rd drawer Pa...

Страница 50: ...specifications Default setting Machine default Auto cassette switching Paper size 2nd cassette Paper size 3rd cassette Paper type 1st cassette Paper type 2nd cassette On All types of paper A4 A4 Plain Plain Up Down Change Close Default setting Default menu Setting mode 3 Perform the step that corresponds to the specification of your copier Inch specification copiers If you select Auto Detecton aut...

Страница 51: ...10 01 14 02 GMT 08 00 Default menu Down Change Setting mode Up Metric specifications Default setting Machine default Auto preheat time Key sound ON OFF Silent mode Date Time Time difference 15Minute On Off 25 10 01 14 02 GMT 00 00 Up Down Change Close Default setting Default menu Setting mode 3 Touch the key or the key to change the displayed information for each field Year Month Day and Time to t...

Страница 52: ...at time Key sound ON OFF Silent mode Date Time Time difference 15 Minute On Off 30 10 01 14 02 GMT 08 00 Default menu Down Change Setting mode Up Metric specifications Default setting Machine default Auto preheat time Key sound ON OFF Silent mode Date Time Time difference 15Minute On Off 25 10 01 14 02 GMT 00 00 Up Down Change Close Default setting Default menu Setting mode 3 Touch the key or the ...

Страница 53: ...ilable in this copier Change any or all of the settings as desired in order to make the most effective use of your copier Default setting Sort mode Description Determines whether or not the Sort mode will be the default setting in the initial mode Available settings Sort On Sort Off Factory setting Sort On Reference page 6 9 ...

Страница 54: ...rt 3 Use the keypad to enter the 4 digit management code The factory default setting is 6300 Inch specifications Enter the administrator number Close Metric specifications Enter the administrator number Close 4 If the entered code matched the registered one the Copy default screen will be displayed Inch specifications Default setting Copy default Default setting Exposure mode Exposure steps Origin...

Страница 55: ...tting Sort Auto Rotation Default margin width Default erase width Preset limit Sort On Rotate Left 1 4 0 Border 1 4 Center 1 4 999Set Default menu Down Setting mode Up Close Metric specifications Default setting Copy default Sort Auto Rotation Default margin width Default erase width Preset limit Sort On Rotate Left 6mm 0mm Border 6mm Center 6mm 999 Set Up Down Change Close Default setting Default...

Страница 56: ...4 Touch the key or the key to change each of the displayed sizes length and width to the desired settings In metric specification copiers the desired sizes can also be entered directly by touching the corresponding keys key and then using the keypad Inch specifications Paper size 37 8 115 8 57 8 17 Input size Auto Detection Others Standard 297x432mm keys keys 1111 16 169 16 Y X Bypass setting Pape...

Страница 57: ...nch Others Standard Default setting A4 Back Close Metric specifications Bypass setting Paper size Unit Paper type Plain Select paper type Auto Detection Input size Centimeter Inch Others Standard Default setting Back Close 4 Touch the Select size key The Select size screen will be displayed Inch specifications EX Plain Select size ISO B5 Bypass setting Paper size Paper type Select paper type Auto ...

Страница 58: ...or Prepunched Letterhead Envelope Default setting Select paper type Back Close Custom 2 Custom 1 Custom 3 Custom 4 Custom 6 Custom 5 Custom 7 Custom 8 Envelope Metric specifications Plain Transp arency Rough Vellum Labels Recycled Preprinted Bond Cardstock Colour Prepunched Letterhead Envelope Default setting Select paper type Back Close Custom 2 Custom 1 Custom 3 Custom 4 Custom 6 Custom 5 Custom...

Страница 59: ...played during the procedure In this case select another paper size 1 With the content of the Basic tab displayed press the key The Default setting screen will be displayed 2 Touch the Print report key Inch specifications Default setting Default setting Copy default Weekly timer Machine default Language Management End BOX Management Bypass setting Document Management Print report Metric specificati...

Страница 60: ... 11x81 2 Output tray Printing report Output Cancel Metric specifications Original Count set 1 sided Sort Output tray AMS Printing report Output Cancel Plain 1 sided top rear NOTE If you want to cancel print out of the corresponding report touch the Cancel key 6 Touch the Close key The touch panel will return to the screen in step 2 7 Touch the End key The touch panel will return to the contents of...

Страница 61: ...d 2 Touch the Language key The Language screen will be displayed Inch specifications Default setting Default setting Copy default Weekly timer Machine default Language Management End BOX Management Bypass setting Document Management Print report Metric specifications Default setting Default setting Copy default Machine default Language Bypass setting Management Week timer End Hard Disk Management ...

Страница 62: ...Section 6 COPIER MANAGEMENT FUNCTIONS 6 16 ...

Страница 63: ...he Document Processor One of the drawers cassettes is not closed properly First pull it out and then push it all the way back in Attach the optional Side Feeder securely to the copier Connect the optional Document Finisher securely to the copier There is no more paper in the displayed drawer cassette Load paper If there is another drawer cassette that contains the same size of paper in the same or...

Страница 64: ...the Start key without changing the original copying will be performed at a 100 1 1 magnification ratio Load paper of the size selected or change the selection for the paper size The orientation of the original and the selected paper are different Change the orientation of the original Remove the originals from the Document Processor stack them together cleanly and reset them in their current order...

Страница 65: ... print outs in the copy eject tray has exceeded the acceptable limit Remove the print outs from the copy eject tray and then touch the Continue key The number of copies in the designated tray of the optional Document Finisher has exceeded the acceptable limit Remove the copies from that tray and then press the Start key When using the copier as a printer the number of print outs in the designated ...

Страница 66: ...d dispose of the hole punch chad There are no staples left in the optional Document Finisher Refer to the Operation Guide for your Document Finisher and load staples Periodic maintenance is required to keep your copier in good condition Contact your service representative or authorized service center as soon as possible It is time to replace certain parts in your copier Contact your service repres...

Страница 67: ...her drawer cassette The optional Side Feeder is out of order and cannot be used for the moment Contact your service representative or an authorized service center as soon as possible If you want to continue copying use another drawer cassette The multi bypass tray is out of order and cannot be used for the moment Contact your service representative or an authorized service center as soon as possib...

Страница 68: ...the left of the Copier key the Printer key or the Scanner key either lights orange or flashes orange carry out the appropriate procedure indicated below Indication Lights orange or flashes orange Procedure Check the appropriate response to the message and perform the corresponding procedure Reference page ...

Страница 69: ...a paper misfeed occurs copying will stop and a message will appear on the touch panel about the misfeed Leave the main switch ON and refer to 3 Removal procedures to remove the jammed paper Inch specification Metric specification 2 Misfeed location indicators Paper misfeed 1 Open front cover JAM 00 WARNING High voltage is present in the charger section Take sufficient care when working in this are...

Страница 70: ...t cover and remove paper 2 Open paper cassette 1 3 Remove paper 4 Set the cassette and close the cover JAM 00 1 If the optional Side Feeder is installed in the copier disconnect it from the main body of the copier 2 First open the upper right cover to the copier and check if there is any jammed paper If there is any jammed paper inside that cover remove it 3 Pull out drawer cassette No 1 4 Remove ...

Страница 71: ...move paper 2 Open paper cassette 3 3 Remove paper 4 Set the cassette and close the cover JAM 00 1 If the optional Side Feeder is installed in the copier disconnect it from the main body of the copier 2 First open the lower right cover to the copier and check if there is any jammed paper If there is any jammed paper inside that cover remove it 3 Pull out the drawer cassette currently being used 4 R...

Страница 72: ...right cover to the copier 3 Remove any jammed paper without tearing it If the paper does happen to tear remove any loose scraps from inside the copier 4 Close the upper right cover to the copier 5 If necessary reconnect the Side Feeder to the copier Misfeed inside the lower right cover of the copier If the message below is displayed a misfeed has occurred inside the lower right cover of the copier...

Страница 73: ...ow is displayed a misfeed has occurred in multi bypass tray Perform the following procedure to remove the jammed paper Inch specification Paper misfeed 1 Remove paper from Multi purpose tray JAM 00 Metric specification Paper misfeed 1 Remove paper from multi purpose tray JAM 00 1 Remove all of the paper remaining in the multi bypass tray If the paper is difficult to remove do not attempt to force ...

Страница 74: ...nframe JAM 00 Metric specification Paper misfeed 1 Remove paper from between copier and side feeder 2 Reset side feeder to mainframe JAM 00 1 Disconnect the Side Feeder from the main body of the copier 2 If there is any jammed paper inside the coupling area between the Side Feeder and the copier remove it 3 Reconnect the Side Feeder to the copier If there is any jammed paper inside the Side Feeder...

Страница 75: ...owing procedure to remove the jammed paper When a misfeed has occurred in the paper conveyor section the following message will appear after you open the front cover in step 1 Inch specification Paper misfeed 1 Turn green lever counterclockwise 2 Turn right green knob clockwise 3 Pull out transfer unit JAM 00 Metric specification Paper misfeed 1 Turn green lever to the left 2 Turn right green knob...

Страница 76: ...over 2 Remove paper If it is difficult to remove paper open front cover and turn left green knob counterclockwise 3 Close cover JAM 00 1 Remove the copy eject tray If the optional Document Finisher is installed on your copier open the front cover to the Document Finisher pull the release lever towards you and detach the Document Finisher from the copier 2 Open the left cover to the copier and remo...

Страница 77: ...irection of the arrow shown in the illustration The paper will be transported to the paper conveyor unit 7 Pull the paper conveyor unit out slowly Remove any jammed paper 8 Open the cover to the fixing unit WARNING High voltage is present in the charger section Take sufficient care when working in this area as there is a danger of electrical shock CAUTION The copier s fixing unit is extremely hot ...

Страница 78: ...er back into in its original position and close the front cover to the Document Finisher 9 Remove any jammed paper without tearing it If the paper does happen to tear remove any loose scraps from inside the copier 10 Close the cover to the fixing unit 11 Replace the paper conveyor unit in its original position in the copier 12 Push the green release lever back up to its original position 3 2 1 ...

Страница 79: ...t 2 Open upper cover and remove paper 3 Loosen 2 green screws are on rear side of the duplex unit and open the guide plate 4 Remove paper 5 Close cover and reset duplex unit JAM 00 Metric specification Paper misfeed 1 Remove paper from duplex unit 2 Open upper cover and remove paper 3 Remove 2 green screws on rear side of the duplex unit and open the guide plate 4 Remove paper 5 Close cover and re...

Страница 80: ...inisher to the copier Then push the release lever back into in its original position and close the front cover to the Document Finisher 8 Open the upper cover to the Duplex Unit and remove any jammed paper without tearing it Close the upper cover and then proceed to the next step 9 Undo the 2 green screws on the bottom of the Duplex Unit 10 Lower the Duplex Unit guide plate open and remove any jam...

Страница 81: ...g in the original table 2 Open the Document Processor cover 3 If there is an original there remove the jammed original without tearing it If the original does happen to tear remove any loose scraps from inside the Document Processor Loose scraps of paper may cause other originals to misfeed 4 Lift open the reversing unit 5 If there is an original there remove the jammed original without tearing it...

Страница 82: ...TROUBLESHOOTING 7 20 6 6 6 6 6Misfeed in the optional Document Finisher If a misfeed occurs in the Document Finisher refer to the Operation Guide for your Document Finisher and remove the jammed paper accordingly ...

Страница 83: ... the copy paper wet Is the copier in the auto exposure mode Is the copier in the manual exposure mode Procedure Connect the plug to an AC outlet Check the appropriate response to that message and perform the corresponding procedure When setting originals on the platen set them face down When setting originals in the Document Processor set them face up In order to adjust the overall exposure level ...

Страница 84: ...r wrinkled Is there any jammed paper or loose scraps of paper remaining inside the copier Procedure Perform the cleaning operation on the slit glass or make the lines less apparent by turning black line correction ON Clean the platen and or the Document Processor When setting originals on the platen align them securely with appropriate original size indicators When setting originals in the Documen...

Страница 85: ...ampened with alcohol or mild detergent Never use thinner or other organic solvents to clean the original cover Cleaning the platen Lift open the Document Processor Wipe the platen with a soft cloth dampened with alcohol or mild detergent Never use thinner or other organic solvents to clean the platen If copies appear soiled such as black lines appearing on the copy image while using the Document P...

Страница 86: ... one 3000 sheet capacity drawer cassette 80 g m2 or from the multi bypass tray 100 sheet capacity 80 g m2 Acceptable copy paper Paper weights Drawers Cassettes 60 g m2 80 g m2 Duplex Unit 64 g m2 105 g m2 Multi bypass tray 45 g m2 200 g m2 110 lbs Paper types Drawers Cassettes Standard copy paper and color paper Duplex Unit Standard copy paper and color paper Multi bypass tray Standard copy paper ...

Страница 87: ...120V 2400 W 220 240V Dimensions W x D x H 26 15 16 x 31 5 16 x 46 3 4 685 mm x 795 mm x 1 186 mm Weight Approx 440 lbs Approx 200 kg Noise emission 70 dB A Required space W x D 58 1 2 x 31 5 16 1 485 mm x 795 mm Optional equipment Side Feeder Document Finisher Key Counter Printer Kit Network Scanner Kit and Tandem Copier Kit Specifications are subject to change without notice ...

Страница 88: ...ion can leak from the machine This machine is classified as Class 1 laser product under IEC 60825 CAUTION Performance of procedures other than those specified in this manual may result in hazardous radiation exposure This label is attached to the laser scanner unit inside the machine and is not in a user access area The labels shown below are attached on the rear side of the machine Laser Safety C...

Страница 89: ......

Страница 90: ...ONFORMITY TO 89 336 EEC 73 23 EEC and 93 68 EEC We declare under our sole responsibility that the product to which this declaration relates is in conformity with the following specifications Limits and methods of measurement for immunity characteristics of information technology equipment EN55024 Limits and methods of measurement for radio interference characteristics of information technology equ...

Отзывы: