background image

5-43

Using Convenient Fax Functions > Using a Connected Telephone

Preparation:

Select [

Auto (FAX/TEL)

].

1

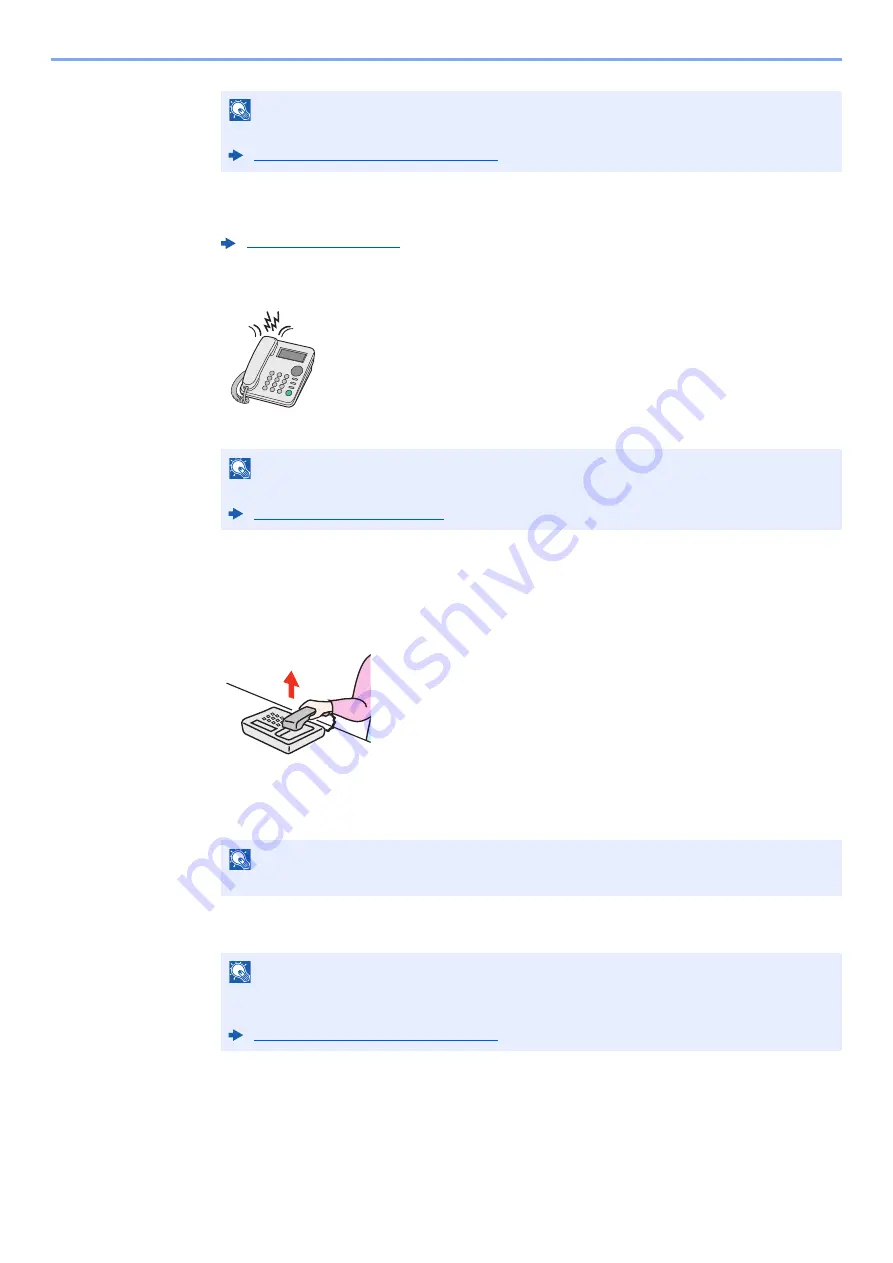
The telephone rings.

The connected telephone set makes a ringing tone.

2

Answer the call.

When the call is from a telephone

1

The machine makes a ringing tone urging the user to respond. Lift the handset of the 
telephone within 30 seconds.

2

Talk to the other party.

When the call is from a fax

The machine starts receiving fax originals.

NOTE

At the end of the conversation, you can also receive faxes by using the Remote Switch Function.

Remote Switch Function (page 5-50)

RX Setting (page 8-12)

NOTE

You can change the number of times the ringing tone rings.

Rings(FAX/TEL) (page 8-12)

NOTE

If you do not lift the handset within 30 seconds, the machine switches to fax reception.

NOTE

At the end of the conversation, you can also receive faxes by using the Remote Switch 
Function.

Remote Switch Function (page 5-50)

Содержание System 12

Страница 1: ...Code 590435en FAX System 12 FAX OPERATION GUIDE...

Страница 2: ...ecording or by any information storage and retrieval system without permission in writing from the Publisher CE Marking Declaration of Conformity for users of the European Union EU This product compli...

Страница 3: ...g the Quick No Search Key 2 11 Quick Setup Wizard 2 12 Fax setup items 2 12 Power Off setup items 2 13 Fax and Power Off setup procedure 2 14 Setting Date and Time 2 15 Registering Destinations in the...

Страница 4: ...yed Transmission 3 27 Changing Deleting Delayed Transmission 3 27 Cancelling Delayed Transmissions Queued 3 28 Immediate transmission 3 28 Continuous Scan 3 28 Job Finish Notice 3 28 File Name Entry 3...

Страница 5: ...cation 5 17 Registering a FAX Box 5 18 Changing FAX Box 5 20 Deleting FAX Box 5 20 Printing Originals from a FAX Box 5 22 Checking Details 5 23 Previewing Images 5 23 Deleting Originals after Printing...

Страница 6: ...r Job Canceled before Sending 7 8 Recipient Format 7 8 FAX RX Result Reports 7 9 Activity Report Outgoing FAX Report and Incoming FAX Report 7 10 Printing Activity Reports 7 10 Automatic Printout 7 10...

Страница 7: ...king the Send Status 10 12 i FAX Reception 10 13 11 Troubleshooting 11 1 Indicators During Sending Receiving Operation 11 2 Responding to an Attention Indicator Flashes 11 2 Precautions When Turning P...

Страница 8: ...received faxes in boxes in the memory forwarding received faxes and polling communication a function that allows the receiving party to call and initiate fax reception 6 Sending Faxes from PC Explain...

Страница 9: ...t page to the previously displayed page This is convenient when you want to return to the page from which you jumped to the current page Click an item in the Table of Contents to jump to the correspon...

Страница 10: ...stem Menu Counter key Common Settings Sound Select Next of Job Accounting Settings Select Change of Job Accounting Job Accounting Settings Next Job Accounting Change User Login Job Accounting Next Use...

Страница 11: ...are used to indicate original and paper placement orientations on the touch panel Orientation Setting Position X Length Y Width Icons on the touch panel Indicated size in this Guide 1 1 Original pape...

Страница 12: ...Safety Conventions in This Guide 1 2 About this Operation Guide 1 3 Legal Notice 1 3 FCC PART 68 REQUIREMENTS 1 3 IMPORTANT SAFETY INSTRUCTIONS 1 4 IMPORTANTES MESURES DE SECURITE 1 4 CANADIAN IC REQU...

Страница 13: ...oints of attention are indicated inside the symbol General warning Warning of high temperature The symbol indicates that the related section includes information on prohibited actions Specifics of the...

Страница 14: ...ular jack that is also compliant See installation instructions for details 4 The REN is used to determine the number of devices that may be connected to a telephone line Excessive RENs on a telephone...

Страница 15: ...e followed to reduce the risk of fire electric shock and injury to persons including the following CAUTION To reduce the risk of fire use only No 26 AWG or larger UL listed or CSA certified telecommun...

Страница 16: ...ne interface The termination on an interface may consist of any combination of devices subject only to the requirement that the sum of the RENs of all the devices not exceed five The REN CANADA of thi...

Страница 17: ...are trademarks of Adobe Systems Incorporated IBM and IBM PC AT are trademarks of International Business Machines Corporation TBR21 DE 05R00 National AN for D AN 01R00 AN for P DE 08R00 National AN fo...

Страница 18: ...l and Safety Information Notice All other company and product names in this Operation Guide are trademarks or registered trademarks of their respective companies The designations and are omitted in th...

Страница 19: ...Fax setup items 2 12 Power Off setup items 2 13 Fax and Power Off setup procedure 2 14 Setting Date and Time 2 15 Registering Destinations in the Address Book 2 16 Adding a Destination Address Book 2...

Страница 20: ...ch panel lights to enable operation 3 MP Multipurpose tray Set the paper in this tray when using a type of paper other than the cassette e g when using special paper 4 LINE connector L2 If you install...

Страница 21: ...l jammed in the Document Processor 8 Opening handle Hold this handle when opening or closing the Document Processor 9 Original eject table Read originals are ejected onto this table 10 Original table...

Страница 22: ...Blinks while the machine is printing or sending receiving or accessing the hard disk SSD Also it lights when there is a sending job FAX using delayed transmission 4 Attention indicator Lights or blink...

Страница 23: ...6 Reset key Returns settings to their default states 7 Numeric Keypad key Displays numeric keys on the touch panel 8 Interrupt key Displays the Interrupt Copy screen 9 System Menu Counter key Displays...

Страница 24: ...page 3 Screen switching keys Use these buttons to switch between desktop pages NOTE You can also switch views by touching the screen and moving the finger sideways i e swiping 4 Taskbar Displays task...

Страница 25: ...DO RQWLQXRXV 6FDQ 2II VLGHG RRN 2ULJLQDO VLGHG I B 1 Displays the status of the equipment as well as necessary operation messages 2 Shows an image of the document to be sent 3 Original Shows the origi...

Страница 26: ...the Stop key or select Cancel The preview image disappears and the destination is cancelled To see the preview again make the transmission function changes and select the destination 6WDWXV 3UHVV 6WDU...

Страница 27: ...ment processor place the originals in the document processor again A document stored in a polling box for polling transmission can be previewed in the same way Polling Communication page 5 29 You cann...

Страница 28: ...he Enter Key page 2 11 6WDWXV DEFG HIJ FRP GGUHVV RRN QWU 1R KHFN HVWLQDWLRQV HVWLQDWLRQ 3DXVH DFNVSDFH 6SDFH HWDLO HOHWH HVW LVWRU KDLQ LUHFW 2Q RRN 2UJ 6HQGLQJ DWD RUPDW 4XLFN 6HWXS HVWLQDWLRQ PDJH...

Страница 29: ...Choosing from the Speed Dial page 3 11 NOTE Moving your finger while touching the top of the numeric keypad enables you to freely move to any key Drag operation Status Address Book Cancel OK Group E...

Страница 30: ...8 10 Local FAX ID Enter the local fax ID The local fax ID can limit other parties with which you can communicate Enter the four digit local FAX ID number 8 10 TTI Select whether or not to print the l...

Страница 31: ...the sizeis larger than the current paper size 8 11 6 Redial Retry Times Set the number of redials 8 9 1 Inch version only 2 This is displayed when the option of two fax kits has been installed 3 DRD...

Страница 32: ...select finish NOTE If the user authentication screen appears enter your login user name and login password and select Login The factory default login user name and login password are set as shown belo...

Страница 33: ...administrator privileges or as a user with privileges to configure this setting The factory default login user name and login password are set as shown below Item Description Time Zone Set the time di...

Страница 34: ...t 2 Add the name 1 Select Address Number Change 2 Use or the numeric keys to enter an address number 1 to 2500 To have the number assigned automatically enter 0000 3 Select OK The screen shown in step...

Страница 35: ...characters Character Entry Method page 12 2 NOTE Up to 32 digits can be entered Use the numeric keys to enter a number Key Description Pause Selecting this key adds about three seconds of waiting time...

Страница 36: ...et when using encrypted transmission to send the data Using the Encrypted Transmission page 5 40 TX Start Speed This is set to change the transmission start speed Select the speed from 33 600 bps 14 4...

Страница 37: ...e Change 5 Enter the destination name to be displayed on the Address Book and select OK The screen shown in step 1 reappears 3 Enter the destination i FAX address Email address 1 Select i FAX 2 Select...

Страница 38: ...Simple mode Transmission confirmation is not sent to the destination machine Full mode Transmission confirmation is sent to the destination machine Item Description Resolution Specify the resolutions...

Страница 39: ...ayed on the Address Book OK The Add Group screen reappears NOTE Refer to the following for registering the One Touch Key Adding a Destination on One Touch Key page 2 25 NOTE To add a group you need in...

Страница 40: ...epeat Steps 2 4 Check if the selected destination was added to the group Save The group is added to the Address Book To register the registered address in a one touch key select Save Yes NOTE Destinat...

Страница 41: ...ion type and address 2 Save Yes Register the changed destination Add a destination to a group 1 Change Name and Address Number 2 Member Add 3 After you have completed the changes Save Yes Register the...

Страница 42: ...lete Yes Delete the contact or group Printing Address List You can print the list of destinations registered in the Address Book You can sort the list in the order of index or address numbers of the d...

Страница 43: ...name displayed in the send base screen Next 4 Select Destination Change The Address Book appears NOTE Refer to the following for use of One Touch Key Choosing from the One Touch Key page 3 11 You can...

Страница 44: ...2 Select a new destination contact or group Selecting Detail shows the detailed information of the selected destination 3 OK OK Save Yes Add the destination to the One Touch Key Deleting the Destinat...

Страница 45: ...can print the list of destinations registered in the One Touch Key List You can select the list for all addresses or only fax addresses of the destinations 1 Display the screen System Menu Counter ke...

Страница 46: ...Setup screens Default Registration Functions Available for Registration 1 Original Size 2 FAX TX Resolution 3 Density 4 2 sided Book Original 1 5 Continuous Scan 6 Original Image 1 This is Book origin...

Страница 47: ...WFXW 6KRUWFXW 6KRUWFXW 6KRUWFXW 2UJ 6HQGLQJ DWD RUPDW 4XLFN 6HWXS HVWLQDWLRQ PDJH 4XDOLW GYDQFHG 6HWXS 3URJUDP 2ULJLQDO 6L H 7 5HVROXWLRQ GSL 1RUPDO 3UHYLHZ 3UHYLHZ 2ULJLQDO RRP 6HQGLQJ PDJH 6HQG 2ULJ...

Страница 48: ...register 2 Register the shortcuts 1 Select the setting you want to add 2 Select Add Shortcut 3 Select the keys corresponding to the shortcut number 1 to 6 to register 4 Enter the shortcut name Save Th...

Страница 49: ...the shortcut 1 Select Edit 2 Select the shortcut key you want to edit 3 Select Shortcut No Change or Shortcut Name Change Change the settings OK 4 Save Yes Deleting Shortcuts 1 In the setup screen of...

Страница 50: ...gout 3 17 Logging in when User Login Administration has been Enabled 3 17 Logging in when Job Accounting has been Enabled 3 18 Fax transmission functions 3 19 Original Size 3 21 Mixed Size Originals 3...

Страница 51: ...selected by default Direct transmission The destination is dialed and communication starts before the original is scanned Select Direct to change the transmission method to direct transmission The ke...

Страница 52: ...iving system select Recall and you can call the receiving system you dialed on the destination list 1 Select Recall 2 Press the Start key The transmission will start NOTE When continuous scan is set y...

Страница 53: ...Yes The selected fax job is sent by priority override and other fax jobs are moved down in the transmission queue If a broadcast transmission job is in progress If a fax job to multiple destinations...

Страница 54: ...ake them out from the original table Cancelling Memory Transmission during communication 1 Select the Status Job Cancel key 2 Canceling Transmission 1 Select Sending Jobs 2 Select the transmission job...

Страница 55: ...o the following To cancel polling transmission refer to the following NOTE Even if transmission is canceled there is a possibility that pages scanned prior to cancelation were sent to the receiving pa...

Страница 56: ...seconds of waiting time during dialing For example when dialing the receiving system on an external line you can use this method to insert a pause before resuming dialing after you dial a specific nu...

Страница 57: ...occurs Fax machines that have ECM mode check for errors as they communicate preventing distortion of the image due to noise on the line and other conditions Encrypted Transmission This is set when us...

Страница 58: ...k Ext Address Book You can change the order in which the destinations are listed by selecting Name or No from the Sort NOTE For more information about how to register destinations in the Address Book...

Страница 59: ...FAX or Group i FAX Only when the optional Internet FAX Kit is activated You can set this function up so that destination types are selected when the address book is displayed For details refer to the...

Страница 60: ...panel select or to scroll and view next or previous One Touch Keys This procedure assumes that One Touch Keys have already been registered For more information on adding One Touch keys refer to the f...

Страница 61: ...istory 2 Select the destinations Select an address from the list displayed Select of Job Type to display only selected type of jobs Select Detail to display the detailed information of the destination...

Страница 62: ...s can be edited if they have been specified Select a destination and select Delete to remove the destination from the list Methods For Entering the Destination page 3 7 NOTE When selecting On for Entr...

Страница 63: ...TE When using a group for the destination you can send originals to up to 500 destinations in one operation You can use this function together with sub address communication and delayed transmission W...

Страница 64: ...continue entering a new address select i FAX Address Entry and repeat the above procedure 4 When all destinations have been entered select OK Select the destination from the Address Book 1 Select Addr...

Страница 65: ...t the destination from the One Touch Key 1 Select One Touch Key 2 Select all destinations and select OK 3 After selecting all the destinations press the Start key NOTE For details of One Touch Key ref...

Страница 66: ...d during operations select a user and log in Character Entry Method page 12 2 NOTE When Keys is selected it is possible to enter numbers using the numeric keys If Network Authentication is selected as...

Страница 67: ...n user name and password appears Enter a login user name and password to login If the user has already registered the account information the account ID entry would be skipped 2 Proceed to complete th...

Страница 68: ...inal 3 22 Original Orientation Select the orientation of the original document top edge to scan correct direction 3 22 Sending Size Select size of image to be sent 3 23 Long Original Reads long sized...

Страница 69: ...a large number of originals in separate batches and then produce as one job 3 28 Job Finish Notice Sends E mail notice when a job is complete 3 28 File Name Entry Adds a file name 3 29 FAX Direct Tra...

Страница 70: ...s except Standard Sizes 1 Others Hagaki Cardstock Oufuku hagaki Return postcard Custom 1 to 4 1 1 For instructions on how to specify the custom original size refer to the following Machine s Operation...

Страница 71: ...1 sided 2 sided Book Original is not set 2 sided 1 1 2 sided is displayed if the optional document processor is installed Binding Binding Left Right Binding Top Select the binding orientation of origi...

Страница 72: ...ame as Original Size or Standard Size Standard Sizes 2 Metric models Ledger Letter Legal Statement 11 15 Oficio II 8K 16K Inch models A3 A4 A5 A6 B4 B5 B6 Folio 8K 16K 216 340 mm Select from standard...

Страница 73: ...ely as possible Typical character size 6 point example Resolution Resolution 400x400dpi Ultra Fine when sending originals with minute characters and lines more finely Typical character size 6 point ex...

Страница 74: ...der Metric 0 mm to 50 mm in 1 mm increments Inch 0 00 to 2 00 in 0 01 increments Set the border erase width 1 Set the value by selecting or Select Keys to use the numeric keys for entry Gutter Back Pa...

Страница 75: ...ons have been set in reverse order however sending of originals to be sent to the same destination is prioritized over the ones to be sent to different destinations You can cancel a delayed transmissi...

Страница 76: ...number using the numeric keys When selecting Address Book Select the destination you want to change in the list OK When entering the fax number using the numeric keys Enter the fax number using the n...

Страница 77: ...us Scan Scans a large number of originals in separate batches and then produce as one job Originals will be scanned continuously until you select Finish Scan You can set the functions that appear on t...

Страница 78: ...Transmission During direct transmission to cancel communication during transmission select the Stop key or Cancel The originals that have been scanned are ejected and the screen returns to the send de...

Страница 79: ...escription Off Does not store a copy of the document being sent in a Custom Box On Store a copy of the document being sent in a Custom Box NOTE When On is selected select the Custom Box in which the c...

Страница 80: ...On Hook 4 Use the numeric keys to enter the number of the receiving system 5 Press the Start key When you hear the fax tone the telephone line has connected to the receiving system Press the Start key...

Страница 81: ...een 2 Place the originals 3 Select the destination and set transmitting functions if you want to use any 4 Press the Start key Scanning of the originals starts and the next transmission is scheduled 5...

Страница 82: ...tination and press the Start key The originals are left in queue and the transmission will start when transmission becomes possible 5 When the interrupt send is completed the waiting communication and...

Страница 83: ...ct Address Book Multiple destinations can be selected 2 When OK is selected 212 is automatically added to all destinations For the procedure for selecting a destination in the address book refer to th...

Страница 84: ...number 1 Enter the fax number 2 Select OK When OK is selected 212 is automatically added NOTE When On is selected in Entry Check for New Dest a confirmation screen is displayed for the entered FAX num...

Страница 85: ...he registered program Selecting the key of the registered program will recall the program If you selected Program proceed to step 1 2 2 Select the key for the program number you want to recall Select...

Страница 86: ...eception 4 3 Flow of automatic reception 4 3 Canceling reception Disconnection of communication 4 3 Manual Reception 4 4 Flow of manual reception 4 4 Fax reception functions 4 5 Media Type for Print O...

Страница 87: ...Method The methods for receiving faxes on the machine are shown below Auto Normal Auto FAX TEL Refer to 5 42 Auto Answering machine Refer to 5 44 Manual Refer to 4 4 Auto DRD Available for some count...

Страница 88: ...bs are displayed on Printing Jobs of the Status screen To print the received originals supply paper or remove jammed paper For the Status screen refer to the following 2 Reception Print Received faxes...

Страница 89: ...it rings 2 Select FAX on the Home screen 3 Select On Hook Select On Hook to establish the connection 4 Select Manual RX Reception will start NOTE To use Manual Reception you need to change the receiv...

Страница 90: ...e reception size is larger than the paper size you can reduce the print size Reduced RX Size page 4 7 Print the date and time of reception and other information Reception Date Time page 4 8 Print rece...

Страница 91: ...t Paper Size Change 2 Inch models Auto Inch Metric models Auto Metric 3 Select OK 3 Selecting the paper type 1 Select Media Type Change 2 Select the paper type 3 Select OK 4 Set the paper type Configu...

Страница 92: ...information about configuring settings refer to the following Selectable paper source Cassette 1 to 5 NOTE Cannot select the cassettes below Paper Size is set to other than Auto Media Type is set to...

Страница 93: ...ti page Statement or A5 size original this function prints 2 pages of the original at a time on one Letter or A4 size sheet of paper If you specify 2 in 1 reception and duplex printing at the same tim...

Страница 94: ...dress Communication 5 17 Registering a FAX Box 5 18 Changing FAX Box 5 20 Deleting FAX Box 5 20 Printing Originals from a FAX Box 5 22 Checking Details 5 23 Previewing Images 5 23 Deleting Originals a...

Страница 95: ...nder fax number 3 Port when 2 optional FAX Kits Dual FAX option are installed 4 Recipient s address i FAX By using the memory forwarding function you can perform the following communication IMPORTANT...

Страница 96: ...very page 5 27 Sub address relay broadcast communication Received originals are forwarded to multiple fax machines By setting a sub address as the forwarding requirement you can restrict relay broadca...

Страница 97: ...ing one of the following keys OK OK Function Description Reference Page Off Do not perform condition based reception forwarding Received faxes are printed on paper Use Rule for Specific RX Forward wit...

Страница 98: ...Forward originals with folder SMB transmission or folder FTP transmission Enter the Host Name Path Login User Name and Login Password of the other party to which you will forward the received origina...

Страница 99: ...step 6 When i FAX was selected in step 6 NOTE Up to 32 characters can be entered for the requirement name For details on character entry refer to the following Character Entry Method page 12 2 Requir...

Страница 100: ...with Ends with Includes Key Description Address Book Select the destination registered in the Address Book or Ext Address Book E mail Addr Entry Forward originals in e mail transmission Enter the e ma...

Страница 101: ...ing File name registration To register another forwarding settings repeat steps 2 1 to 4 5 6 Select the checkbox beside the forwarding settings to be enabled from the list The checkbox beside the forw...

Страница 102: ...Select the checkbox beside the forwarding settings to be enabled from the list The checkbox beside the forwarding setting to be enabled is checked 2 Select OK Cancelling Memory Forwarding To cancel m...

Страница 103: ...is completed Select OK Raising the Priority of Requirements for Forwarding To raise the priority of the requirements for forwarding follow the steps below 1 Display the screen Follow steps 1 of Use R...

Страница 104: ...Setting If you are sending the file as an E mail attachment or transferring it to a folder SMB or FTP select PDF TIFF XPS or OpenXPS as the file format 1 Display the screen Use Rule for All Reception...

Страница 105: ...Page or Off OK To create one file per page select Each Page E mail Subject Add Info Setting Specify whether any information will be added to the subject of the E mail When adding information you can...

Страница 106: ...eived documents Use Rule for All Receptions and select Forward Setting Next 2 Select FTP Encrypted TX Change Use Rule for Specific RX 1 Follow steps 1 of Forward only received documents that match the...

Страница 107: ...eptions 2 Select Print Change Use Rule for Specific RX 1 Follow steps 1 of Forward only received documents that match the conditions Use Rule for Specific RX select the rule and select Detail 2 Select...

Страница 108: ...tion 1 File Name Enter the file name Save 2 To insert additional information into the file name select Job No Date and Time Add No Addr to Front or Add No Addr to Back File name sample Example doc0035...

Страница 109: ...owser 2 In the Address or Location bar enter the machine s IP address as the URL e g 10 180 81 3 The web page displays basic information about the machine and Embedded Web Server RX as well as the cur...

Страница 110: ...ion Union recommendations Sub addresses enable communication modes with third party machines that were previously only possible between our brand machines These include confidential delivery sending o...

Страница 111: ...ogin administration is enabled you can only edit destinations in the Address Book by logging in with administrator privileges FAX Boxes can also be registered in the system menu Item Description Box N...

Страница 112: ...5 19 Using Convenient Fax Functions FAX Box Function 3 Check the details you have entered and then select Save A box is created 1 Displayed when the user login administration is enabled...

Страница 113: ...est number available will be automatically assigned Owner 1 1 Displayed when the user login administration is enabled Set the owner of the box Select the owner from the user list that appears Box Name...

Страница 114: ...5 21 Using Convenient Fax Functions FAX Box Function 2 Delete Yes The box is deleted...

Страница 115: ...ct On 2 Select Start Print The print starts NOTE When the password is set to a FAX Box you need to enter the password in the following situations If user login administration is disabled If user login...

Страница 116: ...l forwarded to a FAX Box on the touch panel 1 Select FAX Box on the Home screen 2 Selecting the Originals 1 Select the box containing the document you want to check Open 2 Selecting the Originals Prev...

Страница 117: ...ument you want to print Open 2 Select the document you want to print 3 Select Print 3 Configure the function Select On 4 Print Select Start Print The original is deleted after printing Deleting Origin...

Страница 118: ...es are described When there are originals in the FAX Boxes the number of pages is displayed 1 Display the screen System Menu Counter key Document Box USB Drive FAX Box Next 2 Print FAX Box List Print...

Страница 119: ...the sub address password using the numeric keys and then enter the OK key You can use up to 20 digits including the numbers from 0 to 9 space and characters to enter a sub address password 5 OK OK 5...

Страница 120: ...ed originals in the FAX Box registered in advance without printing them and output the originals without anyone seeing them Setting example 1 Register the FAX Box 2 Perform sub address transmission 3...

Страница 121: ...g example 1 Perform sub address transmission 2 Use memory forwarding to forward received originals to multiple fax machines 3 Each forwarding destination receives the fax NOTE When forwarding is used...

Страница 122: ...ed for polling transmission are automatically deleted after they have been sent to the destination To allow polling transmission of the same original to multiple destinations set this option to Off 1...

Страница 123: ...the size of stored originals Density Adjusts the density used for scanning originals Original Image Select the image quality according to the original image type Scan Resolution Chooses the level of d...

Страница 124: ...Areas When scanning with the document processor open erase the extra shaded area Skip Blank Page When there are blank pages in a scanned document this function skips the blank pages and scans only pa...

Страница 125: ...communication is disabled for polling reception When 2 optional FAX Kits Dual FAX option are installed and a receive only port is specified communication is via the other port To use polling receptio...

Страница 126: ...on refer to the following 3 Select the destination and entering the sub address For the procedure for setting a sub address refer to the following For the procedure for selecting a destination refer t...

Страница 127: ...lected originals are check marked 3 Print Print Yes Printing starts NOTE When On is selected in Dest Check before Send a destination confirmation screen is displayed when you press the Start key Confi...

Страница 128: ...t are displayed Select File Name Change to rename the file Deleting Originals in a Polling Box Use this procedure to delete an original stored in a Polling box 1 FAX Box on the Home screen Polling Box...

Страница 129: ...will be printed NOTE To use the FAX Memory RX Box set FAX Memory RX to On For the procedure for setting refer to the following FAX Memory RX page 8 8 NOTE To unselect select the checkbox to remove the...

Страница 130: ...fax you want to print Print Once the print is completed received data in the box will be deleted automatically In case of selecting Page selection and print unspecified pages are also deleted NOTE To...

Страница 131: ...herefore the sending system and the receiving system need to have the same encryption key and 2 digit key No registered in advance Description of settings at sending and receiving systems IMPORTANT In...

Страница 132: ...Common Next Encrypt Key Registration Add Edit 2 Configure the function 1 Select the unregistered encryption key Add Edit 2 Encryption Key Enter the 16 digit encryption key OK OK 3 To register other e...

Страница 133: ...h the recipient For the procedure for registering an encryption key refer to the following 2 Select FAX on the Home screen 3 Place the originals 4 Specifying destination Use the numeric keys to enter...

Страница 134: ...ter the encryption key that you decided upon with the sender For the procedure for registering an encryption key refer to the following 2 Display the screen System Menu Counter key FAX Reception Next...

Страница 135: ...et number of times the other party is required to pay phone line charges even if the receiving system does not respond FAX FAX Telephone When the other party has sent originals with automatic send Whe...

Страница 136: ...other party When the call is from a fax The machine starts receiving fax originals NOTE At the end of the conversation you can also receive faxes by using the Remote Switch Function Remote Switch Func...

Страница 137: ...achine switches to fax reception NOTE In order to use FAX Answering Machine Auto Switch Reception it is necessary to connect an answering machine equipped telephone set commercially available product...

Страница 138: ...nt The answering machine plays a response message and starts recording the other party s message When the call is from a fax The machine starts receiving fax originals NOTE If you lift the handset whi...

Страница 139: ...tive to the fax Flow of reception Preparation Select Auto DRD NOTE Using DRD Reception to receive a telephone call is only possible if a separately purchased telephone is connected to the machine DRD...

Страница 140: ...e call is from a telephone Lift the handset and speak with the other party When the conversation is over fax reception can be initiated manually When the call is from a fax Once the ringing tone stops...

Страница 141: ...et and dial the number of the receiving system 3 Check if the telephone line has connected to the fax of the receiving system If the destination is a fax machine you will hear a long high beep sound I...

Страница 142: ...sounds If a person answers you can talk to that person 4 FAX on the Home screen On Hook Manual RX Reception will start 5 Replace the handset When reception starts when the Processing indicator on the...

Страница 143: ...igits When you hear the fax tone from the handset enter the two digit remote switch dial number using the dial button on the telephone set The telephone line switches to the machine and reception star...

Страница 144: ...FAX Receiving 6 2 Setup 6 3 Installing the FAX Driver 6 4 Uninstalling the FAX Driver 6 6 Basic Transmission 6 7 Configuring the Driver Default Settings 6 10 Default Settings Dialog Box 6 11 Changing...

Страница 145: ...nding Network FAX sending is performed in the following sequence Flow of Network FAX Receiving Network FAX receiving is performed in the following sequence Prepare a document using a PC networked to t...

Страница 146: ...to a PC Connect the machine and PC to the network using a network cable Machine Registration Using the memory forwarding function select the recipient PC or file format Machine s Operation Guide NOTE...

Страница 147: ...click OK After installation is successful Set Duplex as default appears and is selected on the Finished page The driver is set to duplex mode by default 3 Select Custom Install Select Custom Install...

Страница 148: ...NOTE The machine cannot be detected unless it is on If the computer fails to detect the machine verify that it is connected to the computer via a network cable and that it is turned on and click Refre...

Страница 149: ...l 3 Finish uninstalling If a system restart message appears restart the computer by following the screen prompts This completes the software uninstallation procedure NOTE Uninstallation on Windows mus...

Страница 150: ...d orientation 3 Select Print from the File menu The Print dialog box for the application that you are using will appear 2 Select settings in the Print dialog box 1 Select the product name of the machi...

Страница 151: ...dialog box will appear 4 Select settings in the Transmit Settings dialog box You can specify settings such as a transmission time or a sub address in the Transmit Settings dialog box For details on t...

Страница 152: ...ther machine Maximum number of characters that can be entered 64 characters Characters that can be entered 0 to 9 space a space or CANNOT be entered as the first character 2 Click Add to Destination L...

Страница 153: ...ers In Windows 10 click Start button on the Windows Control Panel hardware and sound and then Devices and Printers NOTE The image of the screen varies between models Item Description Original Size Sel...

Страница 154: ...on Desktop click Settings Control Panel and then Devices and Printers 2 Right click the name of the machine to be used as the network fax and select Printing preferences from the resulting drop down m...

Страница 155: ...TE If you designate a time that is earlier in the day than the time that is actually displayed in the fax machine itself the transmission operation will be carried out the following day at that time B...

Страница 156: ...ring the Login User Name and Password will be displayed when attempting a transmission The Login User Name and Password must be entered each time a transmission is attempted Job Accounting checkbox If...

Страница 157: ...ered Telephone Number A maximum of 20 characters can be entered Entry is allowed for the characters 0 to 9 and spaces FAX Number A maximum of 20 characters can be entered Entry is allowed for the char...

Страница 158: ...on The Address Selection dialog box opens 2 Select the desired Address Book To select the Address Book registered in the fax machine select Address Book XXXX model name from the drop down menu NOTE Th...

Страница 159: ...delete all of the destinations from the Destination List click on the Delete All button 4 Click on the OK button The Transmit Settings dialog box will be displayed once again NOTE The list can be sor...

Страница 160: ...ord as it is registered in the destination fax Maximum number of characters that can be entered 20 characters Characters that can be entered 0 to 9 space a space CANNOT be entered as the first charact...

Страница 161: ...used To attach and transmit a Cover Page place a check in the check box for Attach Cover Page in the Cover Page tab 4 Optional Settings The settings that were selected in 1 Sending Options Tab can be...

Страница 162: ...b For the setting procedures refer to the following 6 Internet fax Setting For Internet fax transmission click on the Internet FAX tab and enter the Subject and the message Subject A maximum of 60 cha...

Страница 163: ...cted from a template The Cover Page contains such destination information and sender information as that shown below Sample of English template 01 No Item 1 Recipient Name 2 Destination Company Name 3...

Страница 164: ...go to Step 4 2 Enter the fax number In the Address Setting tab enter the destination fax number and click on the Option Settings button Basic Transmission page 6 7 1 Selecting a Destination from the...

Страница 165: ...formation and click on the OK button Item Description Company A maximum of 32 characters can be entered Department A maximum of 32 characters can be entered Recipient A maximum of 32 characters can be...

Страница 166: ...ge 6 14 Item Description Company A maximum of 64 characters can be entered Department A maximum of 64 characters can be entered Name A maximum of 32 characters can be entered Telephone Number A maximu...

Страница 167: ...registered in the Default Settings then the action of selecting the Cover Page for each transmission can be omitted Cover Page Registration Default Settings page 6 26 Original Cover Page templates ca...

Страница 168: ...he Message 1 Click on the Edit Message button 2 Enter the message to be added to the Cover Page and click on the OK button 9 Transmit Click on the Send button to begin the transmission Item Descriptio...

Страница 169: ...ings The registration method is as follows 1 Open the Default Settings dialog box Perform the Default Settings Dialog Box procedure open the Default Settings dialog box 2 Attach a Cover Page Click on...

Страница 170: ...the drop down menu at the top of the dialog box or click on the or button The template display magnification can also be changed within the range of 25 to 250 from the drop down menu 2 Click on the C...

Страница 171: ...Open the Default Settings dialog box Perform the Default Settings Dialog Box procedure open the Default Settings dialog box 2 Edit the Cover Page templates 1 Click on the Cover Page tab place a check...

Страница 172: ...se them as required IMPORTANT If there are too many characters in the entered information such as recipient name or company name the information will not fit in the field box and some of the character...

Страница 173: ...e Recipient Name Recipient information recipient name Address Recipient Address Recipient FAX number or Internet Fax Address All Insert the four types of data above Sender Company Sender Company Sende...

Страница 174: ...6 31 Sending Faxes from PC Basic Transmission 7 The new template will be registered at the top of the list and can now be selected...

Страница 175: ...on Once a fax transmission starts being processed a Transmission Control icon will be displayed in the Windows Task Bar 1 Double click on that icon to access the Transmission Control window which indi...

Страница 176: ...etails of the Job Log 7 5 Printing Administrative Reports Result Report Setting 7 7 Send Result Reports 7 7 Attach Image of NW FAX 7 8 Report for Job Canceled before Sending 7 8 Recipient Format 7 8 F...

Страница 177: ...results stored Any time 7 3 Send result report Receipt result report Report printing Latest send or receipt result Automatic printout after every sending or receiving operation No Print Output or Erro...

Страница 178: ...s of file storage in FAX Boxes and Polling box Then select Log 2 Check 1 Select Job Type and select FAX or i FAX 2 Select Close to exit NOTE Even when job accounting is enabled 100 each of send and re...

Страница 179: ...Detail Select a job from the list and select this key to show detailed information of the job Checking Details of the Job Log page 7 5 Display Key Description Job No Job acceptance number End Date Jo...

Страница 180: ...eception data Storing i FAX reception data Job Name Job name User Name User name Blank if no information is available Result Result is indicated Completed Job ended properly Canceled Job was canceled...

Страница 181: ...tination The number of destinations is displayed User Name User name Blank if no information is available Job Name Job name Accepted Time Time when job was accepted End Time Time when job ended Origin...

Страница 182: ...Report Result Report Setting Next Send Result Report Next FAX Change 2 Configure the function 1 Select Off not to print On to print Error Only or Specify Each Job 2 If you selected On Error Only or S...

Страница 183: ...and destination that appear on the Send Result Report are taken from the information stored in the address book If Name or Destination is selected either the name destination name or the destination...

Страница 184: ...ed successfully 1 Display the screen System Menu Counter key Report Result Report Setting Next FAX RX Result Report Change 2 Configure the function Select Off not to print On to print or Error Storing...

Страница 185: ...data are printed as a report 1 Display the screen Status Job Cancel key Device Communicate Log 2 Print 1 Select Outgoing to print the sent fax report and select Incoming to print the received fax repo...

Страница 186: ...number of user setups FAX related information includes the Local FAX Number Local FAX Name fax line setting etc You can print it out as necessary 1 Display the screen System Menu Counter key Report Pr...

Страница 187: ...ress Book and select OK Enter the E mail address 1 E mail Address Entry E mail Address 2 Enter the address of the destination and select OK For details on character entry refer to the following NOTE T...

Страница 188: ...isplay the detailed information on the selected destination 2 Change a destination Delete a destination 1 To delete the destination select the destination you want to delete 2 Delete Yes The destinati...

Страница 189: ...aintenance 8 14 Transmission Restriction 8 15 Registering Permit FAX No 8 16 Changing Permit FAX No 8 17 Deleting Permit FAX No 8 17 Registering Reject FAX No 8 18 Changing Reject FAX No 8 18 Deleting...

Страница 190: ...etting by selecting it 2 Accepts the settings and exits 3 Returns to the previous screen without making any changes Date Timer Energy Saver Change Date Time Close Status Date Format Time Zone Auto Pan...

Страница 191: ...ging in with administrator privileges or as a user with privileges to configure this setting The factory default login user name and login password are set as shown below If function default settings...

Страница 192: ...For details on Polling Box refer to the following Polling Communication page 5 29 For details on FAX Memory RX Box refer to the following FAX Memory RX Box page 5 36 8 8 FAX Configures settings for f...

Страница 193: ...n Cassette 1 to Cassette 5 1 Value Plain Rough Vellum Recycled Preprinted 2 Bond Cardstock 3 Color Prepunched 2 Letterhead 2 Envelope 3 Thick High Quality or Custom 1 8 2 Cannot be used to receive fax...

Страница 194: ...utput tray for printing of receiving faxes 1 Value with optional job separator Inner Tray Outputs to the Inner Tray of the machine Job Separator Tray Outputs to the Job Separator with optional 1 000 S...

Страница 195: ...nd body when sending the scanned originals by i FAX Value Subject Up to 60 characters can be entered Body Up to 500 characters can be entered Continuous Scan FAX Set the continuous scan defaults Value...

Страница 196: ...to register an encryption key for encrypted communication The fax will be deleted page 5 37 FAX Remote Diagnosis If a problem arises with this machine and you contact our service representative this...

Страница 197: ...The information includes the date and time of transmission number of pages sent name and fax number This machine enables the user to select if the TTI is printed out on the fax on the receiving syste...

Страница 198: ...or transmission limit purposes Transmission Restriction page 8 15 ECM TX Port1 Set whether ECM TX is performed ECM is a communication mode specified by the ITU T International Telecommunication Union...

Страница 199: ...FAX exclusive paper source Multipurpose Tray You can select whether to use the MP tray paper when printing out the received fax Value Off On Multipurpose Tray page 4 7 Reduced RX Size When the recept...

Страница 200: ...on page 4 2 Manual Reception page 4 4 DRD Reception Available for some countries page 5 46 Remote SW Dial To start fax reception by operation from the connected telephone set use the following operati...

Страница 201: ...y The fax will be deleted page 5 37 1 This function is displayed when 2 optional FAX Kits Dual FAX option are installed Item Description New Destination Entry FAX 1 1 If Prohibit is set for new destin...

Страница 202: ...utomatically after every 50 faxes sent Activity Report Outgoing FAX Report and Incoming FAX Report page 7 10 Incoming FAX Report An activity report is printed out automatically after every 50 faxes re...

Страница 203: ...n Establishing Requirements Send Restrictions Register Permitted FAX numbers or Permitted ID numbers 1 Registering Permit FAX No page 8 16 Registering Permit ID No page 8 19 Send restriction settings...

Страница 204: ...e 8 18 Reception restriction settings are specified in Reject List in Reception Restrictions Setting Reception Restriction page 8 21 1 If there are no Reject FAX numbers registered calls are only reje...

Страница 205: ...want to change and enter the new number 2 OK Yes The registration is changed Deleting Permit FAX No 1 Display the screen System Menu Counter key FAX TX RX Restriction Next Permit No List Add Edit 2 De...

Страница 206: ...ect FAX No 1 Display the screen System Menu Counter key FAX TX RX Restriction Next Reject No List Add Edit 2 Changing 1 Select Detail for Reject FAX No you want to change 2 Enter the new number 3 OK Y...

Страница 207: ...to delete and select Delete 2 Select Yes The registration is deleted Registering Permit ID No 1 Display the screen System Menu Counter key FAX TX RX Restriction Next Permit ID List Add Edit 2 Add a Pe...

Страница 208: ...want to change 2 Enter the new number 3 OK Yes The registration is changed Deleting Permit ID No 1 Display the screen System Menu Counter key FAX TX RX Restriction Next Permit ID List Add Edit 2 Dele...

Страница 209: ...from senders on the list of Rejected FAX numbers or from senders whose Local FAX Number is not registered are rejected You can select whether reception from a party whose local fax number is not regis...

Страница 210: ...8 22 Fax Settings Transmission Restriction 2 Configure the function To receive faxes from the unknown number Select Permit OK To reject faxes from the unknown number Select Reject OK...

Страница 211: ...rinting all other printing operations are prohibited during the unusable time period including printing of copy jobs and printer jobs and printing from USB Drive Faxes and print jobs received during t...

Страница 212: ...8 24 Fax Settings Unusable Time NOTE To use the machine temporarily during unusable time enter the Unlock Code and select Login...

Страница 213: ...em Description Registration of User Register user access privileges User ID and Password Enable Disable User accounting Enable User accounting NOTE Machine s Operation Guide Item Description Registrat...

Страница 214: ...aled from this machine to the receiving system Polling reception Sending Faxes from PC Destinations include FAX and i FAX destinations i FAX Transmission Transmission from the document box When job ac...

Страница 215: ...pment This chapter introduces the optional equipment available for the FAX kit Internet FAX Kit A Internet FAX Kit 9 2 Dual FAX 9 3 Dual FAX Settings 9 3 Reception Port Selection 9 3 Job Accounting Po...

Страница 216: ...9 2 Optional Equipment Internet FAX Kit A Internet FAX Kit Internet FAX Kit A Internet FAX Kit You can use Internet FAX on this machine Internet Faxing i FAX page 10 1...

Страница 217: ...receive simultaneously there will be fewer occasions when you cannot receive a fax during fax transmission Dual FAX Settings Specifying the settings for the second line Transmission page 8 9 Reception...

Страница 218: ...ist Add Edit Add FAX Port Restriction Change 2 Configure the settings Off Use Port 1 Only or Use Port 2 Only OK For detailed information on restrictions and job accounting refer to the following NOTE...

Страница 219: ...w to use the Internet faxing i FAX using the Internet FAX Kit What is i FAX 10 2 i FAX Settings 10 5 Accessing Embedded Web Server RX 10 5 i FAX Default Settings 10 6 i FAX transmission procedure 10 1...

Страница 220: ...server with a machine that supports Internet fax and is connected via LAN Real time transmission and reception are possible Example of sending i FAX i FAX Transmission Flowchart The procedure for send...

Страница 221: ...that you can use for transmissions are dependent on the performance of the receiving machine Check the specifications of the receiving machine before sending the fax If you do not know the specificati...

Страница 222: ...ation on the resolutions compression modes and paper sizes supported by this machine is sent to the sender When this machine sends an i FAX The machine sends a transmission confirmation to recipients...

Страница 223: ...the machine and Embedded Web Server RX as well as their current status 3 Enter the user name and password of the administrator and click Login Setting Administrator User Name and Password restricts ge...

Страница 224: ...e for printing the received documents Use MP Tray Selects whether or not to include the MP multipurpose tray for auto media selection when printing received documents When turned On the MP tray will b...

Страница 225: ...P Server Timeout Enter the timeout period in seconds Authentication Protocol Specify whether SMTP authentication will be used or whether POP before SMTP will be used POP before SMTP Timeout If you sel...

Страница 226: ...ddress in the TCP IP settings screen Machine s Operation Guide POP3 Port Number Sets the port number used by POP3 Normally 110 is used POP3 Server Timeout Enter the timeout period in seconds Login Use...

Страница 227: ...ut time in seconds during which this device retries to connect to the SMTP server Reception Direct SMTP Port Number Enter the port number used by Direct SMTP Normally 25 is used Direct SMTP Timeout Se...

Страница 228: ...g the numeric keys NOTE The illustration varies between models Machine s Operation Guide Character Entry Method page 12 2 Choosing from the Address Book page 3 9 Choosing from the One Touch Key page 3...

Страница 229: ...red Item Description Resolution Specify the resolutions that can be received by the destination fax machine If you try to send an i FAX using a prohibited resolution it is automatically changed to a p...

Страница 230: ...AX i FAX transmission procedure Checking the Send Status 1 Select the Status Job Cancel key 2 Display the send job status screen Select Sending Jobs The list of accepted time destination and status ar...

Страница 231: ...FAX Select i FAX Check New FAX The machine connects to the mail server and starts downloading any Internet faxes it finds NOTE When Direct SMTP reception communication without a mail server is used y...

Страница 232: ...s the following topics Indicators During Sending Receiving Operation 11 2 Responding to an Attention Indicator Flashes 11 2 Precautions When Turning Power OFF 11 3 Messages 11 4 Error Code List 11 6 T...

Страница 233: ...ouch panel when the Status Job Cancel key is pressed or the attention indicator flashes check the following Symptom Checkpoints Corrective Actions Reference Page Cannot send fax Is the modular cord co...

Страница 234: ...Turning Power OFF To power off the machine press the Power switch You cannot automatically receive a fax when the power switch is turned off 1 Turn the power switch off The confirmation message for p...

Страница 235: ...or occurs a sent receipt result report is produced Check the error code shown in the report and refer to the following Error Code List page 11 6 To print the sent receipt result report refer to the fo...

Страница 236: ...delete documents from the FAX box to make room for FAX reception To check the canceled job select the Status Job Cancel key and then Printing Jobs to check receipt result Job Accounting restriction e...

Страница 237: ...tly Send again If you still have trouble reduce TX Start Speed and send again NOTE If the communication error occurs frequently change the default setting of TX Start Speed in System Menu E00900 E0091...

Страница 238: ...ss box contained no data Check with the other party E03300 U03300 An error occurred due to either 1 or 2 below Check with the other party 1 The other party s machine is an our brand model and transmis...

Страница 239: ...stored in the memory or cancel the reception to the Sub Address Box E14100 U14100 Transmission to the Sub Address Box or sub address box on our brand recipient machine was stopped because there is no...

Страница 240: ...to send i FAX Check the network and SMB settings The network cable is connected The hub is not operating properly The server is not operating properly 2204 Failed to send i FAX Check the e mail size l...

Страница 241: ...buttons Refer to the operation manual of your phone set Is the remote switching number correct Check the registration Default 55 8 12 Did you press the remote switching number too quickly Press the r...

Страница 242: ...s the recipient fax machine has a similar sub address transmission feature Is the entered sub address identical to the sub address registered in the recipient fax machine If your entry is correct chec...

Страница 243: ...munication function If the other party s fax machine does not have the same sort of sub address bulletin board communication function it cannot receive faxes via a sub address bulletin board Check wit...

Страница 244: ...re frequently received after this product has been purchased Question Answer 1 I want to add a completion stamp when sending faxes This product does not have a function for completion stamps 2 I want...

Страница 245: ...the following topics Character Entry Method 12 2 Entry Screens 12 2 Entering Characters 12 4 Specifications 12 5 Menu Map 12 7 Received FAX Sizes and Paper Priority Metric Model 12 13 Received FAX Siz...

Страница 246: ...red characters 2 Upper case Select to use upper case letters 3 Lower case Select to use lower case letters 4 No Symbol Select to enter numbers and symbols 5 Space Select to insert a space 6 Cancel Sel...

Страница 247: ...croll the screen to view other numbers or symbols to enter Use the keyboard to enter Backspace Upper case Lower case No Symbol Space Cancel OK Lower case _ Q W E R T Y U I O P A S D F G H J K L Z X C...

Страница 248: ...s correct Press OK Use the keyboard to enter Backspace Upper case Lower case No Symbol Space Cancel OK Lower case L _ Q W E R T Y U I O P A S D F G H J K L Z X C V B N M Input characters Limit charact...

Страница 249: ...utomatic Document Feed Max 270 sheets with document processor Resolution Scan 200 100 dpi Normal 8 dot mm 3 85 line mm 200 200 dpi Fine 8 dot mm 7 7 line mm 200 400 dpi Super Super Fine 8 dot mm 15 4...

Страница 250: ...nsmit Based on settings in the Network FAX Driver setting is possible to any 1 minute increment within the subsequent 24 hour period Transmit and Print Fax transmission and print out at the machine is...

Страница 251: ...tional document processor is installed 2 side Book Original page 3 22 2 2 This is Book original if the optional document processor is not installed Original Orientation page 3 22 Sending Size page 3 2...

Страница 252: ...cheduled Job page 3 28 Log page 7 3 Storing Jobs page 7 3 Status refer to the machine s Operation Guide Log page 7 3 Device Communicate Scanner refer to the machine s Operation Guide Printer refer to...

Страница 253: ...Guide Paper Output page 8 6 1 FAX Port 1 page 8 6 FAX Port 2 2 page 8 6 Orientation Confirmation refer to the machine s Operation Guide Color Toner Empty Action refer to the machine s Operation Guide...

Страница 254: ...t Box USB Drive Custom Box refer to the machine s Operation Guide FAX Box page 5 17 Job Box refer to the machine s Operation Guide Polling Box page 5 29 FAX Memory RX Box page 5 36 Quick Setup Registr...

Страница 255: ...e 8 12 Rings Normal page 8 12 Rings TAD page 8 12 Rings FAX TEL page 8 12 RX Setting page 8 12 Remote SW Dial page 8 12 Reception Port 2 page 8 12 ECM RX Port 1 page 8 12 ECM RX Port 2 2 page 8 12 RX...

Страница 256: ...to the machine s Operation Guide System Network refer to the machine s Operation Guide Edit Destination Address Book page 2 16 One Touch Key page 2 25 Print List page 2 24 Address Book Defaults Sort r...

Страница 257: ...ived FAX Size Priority A5 B5 A4 R A4 Folio B4 A3 A4 Long Originals 1 Folio Long Originals 2 B4 Long Originals 3 A3 Long Originals 4 Paper Size 1 A5 B5 A4 R A4 Folio B4 A3 A3 A3 A3 A3 2 A5 R 5 B5 R 5 A...

Страница 258: ...eived document The image is printed after being rotated 90 automatically 6 The document is printed on this paper when the length of the document received is 351 to 380 4 mm and the cas sette set as th...

Страница 259: ...ginals 3 A3 Long Originals 4 Paper Size 1 A5 B5 A4 R A4 Folio B4 A3 A3 A3 A3 A3 2 A5 R 5 B5 R 5 A4 5 A4 R 5 A4 R A3 B4 6 A3 A3 A3 A4 3 A4 R B4 Folio Folio 5 A4 5 A4 R 6 A4 R 6 B4 B4 B4 A4 R 5 4 Folio...

Страница 260: ...om the received document The image is printed after being rotated 90 automatically 6 The data received is reduced to fit the paper size and then printed 7 The document is printed on this paper when th...

Страница 261: ...the direction of the paper feed Paper Size 1 Statement 4 4 Paper orientation is different from the received document The image is printed after being rotated 90 automatically Letter Letter Legal Ledg...

Страница 262: ...rinted after being rotated 90 automatically Letter Letter Legal Ledger Ledger Legal Ledger 2 Letter Letter 4 Letter 4 Letter Letter 6 Ledger Ledger Letter 3 Legal Legal Legal 4 Letter 4 Letter 4 6 Let...

Страница 263: ...r Entry Method 12 2 Checking Transmission Results and Registration Status 7 2 Common inquiries 11 13 Confirmation Screen of Destinations 7 13 Continuous Scan 3 28 D Date 2 15 Default Continuous Scan F...

Страница 264: ...Forward Settings 5 4 Embedded Web Server RX 5 16 Function Key Assignment 8 7 H Home Screen 2 6 I i FAX Transmission 10 10 Indicators 11 2 Internet Faxing 10 1 Embedded Web Server RX 10 5 Notes on Usin...

Страница 265: ...Receptions 5 4 Priority Override Send 3 4 Q Quick No Search key 2 11 Quick Setup Registration 8 13 Quick Setup Screen 2 28 Changing Registration 2 29 Functions Available for Registration 2 28 Quick S...

Страница 266: ...in Board Reception 5 32 Sub Address Communication 5 17 Sub Address 5 18 Sub Address Password 5 18 Sub Address Transmission 5 26 Sub Address Relay Broadcast Communication 5 3 5 28 Sub Address Relay Bro...

Страница 267: ......

Страница 268: ...changes to the product described in this manual at any moment and without giving prior warning No part of this document may be copied reproduced or transmitted in any form or by any means electronic o...

Отзывы: