16
Deactiv
Deactiv
Deactiv
Deactiv
Deactiva
a
a
a
ating the Cler
ting the Cler
ting the Cler
ting the Cler
ting the Clerk System
k System
k System
k System
k System
Proceed as follows if for any reason you wish to deactivate the Clerk
system, in other words if you no longer want to enter a clerk number
and related secret code to perform sales transactions.
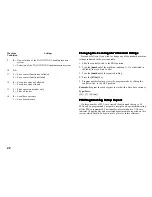
1. Open the printer compartment and slide the control switch to the
PRG position.
2. Type [44444] followed by [0] and then press the
[Amt Tend/TOTAL] key.
3. Slide the control switch to your operating mode and then close the
printer compartment cover.
Enter
Enter
Enter
Enter
Entering a Cler
ing a Cler
ing a Cler
ing a Cler
ing a Clerk Number/Secr
k Number/Secr
k Number/Secr
k Number/Secr
k Number/Secret Code Bef
et Code Bef
et Code Bef
et Code Bef
et Code Befor
or
or
or
ore Cash
e Cash
e Cash
e Cash
e Cash
Reg
Reg
Reg
Reg
Register Opera
ister Opera
ister Opera
ister Opera
ister Operations
tions
tions
tions
tions
Proceed as follows to enter a defined Clerk number and related secret
code before using the cash register in the REG operating mode.
1. Open the printer compartment and slide the control switch to the R1
or R2 position.
2. Type a Clerk number [1, 2, ... or 6].
3. Type the corresponding three-digit code.
4. Press the [Clerk] key.
The clerk number indicator light will display a line (_) to indicate the
clerk number that is in use (CL 1 ...CL 6) and that it is now possible to
carry out transactions. The clerk number is printed on the sales receipt
and on the management reports.
Da
Da
Da
Da
Date and
te and
te and
te and
te and Time
Time
Time
Time
Time
Set the date to print the current date at the top of each receipt, journal
record or management report. The date will print in the
day/month/year format unless otherwise programmed as explained in
the section entitled Programming System Options.
Set the time to print the current time at the bottom of the receipt. The
time prints in the hour:minutes format and by default assumes the 12-
hour format. You can display the time by pressing the [Qty/Time] key
when the cash register is in the R1 or R2 mode.
The date and time change automatically as long as the cash register is
plugged into the wall outlet or the battery back-up system remains
active.
Setting the Da
Setting the Da
Setting the Da
Setting the Da
Setting the Date
te
te
te
te
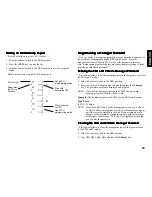
Proceed as follows to set the current date:
1. Slide the control switch to the PRG position.
2. Type the [numeric keys] representing the current date. Remember
to use the DDMMYY format. Single digit numbers for months and
days must be preceded by a zero (0).
3. Press the [#/NS] key to store the date.
4. Program another feature or exit program mode by sliding the control
switch to the OFF position.
Example: Set a date of October 3, 1998.
Type/Press:
[031098] + [#/NS]
NOTE: If you wish that the date just entered be printed in the month/
day/year format, type [70] and then press the [RA/ ] key.
More information on how to change the cash register's basic
programming is explained in the section Programming System
Options.


