


d-Color MF 3300/3800
3-7
3.2
When a paper jam has occurred
3
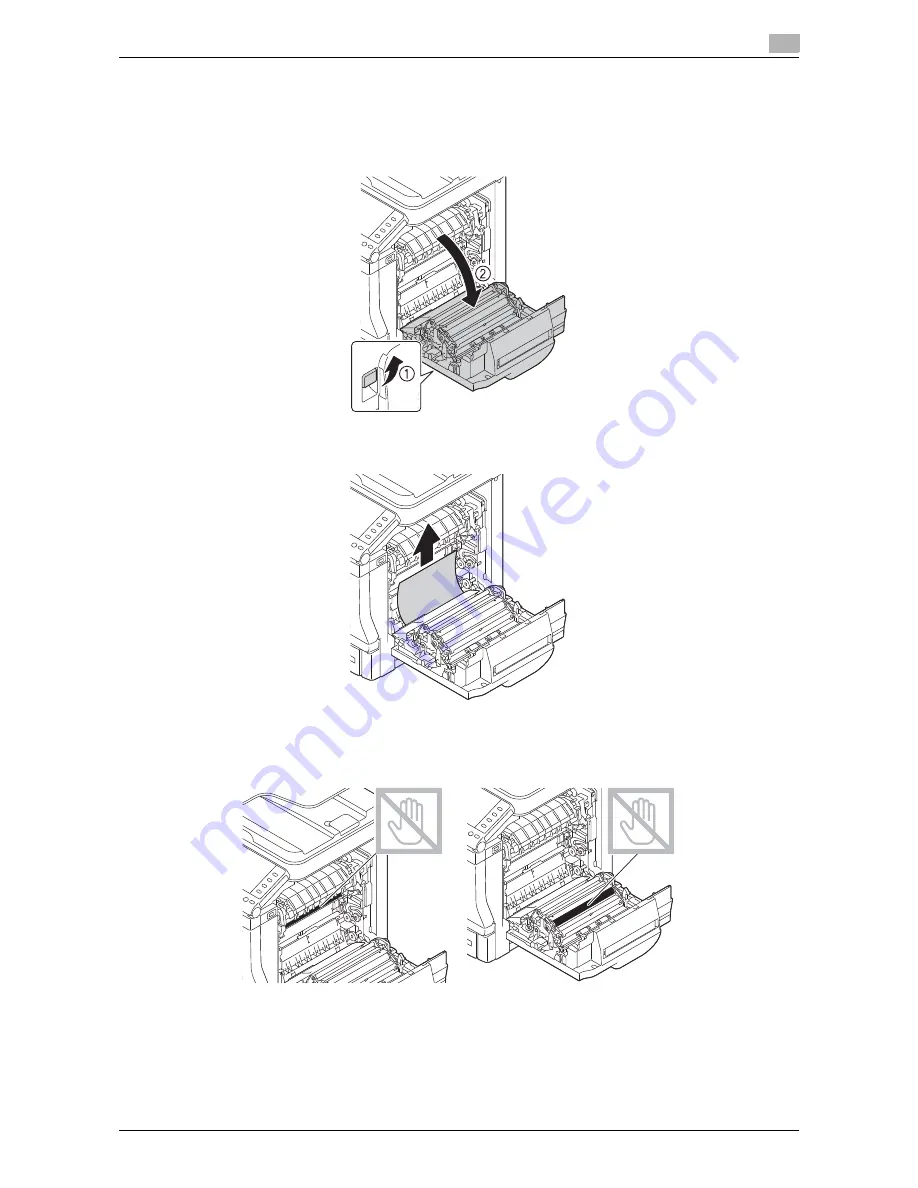
Clear procedure
1
Pull the lever (1), then open the Right Door (2).
%
When opening the
Right Door
, be sure to fold the
Manual Feed Tray
in advance.
2
Carefully pull out the jammed paper.
NOTICE
If you touch the surface of the
Transfer Belt Unit
or
Transfer Roller
, it may reduce printing quality. Be
careful not to touch the surface of the
Transfer Belt Unit
or
Transfer Roller
.
Содержание d-COLOR MF3300
Страница 5: ...1 Cleaning This Machine...
Страница 6: ......
Страница 10: ...1 6 d Color MF 3300 3800 Cleaning 1 1 2 Original Glass Original Cover Pad...
Страница 16: ...1 12 d Color MF 3300 3800 Cleaning 1 1 2...
Страница 17: ...2 Checking and Replacing Consumables...
Страница 18: ......
Страница 45: ...d Color MF 3300 3800 2 29 2 2 Replacing consumables 2 8 Rotate the Finisher 90 degrees to the original position...
Страница 46: ...2 30 d Color MF 3300 3800 Replacing consumables 2 2 2...
Страница 47: ...3 Clearing a Paper Jam...
Страница 48: ......
Страница 66: ...3 20 d Color MF 3300 3800 Clearing a Staple Jam 3 3 4...
Страница 67: ...4 Troubleshooting...
Страница 68: ......
Страница 86: ...4 20 d Color MF 3300 3800 Major messages and actions 4 4 8...
Страница 87: ...5 Checking Counters...
Страница 88: ......
Страница 90: ...5 4 d Color MF 3300 3800 Checking the counter 5 5 1...
Страница 91: ...6 Index...
Страница 92: ......
Страница 94: ...6 4 d Color MF 3300 3800 6...


