background image

GB

F

D

8

○○○○○○○○○○○○○○○○○○○

○○○○○○○○○○○○○○○○○○○○○○○○○○○○○○○○○○○○○○○○○○○○○○○○○○○○○○○○○○○○○○○○○○○○○○○○○

○○○○○○○○○○○○○○○○○○○

○○○○○○○○○○○○○○○○○○○○○○○○○○○○○○○○○○○○○○○○○○○○○○○○○○○○○○○○○○○○○○○○○○○○○○○○○

○○○○○○○○○○○○○○○○○○○

○○○○○○○○○○○○○○○○○○○○○○○○○○○○○○○○○○○○○○○○○○○○○○○○○○○○○○○○○○○○○○○○○○○○○○○○○

I

1

1.3

1

IMPORTANTE!
Per prevenire ogni rischio di
folgorazione è indispensabile
togliere l’alimentazione elettrica
prima di effettuare collegamenti
elettrici ed ogni operazione di
manutenzione sugli apparecchi.

Rendere note a tutto il personale
interessato al trasporto ed all’instal-
lazione della macchina le presenti
istruzioni.

SMALTIMENTO
Il simbolo sul prodotto o sulla
confezione indica che il prodotto non
deve essere considerato come un
normale rifiuto domestico, ma deve
essere portato nel punto di raccolta
appropriato per il riciclaggio di
apparecchiature elettriche ed
elettroniche.
Provvedendo a smaltire questo
prodotto in modo appropriato, si
contribuisce a evitare potenziali
conseguenze negative per l’ambien-
te e per la salute, che potrebbero
derivare da uno smaltimento
inadeguato del prodotto.
Per informazioni più dettagliate sul
riciclaggio di questo prodotto,
contattare l’ufficio comunale, il
servizio locale di smaltimento rifiuti
o il negozio in cui è stato acquistato
il prodotto.
Questa disposizione è valida
solamente negli Stati membri dell’UE.

IDENTIFICAZIONE DELLE
PARTI PRINCIPALI
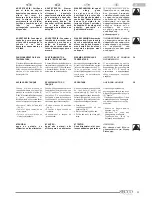
 (fig. 1)

1) Maniglia di spostamento.
2) Selettore umidità/Standby.
3) Griglia entrata aria
4) Tanica raccolta condensa.
5) Griglia uscita aria
6) Coperchio tappo scarico

continuo acqua

IMPORTANT!
To prevent any risk of electrocution,
always disconnect the electric power
supply before performing electrical
connections and any service
operation on the appliances.

The following instructions must be
made known to all personnel involved
in the machine’s transport and
installation.

DISPOSAL
This symbol on the product or its
packaging indicates that the appliance
cannot be treated as normal domestic
trash, but must be handed in at a
collection point for recycling electric
and electronic appliances.
Your contribution to the correct
disposal of this product protects the
environment and the health of your
fellow men. Health and the
environment are endangered by
incorrect disposal.
Further information about the
recycling of this product can be
obtained from your local town hall,
your refuse collection service, or in
the store at which you bought the
product.
This regulation is valid only in EU
member states.

IDENTIFICATION OF MAIN
COMPONENTS
 (fig. 1)

1) Handle for moving.
2) Standby/Humidity selector
3) Air inlet grille.
4) Condensate collection tank.
5) Air outlet grill
6) Continuous water discharge

plug cover

MPORTANT!
Afin d'éviter tout risque
d'électrocution, il est indispensable
de couper le courant électrique  avant
d'effectuer des branchements
électriques et toute opération
d'entretien sur les appareils.

Communiquer ces instructions à
tout le personnel concerné par le
transport et l’installation de la
machine.

ELIMINATION
Ce symbole apposé sur le produit ou
son emballage indique que ce produit
ne doit pas être jeté au titre des
ordures ménagères normales, mais
doit être remis à un centre de collecte
pour le recyclage des appareils
électriques et électroniques.
En contribuant à une élimination
correcte de ce produit, vous protégez
l'environnement et la santé d'autrui.
L'environnement et la santé sont mis
en danger par une élimination
incorrecte du produit.
Pour toutes informations
complémentaires concernant le
recyclage de ce produit, adressez-
vous à votre municipalité, votre service
des ordures ou au magasin où vous
avez acheté le produit.
Cette consigne n'est valable que pour
les états membres de l'UE.

IDENTIFICATION DES
COMPOSANTS PRINCIPAUX
(fig. 1)

1) Poignée pour le

d é p l a c e m e n t .

2) Sélecteur humidité/veille.
3) Grille d’entrée de l’air.
4) Bidon de recueil de

condensation.

5) Grille de sortie air
6) Couvercle du bouchon

d'évacuation continue eau

WICHTIG!
Um das Risiko eines Stromschlags
zu vermeiden, muss die
Stromversorgung vor der
Durchführung elektrischer
Anschlüsse und vor jeder
Wartungsarbeit am Gerät abgetrennt
werden.

Das für den Transport und für die
Maschineninstallation zuständige
Personal ist von diesen Anweisungen
in Kenntnis zu setzen.

ENTSORGUNG
Dieses Symbol auf dem Produkt oder
seiner Verpackung weist darauf hin,
dass dieses Produkt nicht als normaler
Haushaltsabfall zu behandeln ist,
sondern an einem Sammelpunkt für
das Recycling von elektrischen und
elektronischen Geräten abgegeben
werden muss.
Durch Ihren Beitrag zum korrekten
Entsorgen dieses Produktes
schützen Sie die Umwelt und die
Gesundheit Ihrer Mitmenschen.
Umwelt und Gesundheit werden durch
falsches Entsorgen gefährdet.
Weitere Informationen über das
Recycling dieses Produktes erhalten
Sie von Ihrem Rathaus, Ihrer
Müllabfuhr oder dem Geschäft, in
dem Sie das Produkt gekauft haben.
Diese Vorschrift ist nur gültig für
Mitgliedstaaten der EU.

BEZEICHNUNG DER
WICHTIGSTEN TEILE
(abb. 1)

1) Verschiebegriff.
2) Wahlschalter Feuchtigkeit /

Stand-by

3) Lufteintrittsgitter.
4) Kondenswasserbehälter.
5) Luftauslassrost
6) Verschlussdeckel

Dauerwasserabfluss

2

3

4

1

5

6

Содержание Secco

Страница 1: ...STALLATION USE AND MAINTENANCE INSTRUCTIONS POUR L INSTALLATION L EMPLOI ET L ENTRETIEN HANDBUCH F R INSTALLATION GEBRAUCH UND WARTUNG INSTRUCCIONES PARA LA INSTALACI N USO Y MANTENIMIENTO MANUAL DE I...

Страница 2: ...LEANING THE DEHUMIDIFIER 3 10 STORING THE DEHUMIDIFIER ELECTRICAL DIAGRAM SPECIFICATIONS TROUBLE SHOOTING SOMMAIRE 1 GENERALITES 1 1 INFORMATIONS GENERALES 1 2 SYMBOLOGIE 1 2 1 Pictogrammes r dactionn...

Страница 3: ...TEN O 3 1 PAINEL DE COMANDOS 3 2 LIGA O DESUMIDIFICA O E DESLIGA O 3 2 1 Stand by 3 2 2 Selec o da modalidade de funcionamento 3 2 3 Visualiza o da temperatura e da humidade do ambiente 3 3 FUNCIONAME...

Страница 4: ...teurdenotreproduction Document r serv aux termes de la loi avec interdiction de reproduction ou de transmission tiers sans l autorisation expresse de le fabricant Lireattentivementlepr sentmanuel avan...

Страница 5: ...devem serdelxadosaoalcancedascrin as pois s opotenciaisfontesdeperigo AFIRMACONSTRUTORAN OSEAS SUMEARESPONSABILIDADEPOR DANOSAPESSOASOUACOISAS PROVOCADOS PELA INOBSERV NCIA DAS NORMAS CONTIDASNOPRESEN...

Страница 6: ...t de mani re univoque les informations n cessaires pour une utilisation correcte de la machine dans des conditions de s curit Pictogrammes r dactionnels Service Indique des situations o il faut inform...

Страница 7: ...firma construtora M olevantada Assinala as ac es que n o se devem absolutamente efectuar Pictogramas relativos seguran a Tens oel tricaperigosa Avisa o pessoal interessado que a opera o descrita apre...

Страница 8: ...umidity selector 3 Air inlet grille 4 Condensate collection tank 5 Air outlet grill 6 Continuous water discharge plug cover MPORTANT Afin d viter tout risque d lectrocution il est indispensable decoup...

Страница 9: ...ha e de reciclagem para aparelhos el ctricos e electr nicos Gra as ao seu contributo para a elimina o correcta deste produto protegeoambienteeasa dep blica Aelimina oincorrectaderes duos prejudica o a...

Страница 10: ...1 5 DESCRIPTION DU FONCTIONNEMENT L air humide aspir par le ventilateur traverse un serpentin r frig rant qui provoque la condensation de l humi dit en gouttes d eau recueillies dans un bidon situ au...

Страница 11: ...k gesteld worden voor eventueel persoonlijk letsel of materi le schade die veroorzaakt is door ongeschikt onjuist of onredelijkgebruik In geval van storingen en of slechte werking van het apparaat moe...

Страница 12: ...OSAL SERVICE Do not vent R 134A into atmosphere R 134A is a fluorinated greenhouse gas covered by Kyoto Protocol with a Global Warming Potential GWP 1300 Si vous d cidiez de ne plus utiliser un appare...

Страница 13: ...ar kunnen ople veren vooral voor kinderen die ermee kunnen gaan spelen onschadelijktemaken ATTENTIE DIT PRODUCT BEVAT HET ECOLOGISCHE KOELMIDDEL GAS R 134A MET EEN O D P KARAKTERISTIEK P O T E N T I L...

Страница 14: ...nctions INSTALLATION Installer l appareil dans une pi ce appropri e Nous vous recommandons de m nager un espace libre d au moins 50 cm sur le devant de la grille d aspiration de l air et 20 cm l avant...

Страница 15: ...eteld bij het stroomverbruik van andere elektrische apparaten de stroom niet uitvalt vanwege overbelasting van het elektriciteitsnet WAARSCHUWING deaansluitingophet voedingsnetmoetuitgevoerdworden ond...

Страница 16: ...orised When the electric current is restored the device starts operating again following its settings AVERTISSEMENT En cas de remplacement du c ble d alimentation cette op ration doit tre effectu e se...

Страница 17: ...ca Olimpia Splendid ou por pessoal com qualifica o an loga INTERRUP O DE CORRENTE Se durante o funcionamento faltar a corrente el ctrica fica memorizado o ltimo funcionamento em que se encontrava o de...

Страница 18: ...EMPLOI ET ENTRETIEN PANNEAU DE COMMANDE Les touches et les voyants pr sents sur le panneau de commande ont la signification suivante Fig 4 A S lecteur humidit veille B Voyant bac de r cup ration des...

Страница 19: ...e omgeving wordt verhoogd door de knop met de wijzers van de klok mee te draaien en wordt verlaagd door de knop tegen de wijzers van de klok in te draaien De maximumcapaciteit die geselecteerd kan wor...

Страница 20: ...Then restart the dehumidifier FUNZIONAMENTO CON SCARICO CONTINUO Se avete l esigenza di far funziona re il deumidificatore per un lungo tempo senza avere la possibilit di svuotare periodicamente la t...

Страница 21: ...arga de agua y qu tela de la cubierta posterior del deshumidificador Fig 5 Ref A Extraiga el tap n de goma del racor de descarga de la cubeta colectora de agua Fig 5 Ref B Introduzca un tubo de goma n...

Страница 22: ...xtraire le bac de l appareil fig 6 Vider l eau contenue dans le r cipient Repositionner le bac dans son logement ATTENTION eau non potable n tant pas indiqu e un usage alimentaire WARNING Make sure th...

Страница 23: ...n WERKING BIJ EEN LAGE TEMPERATUUR Het ontvochtigingsapparaat kan ook bij zeer lage temperaturen werken tot een minimumwaarde van 5 C In deze gevallen zorgt het ontvochtigingsapparaat voor de uit voer...

Страница 24: ...s in horizontaler Lage darf das Ger t erst eine Stunde nach dem Aufrichten in Betrieb gesetzt werden Vor dem Transport ist der Kondenswasserbeh lterzuentleeren NETTOYAGE DU FILTRE AIR Le filtre retien...

Страница 25: ...flecha A para liberarlo de los ganchos a continuaci n extraiga el filtro de la m quina tirando de la leng eta en la direcci n indicada por la flecha B Fig 7 Limpieelfiltrodeaireconunchorro de agua y d...

Страница 26: ...brancher la fiche de la prise de courant NETTOYAGE DU D SHUMIDIFICATEUR Avant de nettoyer le d shumidificateur toujours d brancher la fiche de la prise de courant Pour le nettoyage externe n utiliser...

Страница 27: ...lleen schoonmaakproducten en geen benzine diesel of soortgelijke pro ducten Gebruik een vochtige doek om te voorkomen dat er water in het apparaat terechtkomt Gebruik geen directe waterstraal omdat de...

Страница 28: ...eur 2 p les S4 Interrupteur de l humidostat B1 Capteur de l humidostat T1 Humidostat ELEKTROSCHALTPLAN F1 Kompressor Thermoschutz F2 Thermostat zur Vermeidung von Reifbildung H1 Kontrolllampe maximale...

Страница 29: ...en rijpvorming H1 Controlelampje max peil condens M1 Motor compressor M2 Motor ventilator X3 Connector 2 polen S2 Microschakelaar tank vol X1 Connector 2 polen X2 Connector 2 polen S4 Schakelaar vorch...

Страница 30: ...ry bulb wet bulb Min operating conditions dry bulb wet bulb Fuse Tension d alimentation Puissance absorb e en mode d shumidification Air trait R frig rant Humidostat Dispositif de d givrage Contenance...

Страница 31: ...Refrigerante Interruptor de humidade Dispositivodedescongela o Capacidade do tanque Dimens es hxlxp mm Peso Condi es de funcionamento m ximo na desumidifica o bolbo seco bolbo h mido Condi es de funci...

Страница 32: ...ziona ma non riduce l umidit nel locale ANOMALIES POSSIBLES CAUSES La fiche n est pas branch e L humidistat est r gl sur le minimum Le bidon est plein d eau La temp rature et l humidit du local sont t...

Страница 33: ...uito baixas Local muito grande No local h muitas fontes de humidade liquidos em ebuli o SOLU ES Introduza a ficha ou controle que haja electricidade Regule na posi o desejada Esvazie o recipiente norm...

Страница 34: ...GB F D 36 I...

Страница 35: ...STALLATION USE AND MAINTENANCE INSTRUCTIONS POUR L INSTALLATION L EMPLOI ET L ENTRETIEN HANDBUCH F R INSTALLATION GEBRAUCH UND WARTUNG INSTRUCCIONES PARA LA INSTALACI N USO Y MANTENIMIENTO MANUAL DE I...

Страница 36: ...NING THE DEHUMIDIFIER 3 10 STORING THE DEHUMIDIFIER ELECTRICAL DIAGRAM SPECIFICATIONS TROUBLE SHOOTING SOMMAIRE 1 GENERALITES 1 1 INFORMATIONS GENERALES 1 2 SYMBOLOGIE 1 2 1 Pictogrammes r dactionnels...

Страница 37: ...MANUTEN O 3 1 PAINEL DE COMANDOS 3 2 SELEC O E FUN ES 3 2 1 Stand by 3 2 2 Selec o da modalidade de funcionamento 3 2 3 Visualiza o da temperatura e da humidade do ambiente 3 3 FUNCIONAMENTO COM CARG...

Страница 38: ...nt r serv aux termes de la loi avec interdiction de reproduction ou de transmission tiers sans l autorisation expresse de le fabricant Lireattentivementlepr sentmanuel avantdeproc der touteop ration i...

Страница 39: ...evem serdelxadosaoalcancedascrin as pois s opotenciaisfontesdeperigo AFIRMACONSTRUTORAN OSEAS SUMEARESPONSABILIDADEPOR DANOSAPESSOASOUACOISAS PROVOCADOS PELA INOBSERV NCIA DAS NORMAS CONTIDASNOPRESENT...

Страница 40: ...t de mani re univoque les informations n cessaires pour une utilisation correcte de la machine dans des conditions de s curit Pictogrammes r dactionnels Service Indique des situations o il faut inform...

Страница 41: ...firma construtora M olevantada Assinala as ac es que n o se devem absolutamente efectuar Pictogramas relativos seguran a Tens oel tricaperigosa Avisa o pessoal interessado que a opera o descrita apre...

Страница 42: ...ving 2 Control panel 3 Air inlet grille 4 Condensate collection tank 5 Air outlet grill 6 Continuous water discharge plug cover MPORTANT Afin d viter tout risque d lectrocution il est indispensable de...

Страница 43: ...entro de recolha e de reciclagem para aparelhos el ctricos e electr nicos Gra as ao seu contributo para a elimina o correcta deste produto protegeoambienteeasa dep blica Aelimina oincorrectaderes duos...

Страница 44: ...caused by inappropriate incorrect or unreasonableuse 1 5 DESCRIPTION DU FONCTIONNEMENT L air humide aspir par le ventilateur traverse un serpentin r frig rant qui provoque la condensation de l humi d...

Страница 45: ...n de compressortevoorkomenwordt dezelaatstemeteenvertragingvan 3 minuten ten opzichte van de laatste uitschakeling ervan geactiveerd Dit apparaat mag uitsluitend gebruikt worden voor het doel waarvoor...

Страница 46: ...phere R 134A is a fluorinated greenhouse gas covered by Kyoto Protocol with a Global Warming Potential GWP 1300 En cas de panne et ou de mauvais fonctionnement de l appareil l teindre et ne pas tenter...

Страница 47: ...n vertrekken waar de lucht gas olie of zwavel kan bevatten en ook niet in de buurt van warmtebronnen Leg geen zware of hete voorwerpen bovenop het apparaat Als u besluit om het apparaat af te danken w...

Страница 48: ...ce with equivalent functions INSTALLATION Installer l appareil dans une pi ce appropri e Nous vous recommandons de m nager un espace libre d au moins 50 cm sur le devant de la grille d aspiration de l...

Страница 49: ...stroom niet uitvalt vanwege overbelasting van het elektriciteitsnet WAARSCHUWING deaansluitingophet voedingsnetmoetuitgevoerdworden onderdezorgvandeinstallateuren volgensdnationalenormendievan kracht...

Страница 50: ...t least an hour to avoid damage to the internal parts of the appliance AVERTISSEMENT En cas de remplacement du c ble d alimentation cette op ration doit tre effectu e seulement par un technicien du se...

Страница 51: ...gura o MONTAGEM DAS RODAS para as vers es com rodas As rodas encontram se den tro de um saco colocado dentro do dep sito de recolha da condensa o Com as m os introduzir os pernos das rodas nos respect...

Страница 52: ...eactivate the appliance press the key 1 MODE D EMPLOI ET ENTRETIEN TABLEAU DE COMMANDE Le d shumidificateur que vous avez achet est quip d une logique lectronique qui g re son fonctionnement de mani r...

Страница 53: ...idsgraad temperatuur 4 Toets afname gewenste vochtigheidsgraad temperatuur 5 Toets signalering gemeten vochtigheidsgraad omgevingstemperatuur 6 Aanduiding temperatuur 7 Aanduiding vochtigheidsgraad 8...

Страница 54: ...king again It is advisable to set a desired humidity value between 40 and 60 S lection mode de fonctionnement La touche 2 figure 4 permet la s lection entre deux modes de fonctionnement de l appareil...

Страница 55: ...esta fun o indicada pelo s mbolo gota aceso no display poss vel configurar o grau de humidade desejado para o ambiente no qual se encontra o aparelho Premindo as teclas 3 o 4 aumenta se ou diminui se...

Страница 56: ...r ansteigt Im Falle da diese Alarm meldung auch bei einem h heren F e u c h t i g k e i t s g r a d eingeblendet bleibt ist ein Service Zentrum zu Hilfe zu ziehen Affichage de la temp rature et de l h...

Страница 57: ...splay los valores de temperatura y humedad ambiente detectados por el aparato ADVERTENCIA Cuando la humedad relati va desciende a valores muy bajos 20 25 o bien que no justifiquen el funcionamiento de...

Страница 58: ...Then restart the dehumidifier FUNZIONAMENTO CON SCARICO CONTINUO Se avete l esigenza di far funziona re il deumidificatore per un lungo tempo senza avere la possibilit di svuotare periodicamente la t...

Страница 59: ...arga de agua y qu tela de la cubierta posterior del deshumidificador Fig 5 Ref A Extraiga el tap n de goma del racor de descarga de la cubeta colectora de agua Fig 5 Ref B Introduzca un tubo de goma n...

Страница 60: ...il fig 6 Vider l eau contenue dans le r cipient Repositionner le bac dans son logement ATTENTION eau non potable n tant pas indiqu e un usage alimentaire WARNING Make sure that the pipe does not excee...

Страница 61: ...LAGE TEMPERATUUR Het ontvochtigingsapparaat kan ook bij zeer lage temperaturen werken tot een minimumwaarde van 5 C In deze gevallen zorgt de elektroni sche logica voor de uitvoering van de automatisc...

Страница 62: ...es in horizontaler Lage darf das Ger t erst eine Stunde nach dem Aufrichten in Betrieb gesetzt werden Vor dem Transport ist der Kondenswasserbeh lterzuentleeren NETTOYAGE DU FILTRE AIR Le filtre retie...

Страница 63: ...flecha A para liberarlo de los ganchos a continuaci n extraiga el filtro de la m quina tirando de la leng eta en la direcci n indicada por la flecha B Fig 7 Limpieelfiltrodeaireconunchorro de agua y d...

Страница 64: ...brancher la fiche de la prise de courant NETTOYAGE DU D SHUMIDIFICATEUR Avant de nettoyer le d shumidificateur toujours d brancher la fiche de la prise de courant Pour le nettoyage externe n utiliser...

Страница 65: ...n geen benzine diesel of soortgelijke producten Gebruikeenvochtigedoek om te voorkomen dat er water in het apparaat terechtkomt Gebruik geen directe waterstraal omdat de veiligheid van het apparaat hi...

Страница 66: ...mp rature vaporateur F1 Protection contre les surcharges M1 Compresseur M2 Moteur ventilateur S1 Micro interrupteur ELEKTROSCHALTPLAN A1 Leistungstafel A2 Steuertafel A3 Feuchtigkeits Temperatur Senso...

Страница 67: ...A A1 Elektrisch paneel A2 Bedieningspaneel A3 Sensorpaneel vochtigheid temperatuur B1 Temperatuursonde verdamper F1 Beveiliging overbelasting M1 Compressor M2 Ventilatormotor S1 Microschakelaar ESQUEM...

Страница 68: ...ity Dimensions hxlxd mm Weight Conditions of maximum working in dehumidification process dry bulb wet bulb Min operating conditions dry bulb wet bulb Fuse Tension d alimentation Puissance absorb e en...

Страница 69: ...U R 32 C 80 U R Ar tratado Refrigerante Interruptor de humidade Dispositivodedescongela o Capacidade do tanque Dimens es hxlxp mm Peso Condi es de funcionamento m ximo na desumidifica o bolbo seco bo...

Страница 70: ...on temperature sensor is damaged The ambient temperature is too low INDIVIDUAZIONE DI ANOMALIE DI FUNZIONAMENTO CAUSE Spina non collegata L umidostato regolato sul minimo La tanica piena d acqua Le te...

Страница 71: ...t du local Le code alarme Hr clignotant s affiche l cran Le code alarme tE clignotant s affiche l cran Le code alarme Lo clignotant s affiche l cran KLEINE ST RUNGEN SELBST BEHEBEN ST RUNGEN Der Entfe...

Страница 72: ...y aparece el c digo alarma Hr titilante En el display aparece el c digo alarma tE titilante En el display aparece el c digo alarma Lo titilante DETEC O DE ANOMALIAS DE FUNCIONAMENTO CAUSAS A ficha est...

Страница 73: ...n met kokend water e d in de ruimte De omgevingsvochtigheidsgraad is te laag De sensor voor de temperatuur en vochtigheidsgraad van de ruimte is beschadigd De sensor voor de verdampingstemperatuur van...

Страница 74: ...GB F D 40 I...

Отзывы: