Getting started > 27
M
AC
-
PRINTER
DRIVER
The information in this section is based on Mac OS X Lion (10.7). Other versions may
appear slightly different, but the principles are the same.
1.
Insert the DVD-ROM and run the Oki driver installer program.
2.
Follow the on-screen instructions to install the printer driver.
3.
Attach the printer to a USB port of your computer.
4.
Switch on the printer.
5.
Choose
Apple Menu > System Preferences > Print & Scan
.
6.
If the printer is already in the list of printers, click “
-
” to remove it.
7.
Click “
+
” to add a new printer.
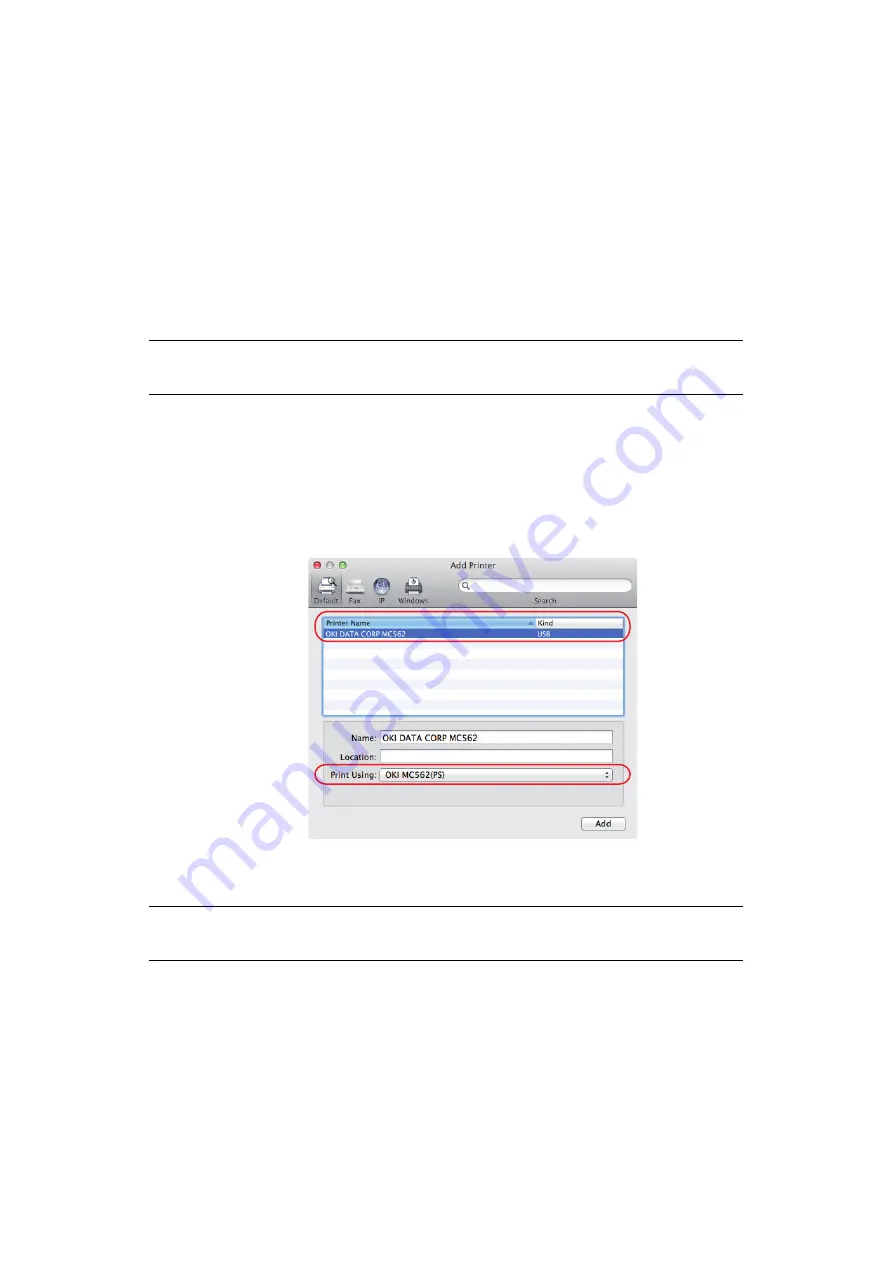
8.
Ensure:
>
The
Default
tab is selected and select your machine from the list.
>
Your machine is displayed as
Kind
“USB” in the list of available printers.
>
The
Print Using:
selection matches your machine.
If “Generic PostScript Printer” is displayed, select a driver that matches.
9.
Click
Add
.
10.
Click
Configure...
and ensure the hardware options displayed match your machine.
11.
The printer is added to the list of printers.
12.
Restart your computer.
NOTE
This is necessary as Lion may not be using the correct Oki printer driver files.
NOTE
Hardware options are not configured automatically.


