background image

ES 2024/2024e  Troubleshooting  • 401

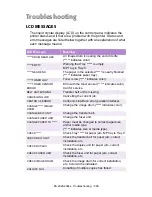
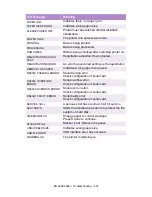
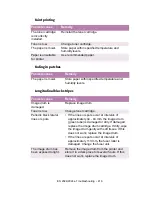
PAPER JAM

Indicates there is a paper jam.

PAPER SIZE ERROR

Indicates wrong paper size.

PLEASE POWER OFF

Printer must be switched off after disk/flash 
initialization.

POWER SAVE

The printer is in power save mode.

PRINTING

Data is being printed.

PROCESSING

Data is being processed.

RAM CHECK

RAM is being checked after switching printer on.

REGISTRATION ADJUST 
TEST

Registration adjustment being tested.

REGISTRATION ERROR

An error has occurred setting up the registration.

REMOVE THE PAPER

Indicates wrong paper being used.

RS232C FRAMING ERROR

Serial framing error. 
Check configuration of serial card.

RS232C OVERFLOW 
ERROR

Serial overflow error. 
Check configuration of serial card.

RS232C OVERRUN ERROR

Serial overrun error. 
Check configuration of serial card.

RS232C PARITY ERROR

Serial parity error. 
Check configuration of serial card.

SERVICE CALL

A serious error has occurred. Call for service.

SHUTDOWN

Starts the shutdown procedure to protect the file 
system on hard disk.

SIZE MISMATCH

Change paper to correct size/type. 
Press On-line to continue.

STACKER FULL

Stacker is full. Remove the paper.

UNSUITABLE SIZE

Indicates wrong paper size.

USB I/F ERROR

USB interface error has occurred.

WARMING UP

The printer is warming up.

LCD Message

Meaning

Содержание ES2024

Страница 1: ......

Страница 2: ...herein Copyright 2003 All rights reserved As an ENERGY STAR Program Participant the manufacturer has determined that this product meets the ENERGY STAR guidelines for energy efficiency This product co...

Страница 3: ...ons 41 Paper feed and exit 43 Printer settings 45 List of user menu settings 46 List of administrator menu settings 73 Setting color tuning from the front panel 76 Switching off 79 Interfaces 80 Windo...

Страница 4: ...use 159 Enabling installed options in the drivers 160 Changing defaults for paper feed size and media in the driver 168 Operation 174 Factors that affect color printing 175 Choosing a color matching...

Страница 5: ...p printing 265 Printing custom page sizes 268 Changing the resolution for a print job 273 Duplex printing printing on both sides of the paper 274 Printing booklets PCL Only Windows Me only 276 Printin...

Страница 6: ...ng posters PCL driver only 375 Maintenance 377 Adding Paper 377 Changing the toner cartridge 380 Changing the image drum 385 Changing the transfer belt 388 Changing the fuser unit 392 Cleaning the LED...

Страница 7: ...ion menu 444 PPR Emulation menu 445 FX Emulation menu 446 Parallel menu 446 USB menu 447 Network menu 447 Memory menu 447 Disk Maintenance menu 448 System Adjust menu 448 Maintenance menu 449 Software...

Страница 8: ...s like this A caution provides additional information which if ignored may result in equipment malfunction or damage WARNING A warning appears like this A warning provides additional information which...

Страница 9: ...advice on how to use this User s Guide to get the most from your printer MODEL SUMMARY Model Resolution Print speed Network card Duplex Unit Memory Hard disk Executive Series 2024 600 x 1200 dpi 20 pp...

Страница 10: ...ivity via internal network interface card optional on ES 2024 Environmentally friendly the advanced power save mode minimizes power consumption and the separate toner and drum design cuts down on wast...

Страница 11: ...formation in two ways In the list of bookmarks down the left hand side of your screen click the topic of interest to jump to the required topic If the bookmarks are not available use the Table of Cont...

Страница 12: ...printing from Acrobat Reader is 1 From the toolbar select File then Print or press the Ctrl P keys 2 Choose which pages you wish to print a All pages for the entire manual b Current page for the page...

Страница 13: ...1 The printer 2 4 toner cartridges cyan magenta yellow and black 3 Power cable 4 CD ROM disks 5 LED lens cleaner not illustrated 6 Light proof plastic bags not illustrated 7 Documentation not illustra...

Страница 14: ...ES 2024 2024e Getting Started 14 CD ROM DISK CONTENTS The CD ROM disks supplied with your printer contain the following software CD1 Drivers Software Utilities CD2 Manuals...

Страница 15: ...at surface large enough and strong enough to accept the size and weight of the printer There must be sufficient space around the printer to allow for access and printer maintenance 05 eps 20cm 7 875in...

Страница 16: ...NTER COMPONENTS 1 Top cover 2 Control panel 3 Top cover release catch 4 Multi purpose tray manual feed 5 Paper support extension printer components 1K eps 6 Paper guides 7 Front cover 8 Paper tray 9 P...

Страница 17: ...LED heads 4 12 Discharge roller 13 Fuser unit printer components 2K eps 14 Image drum and toner cartridge cyan 15 Image drum and toner cartridge magenta 16 Image drum and toner cartridge yellow 17 Im...

Страница 18: ...Started 18 18 Power connector 19 Rear exit paper tray 20 Interfaces and option card slott printer components 5K eps 21 USB interface connector 22 Parallel interface connector 23 Network interface car...

Страница 19: ...to a computer and power supply the toner cartridges must be installed and paper inserted in the paper tray PACKAGING AND PROTECTIVE SHEET REMOVAL 1 Remove any adhesive tape and packaging from the prin...

Страница 20: ...ES 2024 2024e Setting up 20 3 Remove the LED head restrainer from behind the LED heads in the top cover packaging removalK eps...

Страница 21: ...drums and place them on a level surface image drum removeK eps CAUTION Never expose image drums to light for more than 5 minutes Always hold image drum by the ends Never expose image drums to direct...

Страница 22: ...sheets from each of the four image drums protective sheet remove1K eps and protective sheet remove2K eps 6 Replace the four image drums into the printer making sure each image drum is installed in it...

Страница 23: ...toner cartridge back and forth several times then holding it horizontally remove the tape toner shakeK eps and toner tape removeK eps WARNING Take extreme care when handling toner Toner can be harmfu...

Страница 24: ...oner release lever toner clip removeK eps 4 Insert the toner cartridge into the black image drum left side first engaging the drum locating peg in the hole in the toner cartridge Make sure the colors...

Страница 25: ...drum toner cartridge install 2K eps 6 Gently push the colored lever toward the rear of the machine until it stops This releases the toner into the image drum CAUTION The lever should go back easily I...

Страница 26: ...2024e Setting up 26 toner cartridge install 3K eps 7 Repeat the process for each color toner cartridge being careful to match the color toner to the color image drum 8 Close the top cover close top co...

Страница 27: ...ES 2024 2024e Setting up 27 LOADING PAPER 1 Remove the paper tray from the printer...

Страница 28: ...ES 2024 2024e Setting up 28 2 Adjust the paper guides and rear stopper for the size of paper being used...

Страница 29: ...he paper guides and rear stopper Don t overfill the paper tray Capacity depends on the type of paper and the paper weight Don t load damaged paper Don t load paper of different sizes paper quality or...

Страница 30: ...ES 2024 2024e Setting up 30 3 If installed a lower paper tray cannot be used to print if there is no paper tray inserted above it 1 2 9 1 2 9 1 2 8...

Страница 31: ...ht 5 For face up printing make sure the rear paper exit is open and the paper supports are extended Paper is stacked in reverse order and tray capacity is approximately 100 sheets depending on paper w...

Страница 32: ...size of the media being used NOTE Don t exceed the Paper Full line about 100 sheets depending on paper weight 50 transparencies or 10 envelopes Load envelopes face up flap down and letterhead statione...

Страница 33: ...m up sequence When the printer is ready the READY indicator comes on and stays on green and the LCD indicates ONLINE WARNING Ensure both the printer power switch and the AC supply are switched OFF bef...

Страница 34: ...ill continue FLASHING indicates that attention is required but printing will stop 2 Ready indicator green ON ready to receive data FLASHING indicates processing data or error 3 Liquid crystal display...

Страница 35: ...ect the menu item or value indicated on the LCD 5 Online button Switches between online and offline status When pressed in Menu mode it returns the printer to on line status When pressed with DATA PRE...

Страница 36: ...until SYSTEM CONFIG MENU is displayed 3 Press the SELECT button 4 Press the ITEM button repeatedly until LANGUAGE is displayed 5 Press the VALUE button repeatedly until the required language is displ...

Страница 37: ...ke sure there is paper in the paper tray 2 Press the MENU button until the INFORMATION MENU is displayed then press the SELECT button 3 Confirm that PRINT MENU MAP is displayed on the LCD 4 Press the...

Страница 38: ...lected paper feed NOTE If the settings in the printer differ from those selected on your computer the printer will not print and the LCD will display an error message The following printer settings ar...

Страница 39: ...on An asterisk appears next to the selected paper size 5 Press the ONLINE button to return the printer to online status 6 Select the correct paper settings in the printer driver before printing the fi...

Страница 40: ...HT for the required tray is displayed 4 Press the VALUE or button until the required paper type or weight is displayed then press the SELECT button An asterisk appears next to the selected paper type...

Страница 41: ...give poor print quality Print quality can be improved by changing the media setting to Ultra Heavy However this will reduce the output speed and prevent the use of the duplex option Don t use very sm...

Страница 42: ...es Don t use envelopes with windows or metal clasps Don t use envelopes with self sealing flaps Don t use damp damaged or curled paper envelopes Labels For recommended labels see your Handy Reference...

Страница 43: ...owing tables Paper Sizes Feed Exit Paper size Tray 1 Tray 2 Tray 3 MP Tray Manual Rear Face up Top Face down A4 S Da a S Simplex D Duplex printing on both sides of the paper S Da Sa S Da S Da A5 S Da...

Страница 44: ...20 to 24 lb 75 90 g m2 Medium S Da a S Simplex D Duplex printing on both sides of the paper S Da Sa S Da S Da 25 to 27 lb 91 104 g m2 Medium heavy S Da S Da Sa S Da S Da 28 to 32 lb 105 122 g m2 Heav...

Страница 45: ...displayed then press the SELECT button 2 Press the ITEM or button until the required item is displayed 3 Press the VALUE or button until the required value is displayed 4 Press the SELECT button Sele...

Страница 46: ...t to DISABLE in the Admin menu SELECT JOB No jobs All jobs File name 1 to nn Selects printing job for Secure Print or Proof and Print This item is also displayed even when OP MENU ALL CATEGORY is set...

Страница 47: ...D check pattern to detect bad ID Displayed only if TEST PRINT MENU of the System Maintenance Menu is set to ENABLE Shutdown Menu Item Value Description SHUTDOWN START Execute Printer shut down sequenc...

Страница 48: ...ay Switch MP TRAY USAGE Normal tray High priority tray Feed when mismatching Do not use Specifies MP tray usage Normal tray Tray select switch Use as a normal tray High priority tray Valid with Tray s...

Страница 49: ...ys prints at the monochrome print speed ORIENTATION Portrait Landscape Sets page orientation for printing LINE PER PAGE 5 to 128 Default 60 Sets the number of lines that can be printed on a standard l...

Страница 50: ...nly displayed if installed TRAY3 MEDIATYPE Plain Letterhead Bond Recycled Card stock Rough Selects the media type for optional Tray3 Only displayed if installed TRAY3 MEDIAWEIGHT Auto Light Medium lig...

Страница 51: ...ets the dimensions of custom paper For these dimensions to work the MP tray paper size must be set to custom Y DIMENSION 5 inches to 47 2 inches default 11 inches 127 mm to 1200 mm Sets the dimensions...

Страница 52: ...the printer is idle It may become invalid if executed in any other state COLOR TUNING Print pattern Prints the pattern for the user to manually adjust TRC Ordinarily this function is not needed becaus...

Страница 53: ...in the horizontal direction The adjustment is reflected as an offset addition value to the corrections through Auto color Registration Correction Values are adjusted in increments of 026 mm Example i...

Страница 54: ...on controls the appropriate print density thus 100 output is not always enabled Selecting ENABLE will allow 100 output In actual printing the TCR values too are controlled by color Matching This funct...

Страница 55: ...PS communication protocol mode of data from OkiLAN 7300e In RAW mode Ctrl T is invalid CLEARABLE WARNING On Job PCL emulation Sets the time before deleting error messages If On press Error Delete swit...

Страница 56: ...job that was being printed when the paper jam occurred will be cancelled after clearing the paper jam When set to ON the print job will continue after the jam has been cleared ERROR REPORT ON OFF Whe...

Страница 57: ...I internal resident font I000 Courier C Font stored in the printer s Flash memory S downloaded soft font stored on the printer s internal hard disk drive Applies only to printers with a hard disk driv...

Страница 58: ...USPSZIP Bulgarian CWI Hung DeskTop German Greek 437 Greek 437 Cy Greek 928 Hebrew NC Hebrew OC IBM 437 IBM 850 IBM 860 IBM 863 IBM 865 ISO Dutch ISO L1 ISO L2 ISO L5 ISO L6 ISO L9 ISO Swedish1 ISO Sw...

Страница 59: ...ION LF LF CR Sets functionality on receipt of LF code in PCL mode PRINT MARGIN Normal 1 5 inch 1 6 inch Sets the width of the non printed margins Normal PCL emulation compatible 1 5 inch domestic mode...

Страница 60: ...tched ON emphasizes the pen width to improve the appearance of lines specified with minimum width CHARACTER PITCH 10 CPI 12 CPI 17 CPI 20 CPI PROPORTIONAL Specifies character pitch in IBM PPR emulatio...

Страница 61: ...ISO 25 Fre ISO 57 Chi ISO 60 Nor ISO 61 Nor ISO 69 Fre ISO 84 Por ISO 85 Spa Kamenicky Legal Math 8 MC Text MS Publish PC Ext D N PC Ext US PC Set1 PC Set2 D N PC Set2 US Bulgarian CWI Hung DeskTop G...

Страница 62: ...NCH Specifies the length of paper TOF POSITION 0 0 to 1 0 INCH in 0 1 inch increments Specifies the distance of print from the top edge of the paper LEFT MARGIN 0 0 to 1 0 INCH in 0 1 inch increments...

Страница 63: ...rbo Croat2 Spanish Ukrainian VN Int l VN Math VN US Win 3 0 Win 3 1 Blt Win 3 1 Cyr Win 3 1 Grk Win 3 1 Heb Win 3 1 L1 Win 3 1 L2 Win 3 1 L5 ISO Swedish1 ISO Swedish2 ISO Swedish3 ISO 2 IRV ISO 4 UK I...

Страница 64: ...COLUMN Specifies the number of columns that will print on a page characters per line FORM LENGTH 11 inch 11 7 inch 12 inch Specifies the length of print media TOF POSITION 0 0 to 1 0 inch in 0 01 inc...

Страница 65: ...0 S Wide 3 0 S ACK BUSY TIMING ACK IN BUSY ACK WHILE BUSY Sets output order for ACK and BUSY during reception ACK IN BUSY BUSY LOW to the end of the ACK pulse ACK WHILE BUSY BUSY LOW to the center of...

Страница 66: ...erface SOFT RESET ENABLE DISABLE Enables Disables soft reset command OFFLINE RECEIVE ENABLE DISABLE Enable maintains reception without changing the interface signal even if an alarm occurs The interfa...

Страница 67: ...net frame type DHCP BOOTP ENABLE DISABLE Selects whether selection of DHCP BOOTP is automatic RARP ENABLE DISABLE Selects whether selection of RARP is automatic IP ADDRESS xxx xxx xxx xxx Configures I...

Страница 68: ...printer RESOURCE SAVE AUTO OFF 0 5 MB 1 MB 2 MB 4 MB 8 MB 16 MB 32 MB Set the size of the font cache area and depends on the amount of memory installed in the printer FLASH INITIALIZE EXECUTE Initiali...

Страница 69: ...he OKI Storage Device Manager software by the System Administrator or by someone who is knowledgeable in this area Disk Maintenance Menu The default settings are bold Item Value Description HDD INITIA...

Страница 70: ...ts DUPLEX Y ADJUST 0 00 MM Range 0 25 TO 2 0 MM and 2 0 TO 0 25 MM in 0 25 mm increments Adjusts overall print position of print face vertically in 0 20 increments TRAY 1 LEGAL 14 LEGAL 14 LEGAL 13 5...

Страница 71: ...aves the current menu settings RESTORE EXECUTE Reverts to stored menu settings Only displayed if there are saved menu settings POWER SAVE ENABLE DISABLE When no input is received for a specified time...

Страница 72: ...printed in monochrome BLACK DRUM LIFE REMAINING nnn Displays the remaining life of the black image drum as a percentage CYAN DRUM LIFE REMAINING nnn Displays the remaining life of the cyan image drum...

Страница 73: ...is set to ENABLE even though ALL CATEGORY is set to DISABLE INFORMATION MENU ENABLE DISABLE Enable Disable INFORMATION MENU Set to Disable INFORMATION MENU is not displayed SHUTDOWN MENU ENABLE DISAB...

Страница 74: ...MENU ENABLE DISABLE Displayed only when the Network Interface Card is installed Enable Disable NETWORK MENU Set to Disable NETWORK MENU is not displayed MEMORY MENU ENABLE DISABLE Enable Disable MEMOR...

Страница 75: ...es and not ordinarily used RESET M GAMMA FILTER EXECUTE RESET Y GAMMA FILTER EXECUTE RESET K GAMMA FILTER EXECUTE Block Device Menu The default settings are bold Item Value Description INITIALIZE LOCK...

Страница 76: ...setting default 0 maximum 3 To decrease the color intensity use a higher negative setting default 0 maximum 3 For example to adjust the intensity of the magenta portion Important In most cases using C...

Страница 77: ...he ITEM button one or more times until COLOR TUNING displays d Press SELECT The Color Tuning Pattern prints 2 Adjust the Magenta highlight color a Press the ITEM button one or more times until MAGENTA...

Страница 78: ...TEM button one or more times until MAGENTA DARK nn displays b Press the VALUE button one or more times until the new value you wish to use displays e g nn 3 c Press the SELECT button An asterisk appea...

Страница 79: ...the printer off using the power switch CAUTION Never turn the printer off while it is printing If the optional hard disk has been installed the following procedure must be followed before turning off...

Страница 80: ...s port requires a cable conforming to USB version 1 1 or above The operation of a printer is not assured if a USB compatible device is connected concurrently with other USB compatible machines When co...

Страница 81: ...ES 2024 2024e Setting up 81 See your printed Software Installation Guide for information on Making the interface connections Installing the printer drivers Installing network software...

Страница 82: ...l be printing PostScript graphics choose the PostScript driver In this situation performance will be faster and graphics will be printed at their best quality If neither driver seems to cover all your...

Страница 83: ...INSTALLED OPTIONS IN THE DRIVER Certain options such as additional memory the duplexer or additional trays may be installed in your printer Before using the printer you must enter the printer driver s...

Страница 84: ...lick Start Settings Printers and Faxes 2 Highlight the printer name and click File then Properties 3 Click the Device Settings tab 4 Under Installable Options click Memory Configuration then set the m...

Страница 85: ...Click Start Settings Printers and Faxes 2 Highlight the printer name and click File then Properties 3 Click the Device Settings tab 4 Under Installable Options make sure the setting in the Hard Disk d...

Страница 86: ...86 PCL driver 1 Click Start Settings Printers and Faxes 2 Highlight the printer name and click File then Properties 3 On the Device Option tab click Printer Hard Disk C73XPPCLHDDK tif 4 Click OK and...

Страница 87: ...d Faxes 2 Highlight the printer name and click File then Properties 3 Click the Device Settings tab Under Installable Options click Available Trays then select the appropriate number of trays not incl...

Страница 88: ...t Settings Printers and Faxes 2 Highlight the printer name and click File then Properties 3 On the Device Option tab select the appropriate number of trays not including the Multi purpose tray C73XPPC...

Страница 89: ...ick Start Settings Printers and Faxes 2 Highlight the printer name and click File then Properties 3 Click the Device Settings tab Under Installable Options click Duplex and select Installed in the dro...

Страница 90: ...PCL driver 1 Click Start Settings Printers and Faxes 2 Highlight the printer name and click File then Properties 3 Click the Device Option tab click Duplex Option Unit C73XPPCLDuplex1k tif 4 Click OK...

Страница 91: ...ructions are given as a guide only Some software applications require the paper feed size and media settings to be selected from within the software under Page Setup PostScript drivers 1 Click Start S...

Страница 92: ...rinter Drivers 92 2 Right click the printer name and click Printing Preferences Important If you will be using heavy media transparencies envelopes or labels make sure you open the rear exit before pr...

Страница 93: ...2024e Windows XP Printer Drivers 93 C73XPPSPrefk tif 3 Click the Paper Quality tab Under Tray Selection select the paper feed in the Paper Source drop down list C73XPPSSourceK tif 4 Click the Advanced...

Страница 94: ...ES 2024 2024e Windows XP Printer Drivers 94 5 Under Paper Output select the media size in the Paper Size drop down list C73XPPSSizeK tif...

Страница 95: ...indows XP Printer Drivers 95 6 Under Document Options Printer Features click Media Type and select the media from the drop down list C73XPPSMediaTypeK tif 7 Click OK twice and close the Printers and F...

Страница 96: ...Drivers 96 PCL drivers 1 Click Start Settings Printers and Faxes 2 Right click the printer name and click Printing Preferences 3 On the Setup tab under Media select the required paper size in the Size...

Страница 97: ...ES 2024 2024e Windows XP Printer Drivers 97 4 Select the required paper feed under Source C73XPPCLSourceK tif NOTE If a paper tray is selected the Weight field becomes visible...

Страница 98: ...2024 2024e Windows XP Printer Drivers 98 5 Select the required paper type under Weight C73XPPCLWeightK tif NOTE If Printer Setting is selected make sure the printer has been set to the correct media t...

Страница 99: ...g box a new Status tab is added an Option button is added to the Device Option tab This utility allows you to view but not change the status of the following on the Status tab paper trays installed an...

Страница 100: ...electing print resolution see page 126 Duplex printing see page 128 Watermarks see page 134 Collating see page 136 Proof and Print see page 137 Secure print printing confidential documents see page 14...

Страница 101: ...re listed below Differences between the range of colors a monitor or printer can reproduce Neither a printer nor a monitor is capable of reproducing the full range of colors visible to the human eye E...

Страница 102: ...sequent sections of this User Manual Monitor settings The brightness and contrast controls on your monitor can change how your document looks on screen Additionally your monitor color temperature infl...

Страница 103: ...hop may display color differently from office applications such as Microsoft Word Please see your application s online help or user manual for more information Paper type The type of paper used can al...

Страница 104: ...k CMYK Generally most documents you print will be in RGB format This is the most common and if you do not know your document s color mode assume that it is RGB Typically CMYK documents are only suppor...

Страница 105: ...imetric option see page 112 Use the Color Swatch Utility to print out a chart of RGB swatches and enter your desired RGB values in your application s color picker PS only see page 109 RGB or CMYK If y...

Страница 106: ...ation 106 Printing Vivid Colors RGB only Use Oki Color Matching see page 110 with the Monitor 6500k Vivid sRGB or Digital Camera settings PCL or PS RGB or CMYK Use PostScript Color Matching see page 1...

Страница 107: ...isplayed on your monitor To manually set the color matching options in the PCL driver 1 Click Start Settings Printers and Faxes 2 Right click the appropriate printer name and click Printing Preference...

Страница 108: ...500k Vivid Optimized for printing bright colors when using a monitor with a color temperature of 6500K Ideal for office graphics Monitor 9300k Optimized for printing photographs when using a monitor w...

Страница 109: ...Blue values to use in your application to match that printed color An example of using the Print Color Swatch function You wish to print a logo in a particular shade of red The steps you would follow...

Страница 110: ...ally set the color matching options in the PostScript driver 1 Click Start Settings Printers and Faxes 2 Right click the printer name and click Printing Preferences 3 Click the Color tab C73XPPSColor1...

Страница 111: ...r temperature of 6500K Monitor 6500k Vivid Optimized for printing bright colors when using a monitor with a color temperature of 6500K Ideal for office graphics and text Monitor 9300k Optimized for pr...

Страница 112: ...This uses PostScript Color Rendering Dictionaries built into the printer and affects both RGB and CMYK data Select the rendering type from the Rendering Intent drop down list C73XPPSColor3k tif Rende...

Страница 113: ...white to the usually paper white i e unlike Absolute Colorimetric this attempts to take the paper white into account Absolute Colorimetric Best for printing solid colors and tints such as Company log...

Страница 114: ...lor in the original device that was used to capture or display the image data For example an input device could be a scanner digital camera or monitor Output Profiles e g the ES 2024 provide informati...

Страница 115: ...up ICC profiles 1 Click Start Settings Printers and Faxes 2 Right click the printer name and click Printing Preferences 3 Click the Color tab 4 Under Color mode select Using ICC Profile in the Color...

Страница 116: ...the drop down lists under Select ICC profile 7 Select the desired Rendering Intent and type in a name for the profile and click OK The new name will appear in the Setting Name drop down list under ICC...

Страница 117: ...driver 1 Click Start Settings Printers and Faxes 2 Highlight the printer name and click File then Properties 3 Click the Color Management tab 4 Under Color Profiles currently associated with this prin...

Страница 118: ...PostScript driver 1 Open the file in your application and select File Print 2 In the Print dialog box click the appropriate PS driver on the General tab then click the Preferences button 3 On the Lay...

Страница 119: ...dialog box click the appropriate PCL driver on the General tab then click the Preferences button 3 On the Setup tab under Finishing Mode select the required number of pages per sheet C73XPPCLNUpk tif...

Страница 120: ...paper size before use range 3 to 8 inches 89 to 216 mm wide x 5 to 14 inches 127 to 356 mm long Printing custom pages using the PostScript driver 1 Make sure the rear exit path is open rear exit open...

Страница 121: ...r Quality tab Under Tray Selection select Multi Purpose Tray in the Paper Source drop down list C73_XP_PS_Custom1 bmp 1 Click the Advanced button Under Paper Output select Postscript Custom page Size...

Страница 122: ...om paper and select the Paper Feed Direction 3 Click OK three times 4 Click Print NOTE Long Edge First media feeds in long edge first Short Edge First media feeds in short edge first Long Edge First f...

Страница 123: ...1 Make sure the rear exit path is open rear exit openK eps 2 Open the file in your application and select File Print 3 In the Print dialog box click the PCL driver on the General tab then click the Pr...

Страница 124: ...down list The Set Free Size dialog box appears C73_XP_PCL_Custom1k tif 5 Select the Unit then enter the Width and Length measurements and click OK NOTE You may see a Warning dialog box indicating a co...

Страница 125: ...K then click Print NOTE To save the setting for future use Click Paper Feed Options then click Custom Size Select the unit then enter the relevant information for Width and Height and give your custom...

Страница 126: ...ect the required printing resolution under Quality C73XPPSResok tif and C73XPPCLResok tif NOTE These instructions explain how to change the settings as you are printing a job If you wish to change the...

Страница 127: ...ES 2024 2024e Windows XP Operation 127 5 Select Toner Saving if appropriate 6 Click OK then click Print...

Страница 128: ...e file in your application and select File Print 2 In the Print dialog box click the PS driver on the General tab then click the Preferences button NOTE The optional duplex unit must be installed in t...

Страница 129: ...ES 2024 2024e Windows XP Operation 129 3 On the Layout tab under Print on Both Sides select Flip on Long Edge or Flip on Short Edge C73_XP_PS_Duplex2 bmp 4 Click OK then click Print...

Страница 130: ...Open the file in your application and select File Print 2 In the Print dialog box click the PCL driver on the General tab then click the Preferences button 3 On the Setup tab under 2 Sided Printing se...

Страница 131: ...uplex unit installed and enabled in order to print booklets Not available on some network connections see the Help file Some software applications may not support booklet printing The right to left se...

Страница 132: ...ES 2024 2024e Windows XP Operation 132 3 On the Layout tab under Pages Per Sheet select Booklet in the drop down list C73_XP_PS_Booklet bmp 4 Click OK then click Print...

Страница 133: ...nt dialog box click the PCL driver on the General tab then click the Preferences button 3 On the Setup tab under Finishing Mode select Booklet in the drop down list C73XPPCLBookletk tif 4 Click the Op...

Страница 134: ...ONLY 1 Open the file in your application and select File Print 2 In the Print dialog box click the PCL driver on the General tab then click the Preferences button 3 On the Job Options tab click Waterm...

Страница 135: ...ment select First Page only 6 Click OK twice 7 Click Print NOTE To create a new watermark or edit an existing watermark Click the New or Edit button C93_XP_PCL_Watermark2 bmp Enter the text for the wa...

Страница 136: ...plication and select File Print 2 In the Print dialog box click the appropriate driver on the General tab then click the Preferences button 3 On the Job Options tab under Job Type enter the number of...

Страница 137: ...on the General tab then click the Preferences button NOTES The internal hard disk must be installed in the printer and enabled to allow for spooling of the print job before final printing If the hard...

Страница 138: ..._JobPIN bmp and C73_XP_PCL_JobPin bmp b Type in a four digit personal ID number from 0000 to 7777 then click OK 4 Enter the number of copies and if required select Collate Post Script driver only C73_...

Страница 139: ...ES 2024 2024e Windows XP Operation 139 6 After checking the proof print or delete if incorrect the remaining copies of the document using the procedures given below...

Страница 140: ...ob must be deleted from the printer 1 Press the MENU button to access the PRINT JOBS MENU and press the SELECT button 2 Enter your personal ID number using the buttons on the printer control panel 3 P...

Страница 141: ...cure Print NOTE The internal hard disk must be installed in the printer and enabled to allow for spooling of the print job before final printing If the hard disk memory is insufficient for the spooled...

Страница 142: ...Type in a four digit personal ID number from 0000 to 7777 then click OK 4 Enter the number of copies and if required select Collate C73_XP_PS_Secure bmp and C73_XP_PCL_Secure bmp 5 Click OK then clic...

Страница 143: ...leted from the hard disk drive Deleting the confidential document before printing it 1 Press the MENU button to access the PRINT JOBS MENU and press the SELECT button 2 Enter the personal ID number yo...

Страница 144: ...ces button 3 On the Job Options tab select Store to HDD NOTE The internal hard disk must be installed in the printer and enabled If the hard disk memory is insufficient for the spooled data DISK FULL...

Страница 145: ...CL_JobPin bmp b Type a four digit personal ID number from 0000 to 7777 then click OK 4 Select the number of Copies and click Collate if applicable C73_XP_PS_Store bmp and C73_XP_PCL_Store bmp 5 Click...

Страница 146: ...sk drive 1 Press the MENU button to access the PRINT JOBS MENU and press the SELECT button 2 Enter the personal ID number you selected above using the buttons on the printer control panel 3 Press the...

Страница 147: ...e the need for pre printed stationery An example of using Overlays Suppose that you have created and stored three files in the printer using the Storage Device Manager the company logo the company add...

Страница 148: ...he Print To File option is switched on in your application s Print dialog box 3 Depending on the application you may need to select your OKI printer model and then click the Preferences button This sh...

Страница 149: ...ith the file to be stored as an overlay open in your application program choose File then Print 2 Ensure that the Print To File option is switched on in your application s Print dialog box 3 Depending...

Страница 150: ...s that you created earlier PCL This automatically generates a BIN file PostScript This automatically generates a PostScript hst file Note the name that the file is assigned in the Storage Device Mana...

Страница 151: ...er The Storage Device Manager displays Command Issued to indicate that the file was downloaded successfully 6 Close the Storage Device Manager Defining Overlays PostScript 1 Click Start Settings Print...

Страница 152: ...ame of the overlay in the Overlay Name list and select the pages on which it is to be printed NOTE The Overlay Name must be EXACTLY the same as the file name you made a noted of in the previous sectio...

Страница 153: ...then click Add C93_XP_PS_Overlay3 bmp 8 Click OK 9 If required continue to add files to the overlay by repeating steps 5 through 8 10 Highlight the overlay name s under Defined Overlay and click Add t...

Страница 154: ...n 154 select more than one overlay hold the CTRL key while clicking on each name C73XPPSOverlay2k tif 11 Select Use Overlay from the drop down list at the top of the dialog box then click OK 12 Close...

Страница 155: ...1 Click Start Settings Printers and Faxes 2 Highlight the printer name and click Printing Preferences 3 Click the Job Options tab 4 Click the Overlay button C93_XP_PCL_Overlay1 bmp 5 To define an over...

Страница 156: ...e Custom Pages to select specific page numbers in the document then click Add 9 Click Close 10 Highlight the overlay name under Defined Overlay and click the Add button to add the overlay to the list...

Страница 157: ...cument page into multiple pieces which print enlarged on separate sheets Then the separate sheets are combined to produce a poster It is only available with the PCL printer driver 1 Open the file in y...

Страница 158: ...ES 2024 2024e Windows XP Operation 158 4 Click Options and enter the configuration details C93_XP_PCL_Poster2 bmp 5 Click OK twice 6 Click Print...

Страница 159: ...will be more efficient and give good results If you use PostScript fonts or you will be printing PostScript graphics choose the PostScript driver In this situation performance will be faster and graph...

Страница 160: ...NSTALLED OPTIONS IN THE DRIVERS Certain options such as additional memory the duplexer or additional trays may be installed in your printer Before using the printer you must enter the printer driver s...

Страница 161: ...ick Start Settings Printers 2 Highlight the printer name and click File then Properties 3 Click the Device Settings tab 4 Under Installable Options click Memory Configuration then set the memory in th...

Страница 162: ...e PostScript driver 1 Click Start Settings Printers 2 Highlight the printer name and click File then Properties 3 Click the Device Settings tab 4 Under Installable Options make sure Hard Disk is set t...

Страница 163: ...r Drivers 163 PCL driver 1 Click Start Settings Printers 2 Highlight the printer name and click File then Properties 3 On the Device Option tab click Printer Hard Disk C732kPCLHDDk tif 4 Click OK and...

Страница 164: ...rinters 2 Highlight the printer name and click File then Properties 3 Click the Device Settings tab Under Installable Options click Available Trays then select the appropriate number of trays not incl...

Страница 165: ...Click Start Settings Printers 2 Highlight the printer name and click File then Properties 3 On the Device Option tab select the appropriate number of trays not including the Multi Purpose tray C732kPC...

Страница 166: ...tScript driver 1 Click Start Settings Printers 2 Highlight the printer name and click File then Properties 3 Click the Device Settings tab Under Installable Options make sure Duplex is set to Installe...

Страница 167: ...ivers 167 PCL driver 1 Click Start Settings Printers 2 Highlight the printer name and click File then Properties 3 Click the Device Option tab click Duplex Option Unit C732kPCLDuplex1k tif 4 Click OK...

Страница 168: ...instructions are given as a guide only Some software applications require the paper feed size and media settings to be selected from within the software under Page Setup PostScript driver 1 Click Sta...

Страница 169: ...inter Drivers 169 2 Right click the printer name and click Printing Preferences Important If you will be using heavy media transparencies envelopes or labels make sure you open the rear exit before pr...

Страница 170: ...2024 2024e Windows 2000 Printer Drivers 170 3 Click the Paper Quality tab Under Tray Selection select the paper feed in the Paper Source drop down list C732kPSSourcek tif 4 Click the Advanced button...

Страница 171: ...Output select the media size in the Paper Size drop down list C732kPSSizek tif 6 Under Document Options Printer Features click Media Type and select the media from the drop down list C732kPSMediaType...

Страница 172: ...he Setup tab under Media select the required paper size in the Size drop down list C732kPCLSizek tif 4 Select the required paper feed under Source 5 Select the required paper type under Weight NOTE If...

Страница 173: ...box a new Status tab is added an Option button is added to the Device Option tab This utility allows you to view but not change the status of the following on the Status tab paper trays installed and...

Страница 174: ...Selecting print resolution see page 201 Duplex printing see page 202 Watermarks see page 210 Collating see page 212 Proof and Print see page 213 Secure print printing confidential documents see page...

Страница 175: ...are listed below Differences between the range of colors a monitor or printer can reproduce Neither a printer nor a monitor is capable of reproducing the full range of colors visible to the human eye...

Страница 176: ...bsequent sections of this User Manual Monitor settings The brightness and contrast controls on your monitor can change how your document looks on screen Additionally your monitor color temperature inf...

Страница 177: ...shop may display color differently from office applications such as Microsoft Word Please see your application s online help or user manual for more information Paper type The type of paper used can a...

Страница 178: ...ack CMYK Generally most documents you print will be in RGB format This is the most common and if you do not know your document s color mode assume that it is RGB Typically CMYK documents are only supp...

Страница 179: ...rimetric option see page 186 Use the Color Swatch Utility to print out a chart of RGB swatches and enter your desired RGB values in your application s color picker PS only see page 183 RGB or CMYK If...

Страница 180: ...ration 180 Printing Vivid Colors RGB only Use Oki Color Matching see page 184 with the Monitor 6500k Vivid sRGB or Digital Camera settings PCL or PS RGB or CMYK Use PostScript Color Matching see page...

Страница 181: ...ones displayed on your monitor To manually set the color matching options in the PCL driver 1 Click Start Settings Printers 2 Right click the appropriate printer name and click Printing Preferences 3...

Страница 182: ...6500k Vivid Optimized for printing bright colors when using a monitor with a color temperature of 6500K Ideal for office graphics Monitor 9300k Optimized for printing photographs when using a monitor...

Страница 183: ...Green Blue values to use in your application to match that printed color An example of using the Print Color Swatch function You wish to print a logo in a particular shade of red The steps you would...

Страница 184: ...o manually set the color matching options in the PostScript driver 1 Click Start Settings Printers 2 Right click the printer name and click Printing Preferences 3 Click the Color tab C732kPSColor1k ti...

Страница 185: ...or temperature of 6500K Monitor 6500K Vivid Optimized for printing bright colors when using a monitor with a color temperature of 6500K Ideal for office graphics and text Monitor 9300K Optimized for p...

Страница 186: ...This uses PostScript Color Rendering Dictionaries built in to the printer and affects both RGB and CMYK data Select the rendering type from the Rendering Intent drop down list C73_2k_PS_Color3k tif Re...

Страница 187: ...olorimetric except that it scales the source white to the usually paper white i e unlike Absolute Colorimetric this attempts to take the paper white into account Absolute Colorimetric Best for printin...

Страница 188: ...in the original device that was used to capture or display the image data For example an input device could be a scanner digital camera or monitor Output Profiles e g the ES 2024 printer provide info...

Страница 189: ...set up ICC profiles 1 Click Start Settings Printers 2 Right click the printer name and click Printing Preferences 3 Click the Color tab 4 Under Color mode select Using ICC Profile in the Color Contro...

Страница 190: ...n the drop down lists under Select ICC profile b Select the desired Rendering Intent and type in a name for the profile then click OK The new name will appear in the Setting Name drop down list under...

Страница 191: ...inter driver 1 Click Start Settings Printers 2 Highlight the printer name and click File then Properties 3 Click the Color Management tab 4 Under Color Profiles currently associated with this printer...

Страница 192: ...ING N Up printing using the PostScript driver 1 Open the file in your application and select File Print 2 In the Print dialog box click the PS driver on the General tab then click the Layout tab 3 Und...

Страница 193: ...select File Print 2 In the Print dialog box click the PCL driver on the General tab then click the Setup tab 3 Under Finishing Mode select the required number of pages per sheet C732kPCLNUpk tif 4 Cl...

Страница 194: ...custom paper size before use range 3 to 8 inches 89 to 216 mm wide x 5 to 14 inches 127 to 356 mm long Printing custom pages using the PostScript driver 1 Open the file in your application and select...

Страница 195: ...2000 Operation 195 2 In the Print dialog box click the PS driver on the General tab then click the Paper Quality tab 3 Under Tray Selection select Multi Purpose Tray in the Paper Source drop down list...

Страница 196: ...select Postscript Custom Page Size in the Paper Size drop down list C93_2k_PS_Custom4 bmp NOTE Long Edge First media feeds in long edge first Short Edge First media feeds in short edge first Long Edge...

Страница 197: ...ES 2024 2024e Windows 2000 Operation 197 5 Enter the Width and Height for the custom paper and select the Paper Feed Direction then click OK C73_2k_PS_Custom1k tif 6 Click OK 7 Click Print...

Страница 198: ...k the PCL driver on the General tab then click the Setup tab 3 Under Media select User Defined in the Size drop down list C732kPCLCustom1k tif NOTE Up to 32 custom page sizes can be defined in the PCL...

Страница 199: ...that User Defined now appears in the Size box on the Setup tab 6 Click OK NOTE To save the setting for future use Click Paper Feed Options then click Custom Size Select the unit then enter the relevan...

Страница 200: ...ES 2024 2024e Windows 2000 Operation 200 7 Click Print...

Страница 201: ...der Quality C73_2k_PS_Reso bmp and C73_2k_PCL_Reso bmp 5 Select Toner Saving if appropriate 6 Click Print NOTE These instructions explain how to change the settings as you are printing a job If you wi...

Страница 202: ...1 Open the file in your application and select File Print 2 In the Print dialog box click the PS driver on the General tab then click the Layout tab NOTE The optional duplex unit must be installed in...

Страница 203: ...ES 2024 2024e Windows 2000 Operation 203 3 Under Print on Both Sides Duplex tab select Flip on Long Edge or Flip on Short Edge C73_2k_PS_Duplex2 bmp 4 Click Print...

Страница 204: ...ing the PCL driver 1 Open the file in your application and select File Print 2 In the Print dialog box click the PCL driver on the General tab then click the Setup tab 3 Under 2 Sided Printing select...

Страница 205: ...unit installed and enabled in order to print booklets Not available on some network connections see the Help file Some software applications may not support booklet printing The right to left setting...

Страница 206: ...ES 2024 2024e Windows 2000 Operation 206 3 Under Pages Per Sheet select Booklet in the drop down list C93_2k_PS_Booklet bmp 4 Under Print on Both Sides Duplex select Flip on Short edge...

Страница 207: ...ES 2024 2024e Windows 2000 Operation 207 C73_2k_PS_Booklet bmp 5 Click Print...

Страница 208: ...lets using the PCL driver 1 Open the file in your application and select File Print 2 In the Print dialog box click the PS driver on the General tab then click the Setup tab 3 Under Finishing Mode sel...

Страница 209: ...ES 2024 2024e Windows 2000 Operation 209 4 Click the Options button and set Signature 2Pages Right to Left and Bind Margin as required then click OK pcl booklet setup options bmp 5 Click Print...

Страница 210: ...PCL DRIVER ONLY 1 Open the file in your application and select File Print 2 In the Print dialog box click the PCL driver on the General tab then click the Job Options tab 3 Click the Watermark button...

Страница 211: ...e document select First Page only 6 Click OK 7 Click Print NOTE To create a new watermark or edit an existing watermark Click the New or Edit button C93_Me_Watermark2 bmp Enter the text for the waterm...

Страница 212: ...pen the file in your application and select File Print 2 In the Print dialog box click the appropriate driver on the General tab then click the Job Options tab 3 Under Job Type enter the number of cop...

Страница 213: ...er on the General tab then click the Job Options tab NOTES The internal hard disk must be installed in the printer and enabled to allow for spooling of the print job before final printing If the hard...

Страница 214: ...if required select Request Job Name for each print job C73_2k_PS_JobPin bmp and C73_2k_JobPin_ bmp c Type in a four digit personal ID number from 0000 to 7777 then click OK 4 Click Print The document...

Страница 215: ...job must be deleted from the printer 1 Press the MENU button to access the PRINT JOBS MENU and press the SELECT button 2 Enter your personal ID number using the buttons on the printer control panel 3...

Страница 216: ...int NOTE The internal hard disk must be installed in the printer and enabled to allow for spooling of the print job before final printing If the hard disk memory is insufficient for the spooled data D...

Страница 217: ...C73_2k_PS_JobPin bmp and C73_2k_JobPin_ bmp b Type in a four digit personal ID number from 0000 to 7777 then click OK C732kPSSecurek tif and C732kPCLSecurek tif 4 Enter the number of copies and if re...

Страница 218: ...ES 2024 2024e Windows 2000 Operation 218 6 Go to the printer and print out the document using the front panel see below...

Страница 219: ...eleted from the hard disk drive Deleting the confidential document before printing it 1 Press the MENU button to access the PRINT JOBS MENU and press the SELECT button 2 Enter the personal ID number y...

Страница 220: ...nt 2 In the Print dialog box click the appropriate driver on the General tab then click the Job Options tab NOTE The internal hard disk must be installed in the printer and enabled If the hard disk me...

Страница 221: ...to 16 characters under Job Name Setting and if required select Request Job Name for each print job C73_2k_PS_JobPin bmp and C73_2k_JobPin_ bmp b Type a four digit personal ID number from 0000 to 7777...

Страница 222: ...ES 2024 2024e Windows 2000 Operation 222 4 Click Print The document will be stored on the hard disk and can then be printed on demand or deleted using the procedures given below...

Страница 223: ...sk drive 1 Press the MENU button to access the PRINT JOBS MENU and press the SELECT button 2 Enter the personal ID number you selected above using the buttons on the printer control panel 3 Press the...

Страница 224: ...ce the need for pre printed stationery An example of using Overlays Suppose that you have created and stored three files in the printer using the Storage Device Manager the company logo the company ad...

Страница 225: ...in your application s Print dialog box 3 Depending on the application you may need to select your OKI printer model and then click Properties This should open the printer driver settings 4 Choose all...

Страница 226: ...ur application program choose File then Print 2 Ensure that the Print To File option is switched on in your application s Print dialog box 3 Depending on the application you may need to select your OK...

Страница 227: ...ates a PostScript hst file Note the name that the file is assigned in the Storage Device Manager Names are case sensitive 4 Make sure the printer being used is highlighted in the lower window of the S...

Страница 228: ...n 228 6 Close the Storage Device Manager Defining Overlays PostScript 1 Click Start Settings Printers 2 RIght click the printer name and click Printing Preferences 3 Click the Overlay tab 4 Click the...

Страница 229: ...name of the overlay in the Overlay Name box and select the pages on which it is to be printed NOTE The Overlay Name must be EXACTLY the same as the file name you made a noted of in the previous secti...

Страница 230: ...or select a form name in the drop down list under Form setting then click Add C93_Me_PS_Overlay3 bmp 8 Click OK 9 If required continue to add files to the overlay by repeating steps 5 through 8 NOTE...

Страница 231: ...lick Add to add the overlay s to the list under Active Overlay to select more than one overlay hold the CTRL key while clicking on each name C732kPSOverlay2k tif 11 Select Use Overlay from the drop do...

Страница 232: ...ws 2000 Operation 232 Defining Overlays PCL 1 Click Start Settings Printers 2 Highlight the printer name and click Printing Preferences 3 Click the Job Options tab 4 Click the Overlay button pcl job o...

Страница 233: ...ct which pages the overlay is to be printed on from Print on Pages or use Custom Pages to select specific page numbers in the document then click Add 9 Click Close 10 Highlight the overlay name under...

Страница 234: ...This option allows you to configure and print posters by breaking up the document page into multiple pieces which print enlarged on separate sheets Then the separate sheets are combined to produce a...

Страница 235: ...2024 2024e Windows 2000 Operation 235 3 Under Finishing Mode select Poster Print C732kPCLPosterk tif 4 Click Options and enter the configuration details C93_Me_PCL_Poster2 bmp 5 Click OK then click Pr...

Страница 236: ...you will be printing PostScript graphics choose the PostScript driver In this situation performance will be faster and graphics will be printed at their best quality If neither driver seems to cover a...

Страница 237: ...For additional memory If you have additional memory in your printer use these instructions to update the Windows PostScript driver so that it recognizes the additional memory 1 Click Start Settings P...

Страница 238: ...r Drivers 238 5 To specify usable printer memory size click the Memory button The driver automatically adjusts font cache size according to the memory option selected under Installed ps device options...

Страница 239: ...al hard disk drive PostScript or PCL driver 1 Click Start Settings Printers 2 Highlight the printer name and click File then Properties 3 On the Device Options tab check Printer Hard Disk C73MePSHDDk...

Страница 240: ...or PCL driver 1 Click Start Settings Printers 2 Highlight the printer name and click File then Properties 3 On the Device Options tab select the number of trays installed not including the Multi Purpo...

Страница 241: ...x unit PostScript or PCL driver 1 Click Start Settings Printers 2 Highlight the printer name and click File then Properties 3 Click the Device Options tab check Duplex Option Unit C73MePSDuplex1k tif...

Страница 242: ...plications require the paper feed size and media settings to be selected from within the software under Page Setup PostScript and PCL drivers 1 Click Start Settings Printers 2 Highlight the printer na...

Страница 243: ...type under Type PostScript or Weight PCL 7 Click Paper Feed Options and make any other selections then click OK ps paper feed options bmp and C73_Me_PCL_FeedOpt bmp 8 Click OK to close the printer dia...

Страница 244: ...on tab This utility allows you to view but not change the status of the following on the Status tab paper trays installed and the media assigned to them total size and percentage used of disk memory p...

Страница 245: ...rint resolution see page 273 Duplex printing see page 274 Watermarks see page 278 Collating see page 282 Font substitution see page 283 Proof and Print see page 284 Secure print printing confidential...

Страница 246: ...t factors are listed below Differences between the range of colors a monitor or printer can reproduce Neither a printer nor a monitor is capable of reproducing the full range of colors visible to the...

Страница 247: ...subsequent sections of this User Manual Monitor settings The brightness and contrast controls on your monitor can change how your document looks on screen Additionally your monitor color temperature i...

Страница 248: ...toshop may display color differently from office applications such as Microsoft Word Please see your application s online help or user manual for more information Paper type The type of paper used can...

Страница 249: ...ot know your document s color mode assume that it is RGB Typically CMYK documents are only supported in professional Desktop Publishing and Graphics applications Matching Photographic Images RGB only...

Страница 250: ...your desired RGB values in your application s color picker PS only see page 255 RGB or CMYK If you are printing from a graphics application such as Adobe Photoshop you may be able to use Soft Proofing...

Страница 251: ...peration 251 Printing Vivid Colors RGB only Use Oki Color Matching see page 257 with the Monitor 6500k Vivid sRGB or Digital Camera settings PCL or PS RGB or CMYK Use PostScript Color Matching see pag...

Страница 252: ...r printed colors to the ones displayed on your monitor To manually set the color matching options in the PCL driver 1 Click Start Settings Printers 2 Highlight the appropriate printer name and click F...

Страница 253: ...ES 2024 2024e Windows Me 98 95 Operation 253 3 Click the Color tab C73MePCLColor1k tif...

Страница 254: ...r 6500K Vivid Optimized for printing bright colors when using a monitor with a color temperature of 6500K Ideal for office graphics Monitor 9300K Optimized for printing photographs when using a monito...

Страница 255: ...Red Green Blue values to use in your application to match that printed color An example of using the Print Color Swatch function You wish to print a logo in a particular shade of red The steps you wou...

Страница 256: ...data The table below summarizes the various color matching options available in the PostScript driver and what types of data they affect To manually set the color matching options in the PostScript dr...

Страница 257: ...257 3 Click the Color tab C73MePSColor1k tif 4 Select the method to use from the Color Control drop down list box under Color Mode a Color Control OKI Color Matching This is OKI s proprietary color m...

Страница 258: ...a monitor with a color temperature of 6500K Monitor 6500K Perceptual Optimized for printing photographs when using a monitor with a color temperature of 6500K Monitor 6500K Vivid Optimized for printin...

Страница 259: ...and brighter colors For some photographs other settings may be better depending on the subjects and the conditions under which they were taken sRGB Optimized for matching specific colors such as a com...

Страница 260: ...e from the Rendering Intent drop down list box C73MePSColor3k tif Rendering Intents When a document is printed a conversion takes place from the document s color space to the printer color space The r...

Страница 261: ...to the usually paper white i e unlike Absolute Colorimetric this attempts to take the paper white into account Absolute Colorimetric Best for printing solid colors and tints such as Company logos etc...

Страница 262: ...ES 2024 2024e Windows Me 98 95 Operation 262 This option prints all documents as monochrome...

Страница 263: ...printer driver 1 Click Start Settings Printers 2 Highlight the printer name and click File then Properties 3 Click the Color Management tab 4 Under Color Profiles currently associated with this printe...

Страница 264: ...iginal device that was used to capture or display the image data For example an input device could be a scanner digital camera or monitor Output Profiles e g the ES 2024 printer provide information ab...

Страница 265: ...ect File Print 2 In the print dialog box click the appropriate PS driver then click Properties or Setup or your application s equivalent 3 On the Setup tab under N up select the required number of pag...

Страница 266: ...File Print 2 In the print dialog box click the appropriate PCL driver then click Properties or Setup or your application s equivalent 3 On the Setup tab under Finishing Mode select the required number...

Страница 267: ...ES 2024 2024e Windows Me 98 95 Operation 267 5 Click OK then print the document...

Страница 268: ...to the custom paper size before use range 3 to 8 inches 89 to 216 mm wide x 5 to 14 inches 127 to 356 mm long Printing custom pages using the PostScript driver 1 Open the file in your application and...

Страница 269: ...4 Click the Custom Size button C93_Me_PS_CustSize2 bmp 5 Type in the name you wish to use for the custom paper size in the Paper name box Enter the width and length for the custom paper and select Tr...

Страница 270: ...ES 2024 2024e Windows Me 98 95 Operation 270 9 Print the document...

Страница 271: ...the Setup tab then select User Defined in the Size box under Media The Set Free Size dialog box appears 4 Select the unit then enter the Width and Length measurements and click OK User Defined Size s...

Страница 272: ...t the document NOTE To save the setting for future use Click Paper Feed Options then click Custom Size Enter the relevant information in Width and Height and give your document size a name under Name...

Страница 273: ...resolution under Quality C73_Me_PS_Resok tif and C73_Me_PCL_Resok tif 5 Select Toner Saving if appropriate 6 Click OK and print the document NOTE These instructions explain how to change the settings...

Страница 274: ...file in your application and select File Print 2 In the print dialog box click the appropriate driver then click Properties or Setup or your application s equivalent NOTE The optional duplex unit mus...

Страница 275: ...s Me 98 95 Operation 275 3 On the Setup tab from 2 sided Printing select Long Edge binding or Short Edge binding C73MePSDuplex2k tif and C73MePCLDuplex2k tif 4 Click OK and print the document PostScri...

Страница 276: ...Properties or Setup or your application s equivalent NOTES Available only in the Windows Me Operating System not available for Windows 98 or 95 Available in the PCL printer driver only but not on som...

Страница 277: ...he Setup tab under Finishing Mode select Booklet in the drop down box C73MePCLBookletk tif 4 Click Options and set Signature 2Pages Right to Left and Bind Margin as required then click OK pcl booklet...

Страница 278: ...Script driver 1 Open the file in your application and select File Print 2 In the print dialog box click the appropriate PS driver then click Properties or Setup or your application s equivalent 3 Clic...

Страница 279: ...atermark will print under Print watermark 5 Click OK twice and print the document NOTE To create a new watermark or edit an existing watermark Click the New or Edit button Enter the text for the water...

Страница 280: ...your application and select File Print 2 In the print dialog box click the appropriate PCL driver then click Properties or Setup or your application s equivalent 3 Click the Job Options tab then click...

Страница 281: ...e first page of the document select First Page only 6 Click OK twice and print the document NOTE To create a new watermark or edit an existing watermark Click the New or Edit button Enter the text for...

Страница 282: ...tion and select File Print 2 In the print dialog box click the appropriate driver then click Properties or Setup or your application s equivalent 3 Click the Job Options tab under Job Type enter the n...

Страница 283: ...k the appropriate PS driver then click Properties or Setup or your application s equivalent 3 Click the Fonts tab and select the type of font substitution from the various options given use the on lin...

Страница 284: ...en click Properties or Setup or your application s equivalent NOTES The internal hard disk must be installed in the printer and enabled to allow for spooling of the print job before final printing If...

Страница 285: ...select Collate C73MePSProof1k tif and C73MePCLProof1k tif a Under Job Type select Proof and Print b Enter a job name of up to 16 characters under Job Name Setting and if required select Request Job Na...

Страница 286: ...and C73MePCLProof2k tif 4 Click OK to close the Properties dialog box 5 Print the document The document is stored on the hard disk drive and one copy is printed for checking 6 After checking the proof...

Страница 287: ...e job must be deleted from the printer 1 Press the MENU button to access the PRINT JOBS MENU and press the SELECT button 2 Enter your personal ID number using the buttons on the printer control panel...

Страница 288: ...propriate driver then click Properties or Setup or your application s equivalent NOTE The internal hard disk must be installed in the printer and enabled to allow for spooling of the print job before...

Страница 289: ...t Request Job Name for each print job C73_Me_PS_JobOpt bmp and job pin bmp 4 Type in a four digit personal ID number from 0000 to 7777 then click OK C73MePSSecurek tif and C73MePCLSecurek tif 5 Click...

Страница 290: ...deleted from the hard disk drive Deleting the confidential document before printing it 1 Press the MENU button to access the PRINT JOBS MENU and press the SELECT button 2 Enter the personal ID number...

Страница 291: ...tup or your application s equivalent 3 Click the Job Options tab NOTE The internal hard disk must be installed in the printer and enabled to allow for spooling of the print job before final printing I...

Страница 292: ...o 16 characters under Job Name Setting and if required select Request Job Name for each print job C73_Me_PS_JobOpt bmp and job pin bmp 5 Type a four digit personal ID number from 0000 to 7777 then cli...

Страница 293: ...ES 2024 2024e Windows Me 98 95 Operation 293 8 The document can then be printed or deleted using the procedures given below...

Страница 294: ...rive 1 Press the MENU button to access the PRINT JOBS MENU and press the SELECT button 2 Enter the personal ID number you selected above using the buttons on the printer control panel 3 Press the VALU...

Страница 295: ...duce the need for pre printed stationery An example of using Overlays Suppose that you have created and stored three files in the printer using the Storage Device Manager the company logo the company...

Страница 296: ...re that the Print To File option is switched on in your application s Print dialog box 3 Depending on the application you may need to select your OKI printer model and then click Properties This shoul...

Страница 297: ...h the file to be stored as an overlay open in your application program choose File then Print 2 Ensure that the Print To File option is switched on in your application s Print dialog box 3 Depending o...

Страница 298: ...ile s that you created earlier PCL This automatically generates a BIN file PostScript This automatically generates a PostScript hst file Note the name that the file is assigned in the Storage Device M...

Страница 299: ...rinter The Storage Device Manager displays Command Issued to indicate that the file was downloaded successfully 6 Close the Storage Device Manager Defining Overlays PostScript 1 Click Start Settings P...

Страница 300: ...le name of the overlay in the Overlay Name box and select the pages on which it is to be printed NOTE The Overlay Name must be EXACTLY the same as the file name you made a noted of in the previous sec...

Страница 301: ...ng then click Add C93_Me_PS_Overlay3 bmp 7 Click OK 8 If required continue to add files to the overlay by repeating steps 4 through 7 9 Highlight the overlay name s under Defined Overlay and click Add...

Страница 302: ...98 95 Operation 302 select more than one overlay hold the CTRL key while clicking on each name C93_Me_PS_Overlay4 bmp 10 Select Use Overlay from the drop down list then click OK 11 Click OK to close t...

Страница 303: ...PCL 1 Click Start Settings Printers 2 Highlight the printer name and click File then Properties 3 Click the Job Options tab then click the Overlay button pcl job options overlay bmp 4 To define an ov...

Страница 304: ...use Custom Pages to select specific page numbers in the document then click Add 8 Click Close 9 Highlight the overlay name under Defined Overlay and click the Add button to add the overlay to the lis...

Страница 305: ...ltiple pieces which print enlarged on separate sheets Then the separate sheets are combined to produce a poster It is only available with the PCL printer driver 1 Open the file in your application and...

Страница 306: ...ES 2024 2024e Windows Me 98 95 Operation 306 4 Click Options and enter the configuration details C93_Me_PCL_Poster2 bmp 5 Click OK twice 6 Click OK and print the document...

Страница 307: ...u will be printing PostScript graphics choose the PostScript driver In this situation performance will be faster and graphics will be printed at their best quality If neither driver seems to cover all...

Страница 308: ...mory in your printer use these instructions to update the Windows PostScript driver so that it recognizes the additional memory 1 Click Start Settings Printers 2 Highlight the printer name and click F...

Страница 309: ...drive PostScript driver 1 Click Start Settings Printers 2 Highlight the printer name and click File then Properties 3 Click the Device Settings tab 4 Under Installable Options make sure Hard Disk is s...

Страница 310: ...nter Drivers 310 PCL driver 1 Click Start Settings Printers 2 Highlight the printer name and click File then Properties 3 On the Device Option tab click Printer Hard Disk C73NTPCLHDDk tif 4 Click OK a...

Страница 311: ...Highlight the printer name and click File then Properties 3 Click the Device Settings tab Under Installable Options click Available Trays then select the appropriate number of trays not including the...

Страница 312: ...1 Click Start Settings Printers 2 Highlight the printer name and click File then Properties 3 On the Device Option tab select the appropriate number of trays not including the Multi purpose tray C73N...

Страница 313: ...tScript driver 1 Click Start Settings Printers 2 Highlight the printer name and click File then Properties 3 Click the Device Settings tab Under Installable Options make sure that Duplex is set to Ins...

Страница 314: ...r Drivers 314 PCL driver 1 Click Start Settings Printers 2 Highlight the printer name and click File then Properties 3 On the Device Option tab click Duplex Option Unit C73NTPCLDuplex1k tif 4 Click OK...

Страница 315: ...dia settings to be selected from within the software under Page Setup PostScript drivers 1 Click Start Settings Printers 2 Right click the printer name and click Document Defaults NOTE If the defaults...

Страница 316: ...the Advanced tab under Document Options Paper Output a Click Paper Source and select the paper feed in the Change Paper Source Setting list C73NTPSSourcek tif b Click Paper Size and select the size i...

Страница 317: ...ES 2024 2024e Windows NT 4 0 Printer Drivers 317 c Click Media Type and select the media from the Change Media Type Setting list C73NTPSMediaTypek tif 4 Click OK and close the Printers dialog box...

Страница 318: ...Printer Drivers 318 PCL drivers 1 Click Start Settings Printers 2 Right click the printer name and click Document Defaults 3 On the Setup tab under Media select the required paper size in the Size dro...

Страница 319: ...ES 2024 2024e Windows NT 4 0 Printer Drivers 319 4 Select the required paper feed under Source C73NTPCLSourcek tif NOTE If a paper tray is selected the Weight field becomes visible...

Страница 320: ...per type under Weight C73NTPCLWeightk tif NOTE If Printer Setting is selected make sure the printer has been set to the correct media type If a Warning dialog box appears indicating a setting conflict...

Страница 321: ...2024 2024e Windows NT 4 0 Printer Drivers 321 6 Click the Paper Feed Options button and make any other selections then click OK C73_NT_PCL_FeedOpt bmp 7 Click OK twice and close the Default dialog bo...

Страница 322: ...b This utility allows you to view but not change the status of the following on the Status tab paper trays installed and the media assigned to them total size and percentage used of disk memory percen...

Страница 323: ...resolution see page 344 Duplex printing printing on both sides of the paper see page 346 Watermarks see page 351 Collating see page 353 Proof and Print see page 354 Secure print printing confidential...

Страница 324: ...are listed below Differences between the range of colors a monitor or printer can reproduce Neither a printer nor a monitor is capable of reproducing the full range of colors visible to the human eye...

Страница 325: ...ubsequent sections of this User Manual Monitor settings The brightness and contrast controls on your monitor can change how your document looks on screen Additionally your monitor color temperature in...

Страница 326: ...oshop may display color differently from office applications such as Microsoft Word Please see your application s online help or user manual for more information Paper type The type of paper used can...

Страница 327: ...makes distinctions between Red Green Blue RGB and Cyan Magenta Yellow Black CMYK Generally most documents you print will be in RGB format This is the most common and if you do not know your document s...

Страница 328: ...of RGB swatches and enter your desired RGB values in your application s color picker PS only see page 331 RGB or CMYK If you are printing from a graphics application such as Adobe Photoshop use PostS...

Страница 329: ...e ones displayed on your monitor To manually set the color matching options in the PCL driver 1 Click Start Settings Printers 2 Right click the appropriate printer name and click Document Defaults 3 C...

Страница 330: ...6500K Vivid Optimized for printing bright colors when using a monitor with a color temperature of 6500K Ideal for office graphics Monitor 9300K Optimized for printing photographs when using a monitor...

Страница 331: ...en Blue values to use in your application to match that printed color An example of using the Print Color Swatch function You wish to print a logo in a particular shade of red The steps you would foll...

Страница 332: ...r To manually set the color matching options in the PostScript driver 1 Click Start Settings Printers 2 Right click the printer name and click Document Defaults 3 Click the Color tab C73NTPSColor1k ti...

Страница 333: ...printing bright colors when using a monitor with a color temperature of 6500K Ideal for office graphics and text Monitor 9300K Optimized for printing photographs when using a monitor with a color tem...

Страница 334: ...olor Control PostScript Color Matching This uses PostScript Color Rendering Dictionaries built into the printer and affects both RGB and CMYK data Select the rendering type from the Rendering Intent d...

Страница 335: ...lorimetric Good for proofing CMYK color images on a desktop printer Much like Absolute Colorimetric except that it scales the source white to the usually paper white i e unlike Absolute Colorimetric t...

Страница 336: ...file in your application and select File Print 2 In the Print dialog box select the PS driver then click Properties or Setup or your application s equivalent 3 On the Advanced tab under Document Opti...

Страница 337: ...rint dialog box select the PCL driver then click Properties or Setup or your application s equivalent 3 On the Setup tab under Finishing Mode select the number of pages per sheet C73NTPCLNUpk tif 4 Cl...

Страница 338: ...paper size before use range 3 to 8 inches 89 to 216 mm wide x 5 to 14 inches 127 to 356 mm long Printing custom pages using the PostScript driver 1 Make sure the rear exit is open rear exit openK eps...

Страница 339: ...under Document Options Paper Output a Click Paper Source and select Multi Purpose Tray in the Change Paper Source Setting list C73NTPSCustom1k tif b Click Paper Size and select Postscript Custom Page...

Страница 340: ...e Width and Height for the custom paper and select the Paper Feed Direction 7 Click OK twice then print the document NOTE Long Edge First media feeds in long edge first Short Edge First media feeds in...

Страница 341: ...Make sure the rear exit is open rear exit openK eps 2 Open the file in your application and select File Print 3 In the Print dialog box select the PCL driver then click Properties or Setup or your ap...

Страница 342: ...list The Set Free Size dialog box appears C73NTPCLCustom1k tif 5 Select the Unit then enter the Width and Length measurements to use then click OK NOTE You may see a Warning dialog box indicating a co...

Страница 343: ...d print the document NOTE To save the setting for future use Click Paper Feed Options then click Custom Size Select the unit then enter the relevant information for Width and Height and give your cust...

Страница 344: ...e required printing resolution under Quality C73NTPSResok tif and C73NTPCLResomk tif 5 Select Toner Saving if appropriate NOTE These instructions explain how to change the settings as you are printing...

Страница 345: ...ES 2024 2024e Windows NT 4 0 Operation 345 6 Click OK and print the document...

Страница 346: ...g The Multi purpose tray cannot be used for duplex printing NOTE The optional duplex unit must be installed in the printer and enabled before duplex printing can be carried out NOTE These instructions...

Страница 347: ...rint 2 In the Print dialog box select the PS driver then click Properties or Setup or your application s equivalent 3 On the Advanced tab under Document Options Layout click 2 Sided Printing and selec...

Страница 348: ...e file in your application and select File Print 2 In the Print dialog box select the PCL driver then click Properties or Setup or your application s equivalent 3 On the Setup tab under 2 Sided Printi...

Страница 349: ...Setup or your application s equivalent 3 On the Setup tab under Finishing Mode select Booklet in the list C73NTPCLBookletk tif NOTES You must have the duplex unit installed and enabled in order to pri...

Страница 350: ...2024e Windows NT 4 0 Operation 350 4 Click the Options button and set Signature 2Pages Right to Left and Bind Margin as required then click OK pcl booklet setup options bmp 5 Click OK and print the d...

Страница 351: ...Open the file in your application and select File Print 2 In the Print dialog box select the PCL driver then click Properties or Setup or your application s equivalent 3 On the Job Options tab click t...

Страница 352: ...ent select First Page only 6 Click OK twice and print the document NOTE To create a new watermark or edit an existing watermark Click the New or Edit button C93_Me_Watermark2 bmp Enter the text for th...

Страница 353: ...dialog box select the appropriate driver then click Properties or Setup or your application s equivalent 3 On the Job Options tab under Job Type enter the number of copies required and only if the app...

Страница 354: ...t to file 4 Click Properties or Setup or your application s equivalent NOTES The internal hard disk must be installed in the printer and enabled to allow for spooling of the print job before final pri...

Страница 355: ...D number from 0000 to 7777 then click OK 6 Enter the number of copies and if required select Collate PostScript driver only C73_NT_PS_Proofk tif and C73_NT_PCL_Proofk tif 7 Click OK and print the docu...

Страница 356: ...job must be deleted from the printer 1 Press the MENU button to access the PRINT JOBS MENU and press the SELECT button 2 Enter your personal ID number using the buttons on the printer control panel 3...

Страница 357: ...nder Job Type select Secure Print NOTE The internal hard disk must be installed in the printer and enabled to allow for spooling of the print job before final printing If the hard disk memory is insuf...

Страница 358: ...select Request Job Name for each print job C73_NT_PS_JobPin bmp and job pin bmp b Type in a four digit personal ID number from 0000 to 7777 then click OK 6 Enter the number of copies and if required...

Страница 359: ...indows NT 4 0 Operation 359 7 Click OK and print the document A print file of the document is created and stored on the hard disk drive 8 Go to the printer and print out the document using the front p...

Страница 360: ...deleted from the hard disk drive Deleting the confidential document before printing it 1 Press the MENU button to access the PRINT JOBS MENU and press the SELECT button 2 Enter the personal ID number...

Страница 361: ...s equivalent 5 Enter the number of copies and if required select Collate then select Store to HDD NOTE The internal hard disk must be installed in the printer and enabled If the hard disk memory is i...

Страница 362: ...or each print job C73_NT_PS_JobPin bmp and job pin bmp b Type a four digit personal ID number from 0000 to 7777 then click OK C73NTPSStorek tif and C73NTPCLStorek tif 6 Click OK and print the document...

Страница 363: ...ES 2024 2024e Windows NT 4 0 Operation 363 printed on demand or deleted using the procedures given below...

Страница 364: ...disk drive 1 Press the MENU button to access the PRINT JOBS MENU and press the SELECT button 2 Enter the personal ID number you selected above using the buttons on the printer control panel 3 Press t...

Страница 365: ...ed for pre printed stationery An example of using Overlays Suppose that you have created and stored three files in the printer using the Storage Device Manager the company logo the company address the...

Страница 366: ...e that the Print To File option is switched on in your application s Print dialog box 3 Depending on the application you may need to select your OKI printer model and then click Properties This should...

Страница 367: ...ith the file to be stored as an overlay open in your application program choose File then Print 2 Ensure that the Print To File option is switched on in your application s Print dialog box 3 Depending...

Страница 368: ...is automatically generates a BIN file PostScript This automatically generates a PostScript hst file Note the name that the file is assigned in the Storage Device Manager Names are case sensitive 4 Mak...

Страница 369: ...r displays Command Issued to indicate that the file was downloaded successfully 6 Close the Storage Device Manager Defining Overlays PostScript 1 Click Start Settings Printers 2 RIght click the printe...

Страница 370: ...name of the overlay in the Overlay Name list and select the pages on which it is to be printed NOTE The Overlay Name must be EXACTLY the same as the file name you made a noted of in the previous sect...

Страница 371: ...r or select a form name in the drop down list under Form setting then click Add C93_Me_PS_Overlay3 bmp 7 Click OK 8 If required continue to add files to the overlay by repeating steps 4 through 7 NOTE...

Страница 372: ...click Add to add the overlay s to the list under Active Overlay to select more than one overlay hold the CTRL key while clicking on each name C93_NT_PS_Overlay2 bmp 10 Select Use Overlay from the dro...

Страница 373: ...ys PCL 1 Click Start Settings Printers 2 Highlight the printer name and click Document Defaults 3 Click the Job Options tab 4 Click the Overlay button pcl job options overlay bmp 5 To define an overla...

Страница 374: ...o select specific page numbers in the document then click Add 9 Click Close 10 Repeat steps 5 though 9 for each overlay you wish to add 11 Highlight the overlay name under Defined Overlay and click th...

Страница 375: ...ocument page into multiple pieces which print enlarged on separate sheets Then the separate sheets are combined to produce a poster It is only available with the PCL printer driver 1 Open the file in...

Страница 376: ...ES 2024 2024e Windows NT 4 0 Operation 376 4 Click the Options button and enter the configuration details C93_Me_PCL_Poster2 bmp 5 Click OK twice and print the document...

Страница 377: ...f paper in any paper tray falls below 30 paper tray removeK eps 1 Remove the paper tray 2 Remove the remaining sheets of paper 3 Refill the tray with up to a ream 500 sheets of paper then replace the...

Страница 378: ...the paper tray gently Important To prevent jams Make sure there is no space between the paper and the paper guides and rear stopper Don t overfill the paper tray Capacity depends on the type of paper...

Страница 379: ...ES 2024 2024e Maintenance 379 6 If installed a lower paper tray cannot be used to print if there is no paper tray inserted above it multi traysK eps 1 2 9 1 2 9 1 2 8...

Страница 380: ...ty if so the toner cartridge needs to be replaced Cartridge life is approximately 10 000 letter size pages at 5 print density The first toner cartridge installed in a new image drum needs to be replac...

Страница 381: ...e arrow as far as it will go then remove the toner cartridge 2 lifting the lever end of the cartridge first to disengage the locating peg on the image drum from the toner cartridge toner cartridge rem...

Страница 382: ...ral times Then holding the toner cartridge horizontally remove the tape toner shakeK eps and toner tape removeK eps 6 Insert the new toner cartridge into the image drum left side first engaging the dr...

Страница 383: ...the toner cartridge down engaging the locking pin into the groove on the image drum toner cartridge install 2K eps 8 Gently push the colored lever forward until it stops This releases the toner into t...

Страница 384: ...ot use methyl alcohol or other solvents on the LED head otherwise damage to the lens surface will occur NOTE After installing the new toner cartridge the message on the display TONER LOW or CHANGE TON...

Страница 385: ...he LED head at the same time as changing the image drum Image drum life is approximately 23 000 sheets of letter size media This assumes a typical office environment where 20 of print jobs are one pag...

Страница 386: ...ate image drum toner cartridge from the printer ugc7_038 jpg 3 Make sure the replacement image drum is the correct color and remove it from the packaging 4 Remove the protective sheet from the new ima...

Страница 387: ...e new image drum in the printer ugc7_133 jpg 6 Push the tab inwards and remove the blanking plate from the image drum blanking plate remove eps 7 Install a new toner cartridge see Changing the toner c...

Страница 388: ...layed in the control panel Transfer belt life depends on the number of sheets per print job When single sheets are printed transfer belt life is reduced 1 Switch off the printer and open the top cover...

Страница 389: ...2024e Maintenance 389 3 Press back the lock lever 1 and using the handles 2 and 3 remove the old transfer belt from the printer transfer belt remove eps 4 Remove the new transfer belt unit from its pa...

Страница 390: ...dles 2 and 3 align the pins 4 with the grooves 5 on the printer and insert the new transfer belt into the printer transfer belt replace eps 6 Move the lock lever 1 toward the front of the printer and...

Страница 391: ...ES 2024 2024e Maintenance 391 7 Reinstall the cradle complete with the four image drums and toner cartridges in the printer image drum set replace eps 8 Close the top cover close top coverK eps...

Страница 392: ...d of its product life CHANGE FUSER UNIT is displayed in the control panel Fuser unit life is approximately 60 000 letter size sheets 1 Switch off the printer and open the top cover open top coverK eps...

Страница 393: ...the handle to remove the fuser from the printer fuser unit remove eps 3 Using the handle 2 remove the fuser unit from the printer 4 Remove the new fuser unit from its packaging and lift off the shippi...

Страница 394: ...ance 394 5 Using the handle 2 install the new fuser unit into the printer Make sure the two spring loaded locking levers 1 lock the fuser unit into place fuser unit replace eps 6 Close the top covers...

Страница 395: ...eads when printing does not come out clearly has white lines or when text is blurred 1 Switch off the printer and open the top cover open top coverK eps CAUTION Do not use methyl alcohol or other solv...

Страница 396: ...ES 2024 2024e Maintenance 396 2 Gently wipe the LED head surface with LED lens cleaner or soft tissue LED head clean eps 3 Close the top cover close top coverK eps...

Страница 397: ...its protective packaging it may be prone to mechanical damage To prepare the printer for transportation 1 Turn off the printer 2 Disconnect the power cable and printer interface cable from the printer...

Страница 398: ...tridge with plastic adhesive tape 1 to prevent any toner spillage during transportation image drum seal eps 5 Place the four image drums complete with their toner cartridges back into the printer 6 Us...

Страница 399: ...ce BELT UNIT MISSING Transfer belt unit is missing CANCELLING JOB Cancelling the current job CENTRO I F ERROR Centronics interface error parallel interface CHANGE IMAGE DRUM Change the image drum indi...

Страница 400: ...ndicates which paper tray is empty ERROR POSTSCRIPT A PostScript error has occurred FATAL ERROR Call for service FUSER UNIT MISSING Fuser unit is missing INSTALL ADDITIONAL MEMORY Additional memory is...

Страница 401: ...paper being used RS232C FRAMING ERROR Serial framing error Check configuration of serial card RS232C OVERFLOW ERROR Serial overflow error Check configuration of serial card RS232C OVERRUN ERROR Serial...

Страница 402: ...n the top cover of the printer open top coverK eps NOTE Do not close the top cover completely until it latches during this process If the top cover is closed too soon the paper jam error will not be c...

Страница 403: ...ull out the paper tray and remove any jammed paper from the printer then gently push the paper tray back in paper tray removal eps 3 Check behind the front cover Open the front cover and remove any ja...

Страница 404: ...urface on the bottom of the drums image drum set remove eps b Carefully remove any jammed paper from the transfer belt and top paper exit c Replace all four image drums as one unit into the printer CA...

Страница 405: ...eck behind the rear cover open the rear cover and remove any jammed paper then close the rear cover remove paper rear cover eps 6 Check the fuser unit WARNING The fuser unit is very hot after printing...

Страница 406: ...out the toner drum cradle to access the jammed page image drum set remove eps a Release the fuser roller lock levers at either end of the fuser and slowly remove the jammed paper hot tif and c71_56bw...

Страница 407: ...2024e Troubleshooting 407 7 Check the duplex unit a Open the front cover then slide out the duplex unit front cover open eps and remove duplex unit eps b Open the duplex top cover and remove any jamme...

Страница 408: ...over and slide the duplex unit back into the printer d Close the front cover 8 Check any additional paper trays if any optional paper tray s are installed pull them out and check that no paper is jamm...

Страница 409: ...change the ECP setting to Disable control panel language setupK eps 1 Press the MENU button until PARALLEL MENU is displayed then press the SELECT button 2 Press the ITEM button until ECP is displaye...

Страница 410: ...ications The paper is moist or affected by static Store paper within specified temperature and humidity levels The paper is creased or wrinkled Remove the creased wrinkled paper from the feed tray The...

Страница 411: ...eet specifications Use a bi directional parallel cable to IEEE 1284 1994 standard The interface is disabled Check that the parallel interface is set to enable Configuration procedure was not correctly...

Страница 412: ...B interface Check if there is a USB controller in the Windows device manager USB cable does not meet specifications Use USB cable to specification Ver 1 1 Interface is disabled Check that USB interfac...

Страница 413: ...is disconnected Reconnect the printer interface cable A converter buffer extension cable or USB hub is being used Test by connecting the printer and computer directly Printer driver output port is inc...

Страница 414: ...rease computer s memory Insufficient free space on hard disk Delete unnecessary files Printer driver is incorrectly configured Correctly configure printer driver Possible cause Remedy Print processing...

Страница 415: ...use Remedy LED head is dirty Clean LED head with lens cleaner or soft tissue Toner is low Change toner cartridge Image drum damaged Change image drum Possible cause Remedy LED head is dirty Clean LED...

Страница 416: ...cause Remedy Image drum is damaged Replace image drum Toner is low Change toner cartridge Periodic black lateral lines or spots If the lines or spots occur at intervals of approximately 44 94 mm the...

Страница 417: ...n specified temperature and humidity levels Paper is too thick Use recommended paper Toner is low Change toner cartridge Possible cause Remedy LED is dirty Clean LED with lens cleaner or soft tissue C...

Страница 418: ...ossible cause Remedy Printer error Check the control panel If an error message is displayed correct the problem Possible cause Remedy The printer interface cable is faulty Replace the printer interfac...

Страница 419: ...ength of time before entering power save mode The image drum carries out a cleaning process to ensure print quality which takes time Wait until this process has been completed The fuser unit adjusts t...

Страница 420: ...guration of your printer you may wish to add one or more of the following options as your needs evolve OkiLAN 6200e Plus Network Print Server see page 421 Additional Memory see page 422 Hard Disk Driv...

Страница 421: ...ews and remove the cover 1 from the lower option slot 3 Insert the network interface card 2 into the option slot and secure with the two thumbscrews 3 4 Connect the power cable and switch on the print...

Страница 422: ...s capacity to process complex data Installing additional memory is recommended if carrying out duplex printing or if error messages appear when printing complex data Also used for graphic intensive a...

Страница 423: ...disconnect the power cable and printer interface cable 2 Loosen the two screws 1 and remove the main board mother board remove eps NOTE If the maximum amount of memory is being installed in the printe...

Страница 424: ...white tabs at either end of the socket ugc9_072 jpg b Align the module with the narrow strip 1 on its metallic contact edge to the right toward the slot identifier numbers of the control board ugc7_12...

Страница 425: ...he Total Memory Size shown at the top of the MenuMap matches the memory now installed in the printer If it doesn t turn the printer off and pull out the main board and check to be sure that the module...

Страница 426: ...ternal hard disk is used for proof and print password or secure printing Installing the hard disk drive 1 Switch off the printer and disconnect the power cable and printer interface cable 2 Loosen the...

Страница 427: ...cket on the control board 5 Gently push down on the locking handle 1 making sure the hard disk moves forward and fully engages with the socket 6 Replace the main board and secure it with the two screw...

Страница 428: ...XP see page 85 For Windows 2000 see page 162 For Windows Me 98 95 PostScript driver only see page 239 For Windows NT 4 0 see page 309 NOTE When initializing the hard disk any fonts overlays or print j...

Страница 429: ...slots in the printer 4 Gently slide the duplex unit 2 fully into the printer 5 Close the front cover 1 6 Connect the power cable and switch the printer on 7 The printer will automatically configure to...

Страница 430: ...s Installation 1 Switch off the printer and disconnect the power cable and printer interface cable WARNING The printer weighs 106 lbs 48 kg 2 people are required to lift the printer safely and prevent...

Страница 431: ...31 2 Lower the printer gently on to the additional paper tray aligning the holes and connection socket on the base of the printer with the locating pegs and connector on the additional paper tray unit...

Страница 432: ...37 and check that TRAY 2 and TRAY 3 if installed appear under MEDIA MENU 5 The printer will automatically configure to include this option 6 In the printer driver s change the installed memory to mat...

Страница 433: ...Duplex unit ES 2024e 128 Mb standard Up to 1 Gb max with optional memory modules Print language PostScript3 PCL5c Internal font PostScript 3 PCL5c fonts Print Start First print time 10 secs mono 15 se...

Страница 434: ...m 24ppm 12ppm ES 2024e 20ppm 24ppm 12ppm Duplex color 13ppm Media size Trays 1 2 3 Letter Legal 14 Legal 13 5 Legal 13 Executive A4 A5 B5 A6 Tray 1 only Media size MP tray Letter Legal 14 Legal 13 5 L...

Страница 435: ...AC 60 Hz 2 Hz OR 230 198 264 volts AC 50 Hz 2 Hz Power consumption Operating 1350 max 500 W average 25 C Standby 1200 max 150 W average 25 C Power saving 45 W max Operating environment Operating 50 to...

Страница 436: ...ES 2024 2024e Specifications 436 Weight 106 lbs 48 kg not including optional accessories and paper...

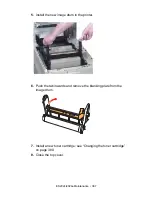
Страница 437: ...NER Description Order No Black Toner 52114901 Cyan Toner 52114902 Magenta Toner 52114903 Yellow Toner 52114904 DRUMS Description Order No Black Image Drum 52117901 Cyan Image Drum 52117902 Magenta Ima...

Страница 438: ...ES 2024 2024e Consumables 438 FUSER UNITS Description Order No Fuser Unit 120V 41945601 Fuser Unit 230V 41945607 TRANSFER BELT Description Order No Transfer belt 41945501...

Страница 439: ...901 OKI Bright White Proofing Paper Order No 32 lb US Bond 8 x 11 500 sheets 52206101 OKI Premium Card Stock Order No White 60 lb Cover 8 x 11 250 sheets 52205601 White 90 lb Index 8 x 11 250 sheets 5...

Страница 440: ...ES 2024 2024e Consumables 440 OKI PRINT MEDIA CONTINUED OKI Premium Envelopes Security Tint Redi Strip Seal Order No White COM 10 Box 100 52206301 White COM 10 Box 500 52206302...

Страница 441: ...EX OFF BINDING LONG EDGE PAPER FEED TRAY1 AUTO TRAY SWITCH ON TRAY SEQUENCE DOWN MP TRAY USAGE FEED WHEN MISMATCHING MEDIA CHECK ENABLE TRANSPARENCY DETECT AUTO RESOLUTIO ES 2024 ES 2024e 600 X 1200 d...

Страница 442: ...setting TRAY1 MEDIATYPE PLAIN TRAY1 MEDIAWEIGHT AUTO TRAY2 MEDIATYPE PLAIN TRAY2 MEDIAWEIGHT AUTO TRAY3 MEDIATYPE PLAIN TRAY3 MEDIAWEIGHT AUTO MPP TRAY PAPERSIZE LETTER MP TRAY MEDIA PLAIN MP TRAY MED...

Страница 443: ...DARK 0 MAGENTA HIGH LIGHT 0 MAGENTA MID TONE 0 MAGENTA DARK 0 YELLOW HIGH LIGHT 0 YELLOW MID TONE 0 YELLOW DARK 0 BLACK HIGH LIGHT 0 BLACK MID TONE 0 BLACK DARK 0 CYAN DARKNESS 0 MAGENTA DARKNESS 0 Y...

Страница 444: ...ON CLEARABLE WARNING ON AUTO CONTINUE OFF MANUAL TIMEOUT 60 sec WAIT TIMEOUT 40 sec LOW TONER CONTINUE JAM RECOVERY ON ERROR REPORT OFF LANGUAGE ENGLISH Item Factory default setting FONT SOURCE reside...

Страница 445: ...pi FONT CONDENSE 10 cpi to 12 cpi CHARACTER SET set 2 SYMBOL SET IBM 437 LETTER 0 STYLE disable ZERO CHARACTER normal LINE PITCH 6 lpi WHITE PAGE SKIP off CR FUNCTUION cr LF FUNCTION lr LINE LENGTH 80...

Страница 446: ...LETTER 0 STYLE disable ZERO CHARACTER normal LINE PITCH 6 lpi WHITE PAGE SKIP off CR FUNCTUION cr LINE LENGTH 80 column FORM LENGTH 11 inch TOF POSITION 0 0 inch LEFT MARGIN 0 0 inch FIT TO LETTER En...

Страница 447: ...ABLE Item Factory default setting TCP IP ENABLE NETWARE ENABLE ETHERTALK ENABLE NETBEUI ENABLE FRAME TYPE AUTO DHCP BOOTP ENABLE RARP DISABLE IP ADDRESS 0 0 0 0 SUBNET MASK 0 0 0 0 GATEWAY ADDRESS 0 0...

Страница 448: ...g PARTITION 1 PCL PARTITION 2 COMMON PARTITION 3 PS Item Factory default setting X ADJUST 0 0 mm Y ADJUST 0 0 mm DUPLEX X ADJUST 0 0 mm DUPLEX Y ADJUST 0 0 mm TRAY1 LEGAL14 PAPER LEGAL 14 TRAY2 LEGAL1...

Страница 449: ...24e Factory Default Settings 449 MAINTENANCE MENU Item Factory default setting EEPROM RESET EXECUTE POWER SAVE ENABLE PAPER BLACK SETTING 0 PAPER COLOR SETTING 0 TRANSPR BLACK SETTING 0 TRANSPR COLOR...

Страница 450: ...igned to help you get the most out of your printer Load these programs from the Menu Installer located on CD1 Utilities included Color Utility Color Swatch Utility Utilities for Maintenance and improv...

Страница 451: ...nd the desired colors for your printed documents Loading the Utility First install the utility from CD1 using the Oki Menu Installer Windows To load the utility Click Start Programs Color Swatch Color...

Страница 452: ...locks to pick the specific colors that you want to appear in your printed document Color Values Each color block or sample is identified with information your software package needs to reproduce that...

Страница 453: ...the bars until you see the desired color Color variations are created to help you find the best match 4 Click OK then print the custom swatch page 5 Repeat these steps if you still don t find the desi...

Страница 454: ...crobat separately before printing PDF Direct Print also lets you set paper source copies 2 sided printing print page range and other settings To use PDF Direct Print An optional built in hard disk mus...

Страница 455: ...Software Utilities 455 Starting To start PDF Direct Print 1 Right click on the file your want to print in Windows Explorer or on the file icon on the Desktop 2 Click PDF Direct Print then click Print...

Страница 456: ...tware Utilities 456 The Start screen provides the following features Select Print Paper Source Copies 2 sided printing Binding Collate Fit to page Print page range Restore Default Save Settings Print...

Страница 457: ...tional information see the PDF Print Direct Help file in the PDF Direct Print Utility NOTE If when attempting to PDF direct print a file ERROR PDF to PS conversion failed displays the file contains an...

Страница 458: ...ility from CD1 using the Oki Menu Installer Getting Help The Oki Storage Device Manager software contains an on line Help system To access it from the main Storage Device Manager screen click Help Top...

Страница 459: ...roves the internal performance of the printer and provides a tool for downloading files from the computer to the printer s memory including Overlays such as logos addresses etc Graphic files Forms suc...

Страница 460: ...stered Reboot the printer Manage the Proof Print and Secure Print spooler queues on the internal hard drive Delete files from the internal hard disk or from the flash memory View the status configurat...

Страница 461: ...numbers from 0 through 7 8 and 9 cannot be used Reboot the printer Deletefiles ShowResourcesispreferable NOTE If preferred clients can choose their own PIN number but the administrator will need to k...

Страница 462: ...You can also use Storage Device Manager to format the partitions on the printer s hard drive but this will wipe out all the contents of the partition and can cause serious problems We recommend that...

Страница 463: ...ager Oki Storage Device Manager The SDM Printer Discovery dialog box opens discovery tif 2 Select the appropriate computer connection s then click Start The printer searches for connected printers and...

Страница 464: ...password tif 2 Type in the default password p1xs7d0m under Enter Password then click Change Password 3 Type the 8 digit alpha numeric password of your choice under New Password 4 Type the password ag...

Страница 465: ...s Me 98 95 Click Properties or your application s equivalent Click the PostScript tab then if it is not already selected click Encapsulated PostScript EPS Windows NT 4 0 Click Properties or your appli...

Страница 466: ...Projects Add File to Project The Open dialog box appears 2 Make sure PRN files prn is selected in the Files of type drop down list 3 Browse to the folder where the files are saved and select the files...

Страница 467: ...of on the hard disk drive 1 Double click the file name in the Project window The Edit Component Name and ID dialog box appears 2 Under Volume type in Flash0 then click OK Step 5 Save the Project and D...

Страница 468: ...PCL Macros Forms There are two basic processes to producing PCL macros A Creating and downloading the PCL project B Test printing the macro Important Unless you are experienced with PCL macro commands...

Страница 469: ...d make sure the Oki PCL driver is selected 3 Print the document to a file using the extension PRN Step 2 Create a New Project 1 Open Storage Device Manager 2 Click Projects New Project The Project dia...

Страница 470: ...ES 2024 2024e Software Utilities 470 Step 3 Convert the Files to Binary bin Format 1 Click Projects Filter Macro File The Filter Printer Patterns dialog box appears filter tif...

Страница 471: ...click the file name The file is saved as a bin file Filter File Created appears 6 Click OK 7 Repeat steps 1 through 6 until you have converted all the files you wish to add to the project Example If...

Страница 472: ...ialog box 3 Repeat steps 1 and 2 until all the files you wish to include in the project appear in the Project dialog box To delete a file from the project click the file name then click Projects Remov...

Страница 473: ...er you need to enter in the printer driver when printing overlays volume 0 printer s disk drive PCL partition 1 printer s disk drive Common partition disk0 printer s disk drive PostScript partition 2...

Страница 474: ...e printer icon highlighted click Printers Test Macro The Test Macro dialog box appears 2 Enter the ID number for the macro file you wish to print you can get this from the File List printout look unde...

Страница 475: ...memory 1 With Storage Device Manager open click Printers Print File Listing Command Issued appears 2 Click OK and wait for the File List to print NOTE You can also print the File List from the printe...

Страница 476: ...for the printer whose contents you wish to view 2 Click Printers HDD Print Jobs The HDD Print Jobs dialog box appears hdd1_bw tif 3 Under Job Types select Secure Jobs to view Secure Print jobs and or...

Страница 477: ...ties 477 4 Delete the files Click Cancel Job s to delete the files without printing them Click Print Job s to print the files out before they are auto matically deleted Important You will not be promp...

Страница 478: ...you wish to view 2 Click Printers Show Resources show_clr tif 3 Click the file s to be deleted press Shift to select a span of files press Ctrl to select additional files PCL Macro files are under Vo...

Страница 479: ...he Oki Storage Device Manager software must be installed It is recommended that the printer be equipped with the optional hard disk drive You can save logos letterheads etc as overlays on the printer...

Страница 480: ...e printer s hard drive using Storage Device Manager before they can be used If the hard disk memory is insufficient for the spooled data the message DISK FULL appears If the software application has a...

Страница 481: ...k the Overlay tab 4 Click Define Overlays 5 Under Overlay Name enter a name for the overlay 6 Under ID Value enter the ID number for the file saved using the Storage Device Manager software see the Fi...

Страница 482: ...elect more than one press the Ctrl key while selecting the names then click Add Each name appears in the Active overlays box To print a sample of an overlay to see what it looks like click the name un...

Страница 483: ...rinter icon then click Printing Preferences The Oki Printing Preferences dialog box appears 3 Click the Overlay tab 4 Click Define overlays The Define overlays dialog box appears 5 Under Defined overl...

Страница 484: ...ters 2 Right click the Oki PCL printer icon then click Printing Preferences The Oki Printing Preferences dialog box appears 3 Click the Overlay tab 4 Click Define Overlays The Define Overlays dialog b...

Страница 485: ...lick Define overlays 5 Under Overlay Name enter a name for the overlay 6 Under ID Value enter the ID number for the file saved using Storage Device Manager see the File List printout 7 In the Print on...

Страница 486: ...efined Overlays click any overlays you wish to use to select more than one press the Ctrl key while selecting the names then click Add The names appear in the Active overlays box To print a sample of...

Страница 487: ...nter icon then click Properties The Oki Properties dialog box appears 3 Click the Job Options tab Click the Overlay button 4 Click Define overlays The Define overlays dialog box appears 5 Under Define...

Страница 488: ...Oki PCL printer icon then click Properties The Oki Properties dialog box appears 3 Click the Job Options tab Click the Overlay button 4 Click Define overlays The Define overlays dialog box appears 5...

Страница 489: ...you are creating 6 In the Print on Pages drop down list select on which pages the overlay is to be printed or select Custom and enter specific page numbers under Custom pages 7 Under Overlay Name typ...

Страница 490: ...rop down list 6 Click up to four groups under Defined Overlay then click Add 7 Click OK and print the document Editing Defined Overlays Me 98 95 PostScript 1 Click Start Settings Printers 2 Right clic...

Страница 491: ...the Oki PostScript printer icon then click Properties The Oki Properties dialog box appears 3 Click the Job Options tab Click the Overlay button 4 Under Defined Overlay click the name of the group you...

Страница 492: ...e Define overlays dialog box appears 5 Under Overlay Name enter a name for the overlay 6 Under ID Value enter the ID number for the file saved using Storage Device Manager see the File List printout 7...

Страница 493: ...erlays you wish to use to select more than one press the Ctrl key while selecting the names then click Add The names appears in the Active overlays box 5 Click Print using active overlays then click O...

Страница 494: ...Under Defined overlays click the overlay to be edited 6 Make your changes then click Apply 7 Click Close 8 Click OK and close the Printers dialog box Deleting Defined Overlays NT 4 0 PCL 1 Click Start...

Страница 495: ...ings Printers 2 Right click the Oki PostScript printer icon then click Document Defaults The Oki Default dialog box appears 3 Scroll down to Layout and click Overlay 4 Under Change Overlay Setting cli...

Страница 496: ...m and enter specific page numbers under Custom pages 9 Under Overlay Name type in the name of the overlay file exactly as it was stored using Storage Device Manager see the File List printout Overlay...

Страница 497: ...the Print on Pages drop down list select on which pages the overlay is to be printed or select Custom and enter specific page numbers under Custom pages 7 Under Form Name type in the name of the over...

Страница 498: ...tive Overlay Groups list 6 Click OK twice and print the document Editing Defined Overlays NT 4 0 PostScript 7 Click Start Settings Printers 8 Right click the Oki PostScript printer icon then click Doc...

Страница 499: ...ault dialog box appears 3 Scroll down to Layout and click Overlay 4 Click Setting of Overlay The Setting of Overlay dialog box appears 5 Click the name of the Defined Overlay Group you wish to remove...

Страница 500: ...printer usage manage consumables usage and replenishment Administrator interface to the system is via a standard web browser enabling you to check on printer status and compatible multi function devi...

Страница 501: ...anization can get customized daily reports of the status of all printers including usage reports User accounts can be configured so that a person in each department can manage their local printers The...

Страница 502: ...ion SP6 0a Microsoft Personal Web Server Version available for free download from Microsoft as Option Pack 4 0 Windows 2000 or NT4 Server SP6 0a Microsoft IIS available for free download from Microsof...

Страница 503: ...nter s status To Install 1 Insert the Oki CD1 into the CD ROM drive If CD does not AutoPlay click Start Run Browse Browse to your CD ROM and double click Install exe then click OK 2 Click Network Soft...

Страница 504: ...Trays Paper Type weight Duplex Installed not installed Disk Memory RAM size and used Flash Memory size and used Toner Remaining toner remaining is all cartridges NOTE If the Automatic Status Check box...

Страница 505: ...er Status Click the WEB SETTING button The following screen displays NetStatusk tif Click on the items listed on the left to see Network Summary Login for Administrators Job Login Printer Menu To see...

Страница 506: ...ws NT 4 0 Windows 2000 and Windows XP operating systems How to Install The Oki LPR Utility supports TCP IP Your network administrator will first need to set up an IP address and TCP IP properties for...

Страница 507: ...information Printers Names of added printers You can add up to 30 printers Status LPR Utility status empty connecting sending paused checking status not connected Finish Number of completed jobs Queue...

Страница 508: ...Windows 2000 178 Windows Me 98 95 252 Windows NT 4 0 329 Windows XP 107 Color matching PostScript Windows 2000 184 Windows Me 98 95 256 Windows NT 4 0 332 Windows XP 110 Color swatch utility 451 Colo...

Страница 509: ...46 L LED head 395 Location 15 M Maintenance Cleaning LED head 395 Fuser unit 392 Image drum 385 Toner cartridge 380 Transfer belt 388 Manual feed 32 Media default Windows 2000 168 Windows Me 98 95 24...

Страница 510: ...ows Me 98 95 242 Windows NT 4 0 315 Windows XP 91 Paper size default Windows 2000 168 Windows Me 98 95 242 Windows NT 4 0 315 Windows XP 91 Paper trays optional Windows 2000 164 Windows Me 98 95 240 W...

Страница 511: ...4 0 357 Secure printing Windows 2000 216 Windows Me 98 95 288 Windows XP 141 Setting up Power cable 33 Protective sheet removal 19 Toner cartridge installation 23 Software utilities 450 Status messag...

Страница 512: ...2024e Index 512 storage device manager 458 W Watermarks Windows 2000 210 Windows Me 98 95 278 Windows NT 4 0 351 Windows XP 134 Windows ICM color matching Windows 2000 191 Windows Me 98 95 263 Windows...

Отзывы: