


C6150 User’s Guide
15
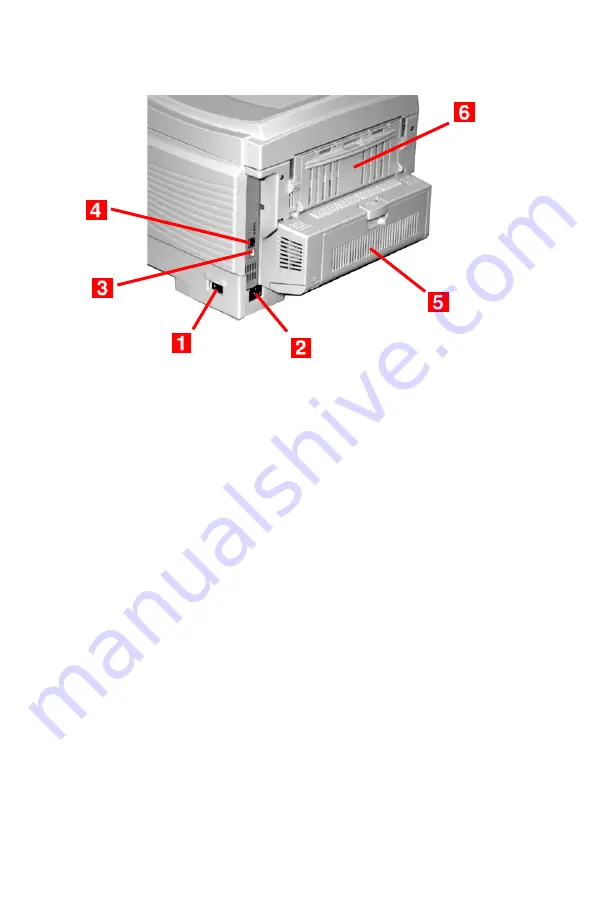
Rear ____________________________
c51_01_backview.jpg
1.
On/Off Switch
2.
Socket for Power Cord
3.
USB Interface
4.
Network Interface
5.
Duplex Unit
6.
Rear Stacker (face up)
•
Capacity 100 sheets
•
When the rear paper stacker is folded down, paper exits
the printer through the rear of the printer and is stacked
face up.
•
This is used for labels, heavy print media, envelopes and
custom paper sizes.
•
When used with the Multi-Purpose Tray, the paper path
through the printer is essentially straight. This avoids
bending the print media around curves in the paper path
and makes paper feeding more reliable.
Содержание C6150 Series
Страница 1: ......
Страница 11: ...C6100 Series User s Guide 11 Additional Information 286...
Страница 57: ...C6150 User s Guide 57 File Print Options This puts the printed stack in the correct order...
Страница 126: ...C6150 User s Guide 126 3 Close the front cover c53_57_frcvrclose jpg...
Страница 135: ...C6150 User s Guide 135 5 Close the rear exit c53_70a_rear1 jpg 6 Close the top cover c53_45_latchcvr jpg...
Страница 137: ...C6150 User s Guide 137 2 Remove any jammed sheets c53_94_jam390 jpg 3 Close the front cover c53_102_jam390 jpg...


