background image


5


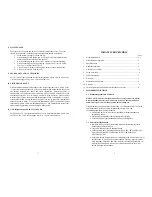
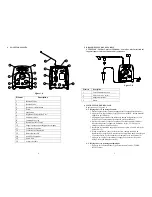
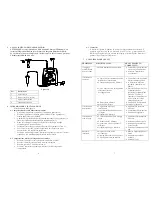
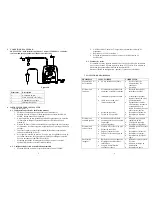
CONNECTING THE UNIT 

CAUTION: A 5-micron filter (TSD800-6), not included, must be installed with the unit to 
ensure proper air filtration. 


Figure 2.0 


6


SETUP INSTRUCTIONS   

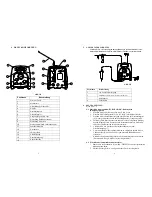
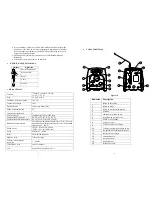
Refer to Figure 1.0 


6.1


Manual Dispense Cycle Setting: 

1.


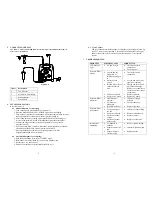
Turn on the unit by pressing the Power button (1)  

2.


Press the Mode button (2) until “PURGE” appears on the Display. 

3.


Turn up the air pressure by rotating the Air pressure regulator knob (6) until 
the desired pressure is indicated on the Air pressure gauge (5)  

4.


After filling the barrel or using pre-packaged adhesive, attach syringe to 
receiver head assembly.  Make certain that the syringe locks into place. 

5.


Connect the plug end of the receiver head assembly to one of the air 
dispense outlet (7) 

6.


If vacuum “suck back” is needed, rotate the Vacuum regulator (8) counter 
clockwise until the desired vacuum pressure is obtained 

7.


Press and hold the Foot switch to activate dispensed cycle. (The 
Purge/Manual Mode is now activated) 


6.2


 Automatic Dispense Cycle Setting: 

1.


Push the Mode button (2) to select “TIMED” mode  

2.


Rotate the Time control knob (9) to set desired dispense time 

3.


Repeat step 3 to 6 in Section 6.1 

4.


Depress Foot switch to activate timed dispensed cycle 


Items Description 

To Air Source 

Air Filter (Not included) 

3 Power 

Adapter 

4 Foot 

Switch 

2

1

3

4


6

6.3


Cycle Counter 

The cycle counter records the numbers of dispense cycle being activated.  Up 
to 65,535 cycles can be recorded.  This number is shown at the lower right 
hand corner of the LCD.  Press the Counter Reset button (3) to clear the 
counter.  


7


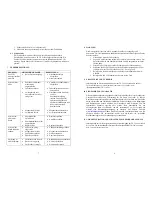
TROUBLESHOOTING


PROBLEM POSSIBLE 

CAUSE  CORRECTION 

LCD does not 
light 


No power input 


Check power cord 
connections 


Turn on power 

System will not 
actuate 


Foot switch not 
plugged in or 
improperly plugged 
in 


Defective foot 
switch 


Broken wire or loose 
connection inside 
unit 


Defective solenoid 


Defective PC board 


Check foot switch 
connection 


Foot switch needs to be 
repaired or replaced 


Unplug power cord and 
disconnect air supply.  
Remove cover and check 
for broken wires or loose 
connections 


Replace solenoid 


Replace PC board 

System will not 
pressurize 


Insufficient air 
pressure 


Air hoses not 
plugged in 


Regulator defective 


Increase air supply 
pressure 


Check connection 


Replace regulator 

System will not 
pull vacuum 


Vacuum setting is 
too low 


Defective solenoid 


Defective vacuum 
venturi 


Defective vacuum 
needle valve 


Increase vacuum setting 


Replace solenoid valve 


Replace venture 


Replace needle valve 

Inconsistent 
dispensing 


Air bubbles in 
adhesive 


Dispense time is too 
low 


Dispense needle 
started to clog 


Reduce vacuum setting 


Increase dispensing time 


Replace needle 


Содержание TECHCON SYSTEMS TS250

Страница 1: ...intended applications of its equipment Unintended uses may result form taking the following actions Making changes to equipment that has not been recommended in the User Guide Using incompatible or da...

Страница 2: ...122 F Storage Temperature 10 C to 60 C 14 F to 140 F Max Relative Humidity 80 for temperature up to 31 C 87 8 F Decreasing linearly to 50 relative humility at 40 C 104 F Air Output TS250 0 100 psi 0...

Страница 3: ...1 To Air Source 2 Air Filter Not included 3 Power Adapter 4 Foot Switch 2 1 3 4 6 6 3 Cycle Counter The cycle counter records the numbers of dispense cycle being activated Up to 65 535 cycles can be...

Страница 4: ...neering product changes without notice 11 I O Configuration and End of Cycle Switch For TS3xx 2xx I O Configuration and End of Cycle Switch information please visit the TS 3xx 2xx User Guide webpage a...

Страница 5: ...eignet 2 ERL UTERUNG DER SYMBOLE Symbol Ein Aus Zyklusbetrieb Timer Vakuum Druckluft 4 3 SPEZIFIKATIONEN Abmessungen 152 x 165 x 178 mm 6 x 6 5 x 7 0 Gewicht 1 2 kg 2 6lbs Eingangs spannung 24 VDC Nen...

Страница 6: ...play erscheint 3 Erh hen Sie die Druckluftversorgung durch Drehen des Druckluftreglers 6 bis der gew nschte Druck am Druckluftmesser 5 angezeigt wird 4 F llen Sie die Kartusche oder verwenden Sie ein...

Страница 7: ...sgelegt und konstruiert Um eine einwandfreie Funktion sicherzustellen sollten folgende Punkte beachtet werden 1 Nur saubere trockene Luft zuf hren 2 Legen Sie die Kartuschen nicht mit der Unterseite n...

Страница 8: ...liquide corrosif ou inflammable un filtre 881 000 000 Non inclus doit tre install sur le doseur pour contribuer viter la r aspiration du fluide dans l appareil Le fluide dos peut tre toxique et ou da...

Страница 9: ...qu ce que PURGE Mode Manuel apparaisse sur l afficheur 3 Augmentez la pression d air en tournant le bouton du r gulateur 6 d air jusqu ce que le manom tre 5 indique la pression souhait e 4 Apr s avoir...

Страница 10: ...1 Assurez vous que l air d alimentation est propre et sec 2 vitez de retourner ou de coucher le corps de la seringue pour que le produit ne s coule pas travers la ligne d alimentation en air vers les...

Страница 11: ...sime prestabilite Indossare sempre un abbigliamento protettivo adeguato o appositi indumenti Utilizzare soltanto spine elettriche dei seguenti modelli PSA15R 240P ZJ oppure PW118RA2403B01 PW118RA2403H...

Страница 12: ...a 40 C 104 F Uscita aria TS250 0 100 psi 0 6 9 bar TS255 0 15 psi 0 1 03 bar Vuoto 406mm 16 di Hg Timer 0 020 60 000 secondi Modalit ciclo Temporizzato Manuale Tolleranza ripetitivit temporizzazione...

Страница 13: ...ro di cicli di dosatura automatica effettuati E possibile registrare fino ad un massimo di 65 535 cicli Questo numero indicato nell angolo in basso a destra del display a cristalli liquidi Premere il...

Страница 14: ...to www okinternational com OK International si riserva il diritto di apportare modifiche tecniche al prodotto senza preavviso 11 CONFIGURAZIONE I O ED INTERRUTTORE DI FINE CICLO Per informazioni sulla...

Страница 15: ...n De 0 C a 50 C de 32 F a 122 F Temperatura de almacenamiento De 10 C a 60 C de 14 F a 140 F Humedad relativa m xima 80 para una temperatura m xima de 31 C 87 8 F con una disminuci n lineal hasta alca...

Страница 16: ...el interruptor de pedal para activar el ciclo de tiempo de dosificaci n 6 3 Contador de ciclos El contador de ciclos registra el n mero del ciclo de dosificaci n autom tica que se est activando Pueden...

Страница 17: ...IMITADA OK International garantiza este producto al comprador original por un per odo de 1 a o a partir de la fecha de compra como libre de defectos de material y mano de obra excepto por el desgaste...

Отзывы: