4
|
English
|
5
English
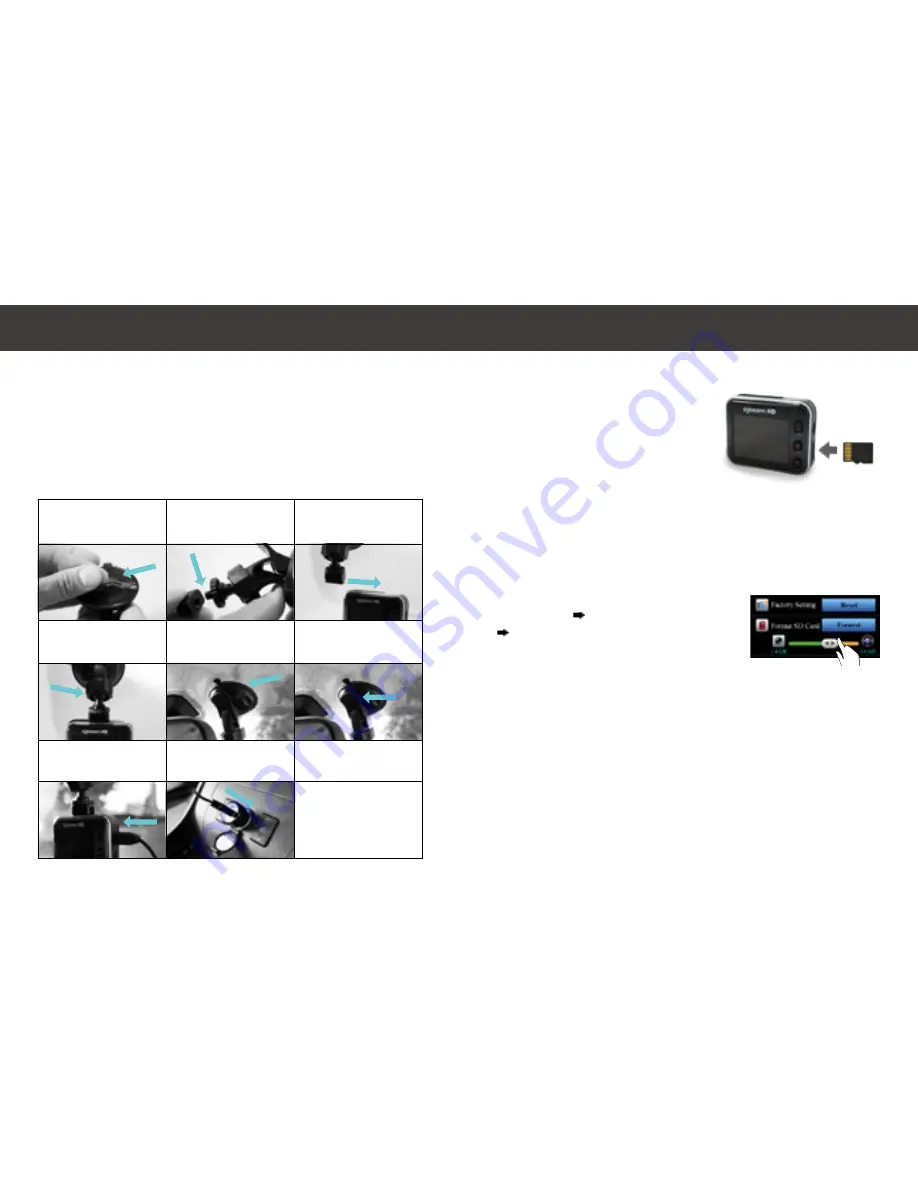
Mounting the Device
To achieve optimal performance from your camera, we recommend
mounting on the front of the windshield, behind the rearview mirror.
This will minimize the impact on the drivers’ line of sight. You will also
need to keep the camera centered, and angle the bracket to optimize the
camera’s view.
Mounting Steps:
Installation
Operation
Inserting a MicroSD Card
Before initial use, insert a microSD card,
as shown in the picture (suggested at
least 4GB, up to 64GB). Press it in until
you hear a click.
To remove the memory card, push the
memory card forward gently until you
hear a click. The card should release.
microSD card
Charging the Unit
Fully charge camera for initial use by:
• Car charger
• PC USB port
• USB adapter (not included)
During charging, when the camera is on, screen shows battery icon or
status indicator flashes in orange. When camcorder is fully charged, the
indicator turns off.
Micro SD Card Setup
Go to [Setup]
[
Camcorder Settings
]
Adjust slide bar and press [Format]
button to complete SD card setup.
When SD card is used for the first time, or is reformatted in camera,
user should allocate memory for Action Cam Mode and Dash Cam
Mode.
1. Peel the plastic film off the
suction cup.
2. Screw the tripod connector
onto the base of the suction
cup mount.
3. Slide the dash cam onto the
tripod connector.
4. Turn on the camera, loosen
the angle locking ring and
adjust the angle.
5. Press the suction cup firmly
onto the windshield.
6. Push down the lever to lock
the suction cup in place.
7. Plug the 12 foot Micro USB
cable into the camera.
8. Plug the power cord into the
cigarette lighter adaptor.
9. Do a test drive and make
sure the camera is recording.
Содержание OC-0900 Chameleon
Страница 1: ...Multi Purpose Dash Camera User Guide...


