background image

EN-17

SmartLink

Overview of SmartLink

The system of the car device is Android 

version, which supports the connection 

between the car device and Smart phone.

And you can also control your phone by the 

car device, such as receiving calls, dialing 

calls, listening to the music and watching 

movies or pictures from your phone, as well 

using navigation from the Smart phone to the 

screen of the car device.

Note:

You can't control your iPhone by the unit. 

(iPhone mirrors display on screen)

4. Correctly connect USB wire.
5. Auto install APP.


For the first connection with SmartLink, 

if the Android phone is not installed with 

interconnection APP, the Smartlink will ask 
for installing the App to the Android phone.

6. Finish connection. 

(If it is not connected successfully, please 

replace USB cable or vehicle USB interface, 

or re-insert USB wire or restart Android 

phone and re-try).

7. After connection, operate according to 
the screen software.

Tip:

•   For your driving safety, please do not use 

the function during driving.

•   For normal use, Android 4.0 to Android 6.0 

version is recommended. Since Android 

2.3X  and  below  version  system  lacks 

relevant support, when using the version 

system to connect the product, some 

functions (such as: mobile video play, etc.) 

may not display normally.

•   According to the different mobile phone” 

Media library” and “Video” program 

support formats, it is not all the video files 

copied to mobile phone can be identified 

and played. According to the different 

equipment function, not all video files of all 

formats can be played in vehicle terminal 

smoothly.

•   Since  the  mobile  phone  data  cable 

performance  difference  in  the  market, 

it is strongly recommended using the 

original USB data line to connect so as to 

guarantee the connection stability.

•   Due  to  the  difference  of  mobile  phone 

performance, when using different mobile 

phones to connect, the performance may 

be different.

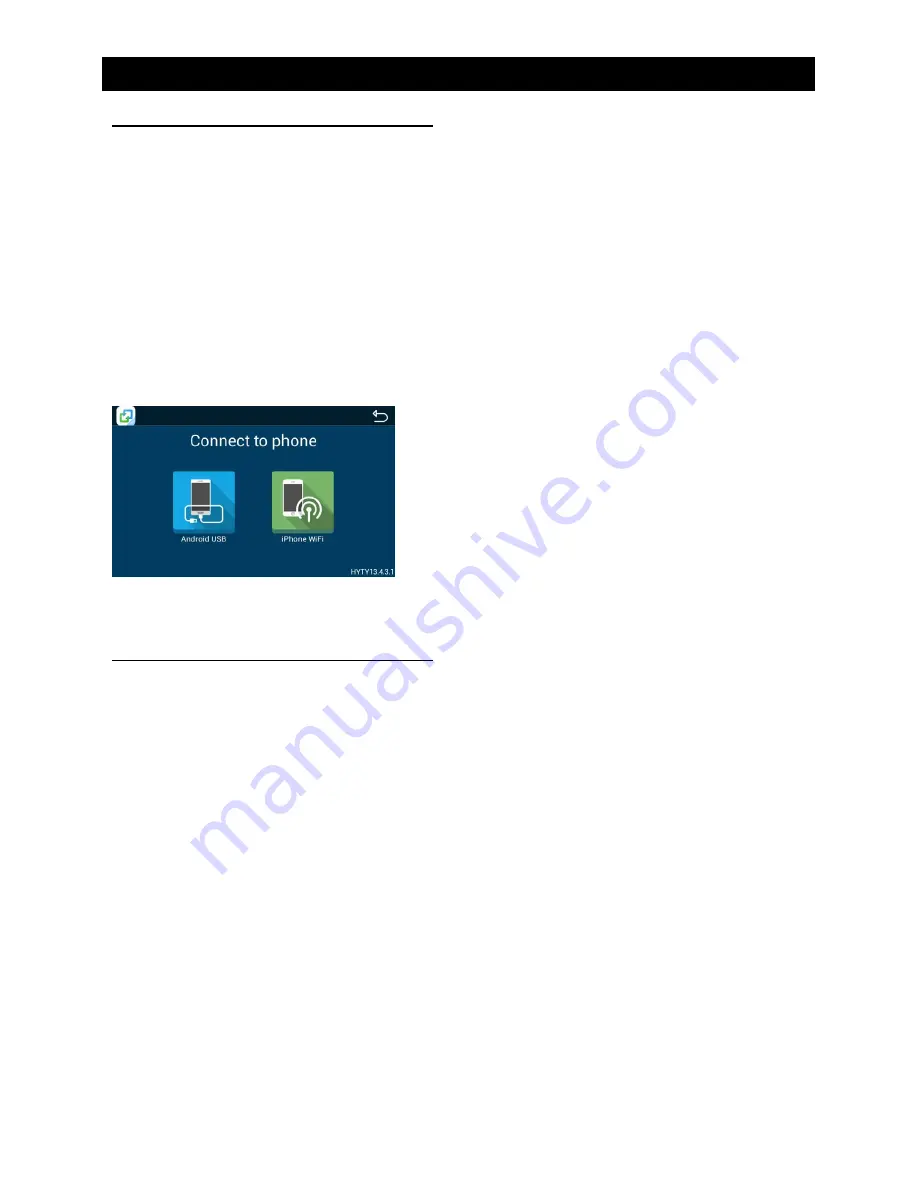
Connect with Android phone

1. Select “Easyconnected Fun Full” in the 
APPS menu and select “Android USB” on 
the screen. 
2. Start Android phone [USB debugging].

The operations of Android phone’s entering 

[Setting] are as follows (since the Android 

phone versions are not the same, it roughly 

has two conditions):

1)  Existence  of  [Developer  options]:  Click 

[Additional  settings]-Click  [Developer 

options]-click  to  open  [Start  developer 

options]-click  to  open  [USB  debugging]-

determine to allow.

2) Inexistence of [Developer options]: Click 

system version number (interior version 

number)  for  7  times,  then  back  to  setting 

and click [Developer options]-click to open 

“Start developer options”-click to open [USB 

debugging]-determine to allow.

3. Bluetooth connection. 

Scan for Bluetooth devices and select this 

system for connection.

Содержание H-ANDROID PLUS NEW

Страница 1: ...H ANDROID PLUS NEW Owner s Manual Manual del Usuario...

Страница 2: ...smell Only connect the unit to a 12 volt power supply with proper negative grounding MUTE OK MUTE OK Never install this unit where the operation and condition for driving safely is compromised MUTE O...

Страница 3: ...ire electric shock and annoying interference use only the included components Caution of disc using 1 DO NOT use irregular shaped disc 2 Disc Cleaning Use a dry soft cloth to wipe the disc from center...

Страница 4: ...Button Power ON press Power OFF long press Mute the Volume press 4 Button Show main menu press Show main options long press 5 Button Press to go back one step on any screen 6 Volume Increase Decrease...

Страница 5: ...ck 11 Setup menu 12 Enter OK key 13 Move the cursor up down left right Up down Manual tuning 14 Numeric keys 15 Mute the volume 16 Unit power 17 Select DVD subtitle language 18 Select DVD angle 19 Ret...

Страница 6: ...ions If the remote control doesn t work change the battery 5 Use button shaped lithium battery CR2025 3V only 6 DO NOT recharge disassemble heat or expose the battery to fire 7 Insert the battery in p...

Страница 7: ...ying source mode you have selected When Vehicle is Put in Reverse If the rear view video camera is connected the unit automatically switches to CAMERA source during reverse driving The unit returns to...

Страница 8: ...hold it and drag to the on the top and release after it turns red Disc Operation Insert a Disc Insert a disc into the slot and the unit will change to disc mode automatically Notes Please confirm whe...

Страница 9: ...t play 9 To enter search menu 10 Hide the second line of control buttons Mixed Disc Playback When inserting a mixed disc the unit will read the disc and show the files list For some discs you need to...

Страница 10: ...r repeatedly Repeat title Play all chapters in the title repeatedly Sequential Track Playback for CD MP3 WMA Only You can play all the tracks in random order During playback press button on the screen...

Страница 11: ...al tuning the frequency will be changed in steps Touch the or button on the operation bar to tune in a lower higher station Auto Tuning Hold the or button on the operation bar for more than 2 seconds...

Страница 12: ...input the frequency touch OK to goto the station directly To cancel an input number touch RDS Basics Radio Data System RDS enables traffic reports to be received and provides many facilities including...

Страница 13: ...B Operations Using USB device 1 Connect your USB device to the USB cable When connecting a USB device the unit will read the files automatically 2 To remove the USB device you should first select anot...

Страница 14: ...ft of the screen 2 Touch an album shown on the list 3 Select a song to play Select Music by Song Name 1 Touch Songs on the left of the screen 2 Select a song to play Playlists Add a song to favorite p...

Страница 15: ...12 13 11 Sequential play 12 Repeat play 13 Show previous page of control buttons Notes Disconnect USB storage devices from the unit when not in use Do not use unauthorized products Gallery Operations...

Страница 16: ...ring the telephone call Touch Phone on the main menu to enter Bluetooth Phone mode 1 If the Bluetooth function of the unit is off the unit will ask you to turn it on Default setting is on 2 Turn on Bl...

Страница 17: ...UTION Please avoid operating your connected mobile phone while audio streaming as this may cause noise or the sound to cut in and out on playback Audio streaming may or may not resume after telephone...

Страница 18: ...c may not display normally According to the different mobile phone Media library and Video program support formats it is not all the video files copied to mobile phone can be identified and played Acc...

Страница 19: ...ully the desktop of you iPhone will display on the screen of the unit If it is not connected successfully please restart the WiFi of your iPhone and refresh the hotspot list on the unit Select EQ on t...

Страница 20: ...ht corner of the main menu Now you can access internet Visit Website To access the internet you must setup wireless network in system settings menu Select on the main menu to view a website Touch the...

Страница 21: ...menu to visit TV mode Touch the center of screen to show operation buttons Steering Wheel Control Select SWC on the APPS menu to enter SWC setting menu 1 Touch number button to select a SWC button 2...

Страница 22: ...Blackout Choose screen blackout off 15s or 30s Beep On Turn on the beep sound Each time you press a button the unit beeps Off Turn off the beep sound Quick gesture operations definition Adjust Video...

Страница 23: ...ess Security Language input Factory data reset All data erase Accounts etc Device To setup Brightness Storage Apps System settings Accessibility To setup accessibility related applications You need do...

Страница 24: ...rd through the installation hole into the engine compartment and connect to the car battery Otherwise a high possibility of serious short circuit to the electrical system may occur If you need to repl...

Страница 25: ...EN 24 Device Connections Wiring Diagram USB 3G TV...

Страница 26: ...attery is low or empty Change the batteries DVD mode The appliance will not play discs The disc is inserted incorrectly The disc is dirty or damaged Disc must be inserted with the label side facing up...

Страница 27: ...resolution 800X480dots DVD Player Signal Noise Ratio 70dB Dynamic Range 70dB Distortion line out 0 8 Frequency Response 3dB 20Hz 20KHz Maximum Output Power 4 45W Load Impedance 4 Audio Audio Output I...

Страница 28: ...CLASS 1 LASER PRODUCT P N 127075007263...

Отзывы: