background image

17

GB

Operating instructions

GB

Note: 

We recommend that you not return the filtered water directly into the pond, but

rather that you introduce the cleaned water indirectly, e.g. via a small watercourse.
This additionally enriches the water with oxygen.
2. Cover the tubing with soil if the tubes are not UV resistant.

Mounting on the cleaning discharge

You will require tube pieces and elbows for the water discharge (

Biotec 18

: DN 50, 

Biotec

36

: DN 70). Insure that the drain tube is UV resistant if you lay the tubing in the open.

1. Put the tube pieces together and lay the tubing from the water discharge to the

pond on a slight incline (at least 1%).

2. Cover the tubing with soil if the tubes are not UV resistant.

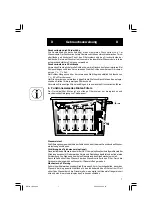
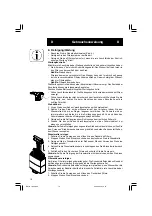
Insert substrate tubes

1. Open the filter cover and swing the sieve insert up.
2. Remove the partition between filter and substrate chamber, in order to more eas-

ily insert the substrate tubes.

3. Remove the protective packaging of the four substrate tubes and insert these in

the guide in the substrate chamber.

4. Re-insert the partition and swing down the sieve insert.
5. Close the lid of the filter.
Now your Biotec filter is ready for operation.

8. Commissioning

– You must read and follow the 

safety instructions

 (chap. 4) before the installation!

– The filter system is a biologic system and requires a few weeks until full biologic

effectivity when newly installed.

Correct water jet adjustment

The strength of the water jet depends on the pump capacity; it can be controlled with
the regulator on the water distributor.
1. Turn the pump on.
2. Open the lid of the filter.
3. Adjust the water jet for the filter operation in such a manner that the water jet

occurs in the first third of the sieve. In this manner an optimal turbulence and
distribution of the water is achieved above the sieve surface.

4. Close the lid of the filter.

9. Cleaning/Maintenance

– Follow the safety instructions (chap. 4).
– Clean the filter system only as needed.
– Clean the filter system immediately if the red “Maintenance” LED of the display is

blinking.

Maintenance indicator

If the red “Maintenance” indicator LED is blinking, this can have two causes:
– The “Screenex” has become blocked with debris. Water is no longer running into

the filter; rather it is flowing sideways via the sieve.

Remedy

 Clean sieve.

– Filter pads are dirty. The water can no longer flow through the dirty filter pads fast

enough. Thereby the water level in the filter container increases.

Remedy

 Clean filter pads.

Biotec 18-36..p65

26.03.2003, 15:31

17

Содержание Biotec 18

Страница 1: ...structions Moded emploi Gebruiksaanwijzing Instrucciones de uso Bruksanvisning Instrukcja u ytkowania haszn latiutas t sa N vod k pou it N vodnapou itie Navodilozauporabo Instruc iunidefolosire Brugsa...

Страница 2: ...2 Biotec 18 36 p65 26 03 2003 15 31 2...

Страница 3: ...3 Biotec 18 36 p65 26 03 2003 15 31 3...

Страница 4: ...4 Biotec 18 36 p65 26 03 2003 15 31 4...

Страница 5: ...olehabenfolgendeBedeutung Achtung Wichtiger Hinweis auf Gefahren Wichtige Information Achtung Ziehen Sie den Netzstecker Vor direkter Sonneneinstrahlung sch tzen Bei Frost m ssen Sie den Filter au er...

Страница 6: ...Das gesamte Filtersystem muss wasserdicht sein Montieren Sie deshalb den Schlauchanschluss und die Rohrleitungen sorgf ltig Der Filter darf in keinem Fall berlaufen Es besteht die Gefahr der Teichentl...

Страница 7: ...B gen die zu weiteren Druckverlusten f hren 6 FunktionsweisedesBiotec Filters Der Durchlauffilter Biotec ist ein offenes Filtersystem zur biologischen und mechanischenReinigungvonTeichwasser Wasserein...

Страница 8: ...in die Kanalisation oder ins Blumenbeet abgeleitet Das Schmutzwasser ist ein idealer Blumend nger Der Reinigungsauslass wird ber ei nenAbsperrschieberge ffnet 7 Biotec Filter aufstellen und montieren...

Страница 9: ...fenverlegen 1 Stecken Sie die Rohrst cke zusammen und verlegen Sie die Rohrleitung vom Reinigungsauslass bis zur Kanalisation oder zum Blumenbeet mit einem leich ten Gef lle mindestens 1 2 DeckenSiedi...

Страница 10: ...immer weiter nach hinten bis in die Auffangrinne gesp lt Von dort kann das Schmutzwasser ber den Reinigungsauslass abflie en 3 Reinigen Sie die Auffangrinne zum Schluss von dem restlichen Schmutz 4 Dr...

Страница 11: ...ht k nnen Sie die Filtersch ume herausnehmen und unter klarem Wasser reinigen Verwenden Sie keine Reinigungsmittel Substratrohre reinigen oder Inhalt wechseln 1 Schalten Sie die Pumpe aus und ffnen de...

Страница 12: ...h 15 000 23 000 EingangStufenschlaucht lle 3 4 bis 1 1 2 1 bis 2 Wasserauslass mm 70 100 Filtermatten 1 1 Anzahl Filterschw mme blau 4 9 Anzahl Filterschw mme rot 4 9 Spezialgranulat kg 4 5 9 0 Geeig...

Страница 13: ...the following meaning Attention Important hazard information Important information Attention Unplug the power plug Protect from direct sunlight Take the filter out of service in freezing conditions GB...

Страница 14: ...structions Assemblynotes The entire filter system must be watertight Therefore you must mount the hose connection and the tubing carefully The filter may not overflow under any circumstances There is...

Страница 15: ...ersal water intake connection with a hose Preliminary clarification of the pond water optional Theinflowingwaterisexposedtoshortwaveultra violetraysundertheUVCbulb This kills germs and bacteria and al...

Страница 16: ...onto the water intake duct If you have connected a UVC bulb to the Biotec filter you can disregard step 4 4 Seal the second water intake with the closed hose tail included 5 Lay the hose all the way t...

Страница 17: ...tion 8 Commissioning You must read and follow the safety instructions chap 4 before the installation The filter system is a biologic system and requires a few weeks until full biologic effectivity whe...

Страница 18: ...down the sieve insert 5 Close the filter lid and turn on the pump Note If cleaning the trickle mat is not sufficient then it should be replaced Cleaning filter pads TheBiotecfilterismaintenancefreefo...

Страница 19: ...y the filter and thoroughly clean it check the filter for possible damage in the process Remove and clean the sieve insert with the trickle mat all pad inserts and the sub stratetubes Storetheseinadry...

Страница 20: ...kazal bbijelent sselb rnak Figyelem Vesz lyre utal fontos figyelmeztet s Fontos inform ci k Figyelem H zza ki a h l zati csatlakoz dug j t Ne tegye ki k zvetlen naps t snek Fagyvesz ly eset n helyezze...

Страница 21: ...szeszerel shez A teljes sz r rendszernek v zz r nak kell lennie Gondosan v gezze el a cs vezet k s a t ml csatlakoztat s t A sz r semmilyen esetben sem folyhat t l A t le r t s nek vesz lye ll fenn El...

Страница 22: ...suniverz liscsatlakoz j hoz A t viz nek el zetes tiszt t sa opcion lis A befoly vizet az opcion lis UVC l mpa r vid hull mhossz iboly nt li f nnyel sug rozza be Ez el li a bakt riumokat s cs r kat va...

Страница 23: ...elt a4 pontot tugorhatja 4 Z rja el a m sodik v zkifoly st a csomagban tal lhat z rt t ml csatlakoz val 5 gy fektesse le a t ml t hogy az ne legyen megt rve s ne lehessen eltaposni 6 A t ml m sik v g...

Страница 24: ...sa Av zsug rer ss geaszivatty teljes tm ny t lf gg sav zeloszt nlev szab lyz val ll that be 1 Kapcsolja be a szivatty t 2 Nyissa ki a sz r fedel t 3 A sz r megfelel m k d s hez gy ll tsa be a v zsuga...

Страница 25: ...szita bet tet 3 A tiszt t szersz mot helyezze fel az egyik szivacstart ra s t bbsz r nyomja ssze a szivacs bet tet Ezzel a sz r szivacsokat mechanikusan kitiszt tja 4 A mechanikus tiszt t st v gezze e...

Страница 26: ...t gy takarja le hogy ne hatolhasson bele es v z A sz r t sz razon teleltesse t Amennyire lehets ges az sszes t ml t cs vezet ket s csatlakoz t v ztelen tse 11 M szaki adatok Biotec 18 Biotec 36 M rete...

Отзывы: