


- EN -
12
Aquamax Eco Classic 2500
Installation
Always place the unit below water level.
Place the unit horizontally on the ground ensuring its stable position.
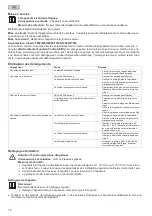
Operating the unit in the pond
B
The pump is in the pond. The return system, e.g. a pond filter, is connected to the pump outlet.
How to proceed:
C
1. Screw the stepped hose adapter to the outlet.
2. Shorten the stepped hose adapter to the diameter of the hose used if necessary.
– This reduces pressure losses.
3. Slip the hose clip over the hose, fit the hose onto the hose connector and secure with the hose clip.
Aquamax Eco Classic 3500/5500/8500/11500/14500/17500
Installation
The unit can be placed submerged or dry.
Always place the unit below water level.
Place the unit horizontally on the ground ensuring its stable position.
Operating the unit in the pond
B
The pump is in the pond. The return system, e.g. a pond filter, is connected to the pump outlet.
How to proceed:
D
1. Screw the stepped hose adapter including union nut and sealing ring to the outlet.
2. Shorten the stepped hose adapter to the diameter of the hose used if necessary.
– This reduces pressure losses.
– Align the stepped hose adapter prior to tightening the union nut.
3. Slip the hose clip over the hose, fit the hose onto the hose connector and secure with the hose clip.
Install the unit at a dry place
E
Install the unit so that it is not exposed to direct sun radiation (max. 40 ºC).
How to proceed:
F
1. Remove screws.
– The screws are used as transport protection and not required for operation.
2. Actuate the engagement hook and fold up the strainer top casing.
3. Remove pump.
4. Screw the stepped hose adapter including sealing ring onto the inlet.
5. Shorten the stepped hose adapter to the diameter of the hose used if necessary.
– This reduces pressure losses.
6. Slip the hose clip over the hose, fit the hose onto the hose connector and secure with the hose clip.
– Align the stepped hose adapter prior to tightening the union nut.
7. Screw the stepped hose adapter including union nut and sealing ring to the outlet.
8. Shorten the stepped hose adapter to the diameter of the hose used if necessary.
– This reduces pressure losses.
– Align the stepped hose adapter prior to tightening the union nut.
9. Slip the hose clip over the hose, fit the hose onto the hose connector and secure with the hose clip.
Содержание AquaMax Eco Classic 2500
Страница 2: ...2...
Страница 3: ...3...
Страница 4: ...4...
Страница 96: ...BG 96 x x x x x x x 30 mA x x x x x x x x x x x x x x ICD 20 A x x x U 12 V AC U 30 V DC x x...
Страница 101: ...UK 101 x x x x x x x 30 x x x x x x x x x x x x x x ICD 20 A x x x U 12 U 30 x x...
Страница 106: ...RU 106 x x x x x x x 30 x x x x x x x x x x x x x x ICD 20 A x x x U 12 U 30 x x...
Страница 111: ...CN 111 x x x x x x x 30mA x x x x x x x x x x x x x x ICD 20 A x x x U 12 V U 30 V x x...
Страница 113: ...CN 113 Aquamax Eco Classic 3500 5500 8500 11500 14500 17500 2 EFC 90 35 C x U 12 V U 30 V x x x 2 x x OASE PumpClean x...
Страница 114: ...CN 114 Aquamax Eco Classic 2500 x G 1 2 3 4 5 6 Aquamax Eco Classic 3500 5500 8500 11500 14500 17500 x H 1 2 3 4 5 6 7...
Страница 117: ...117 UK 2 4 RU 2 4 CN 2 4...
Страница 119: ...119 AMX0036...
Страница 120: ...31164 01 16...


