NZXT. 5
motherboard tray. ( Note: If you find that some holes are
unused, this is normal, this case is made to support for many
motherboard sizes )
4. Place your motherboard on top of the brass standoffs and
attach it to the tray using screws provided.
LED, Power and Reset Installation
Please refer first to your motherboard manual to find where your
power switch and reset pins are located. The colors following each
instruction designate the color of the wires.
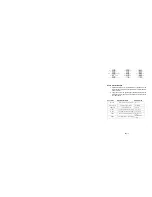
1. Connect the Reset switch (labeled RESET SW) by
connecting to your motherboard RESET connector. Make
sure you always attach the white wire to ground. The reset
switch is located inside the front door. (Blue/White +/-)
2. Connect the Power Switch pin (labeled P LED +/-) to the
PWR connector on the motherboard. The power switch is
the chrome piece on the front panel. (Green/White +/-)
3. Connect the HDD LED (labeled H.D.D LED) and HDD LED
connectors to the appropriate headers on your motherboard.
The HDD LED located on the front panel should flash red
when there is activity in the hard drive. (Red/White, +/-)
4. The NZXT Guardian 921 has a separate four pin molex
connector to light the front LEDs, simply connect it to your
power supply. (Blue/White, +/-)
All White and Black Pin Connectors correspond to
ground.
USB & Audio Installation
USB Installation
1. The USB is located of the left side on your front panel.
2. Refer to your motherboard manual and match the labels on
the USB port connectors with your motherboard in order to
install.
Содержание GUARDIAN 921
Страница 1: ...GUARDIAN 921 User s manual...
Страница 2: ......

