


NXP Semiconductors
UM11712
PCAL6534EV-ARD evaluation board
expanders produced by NXP Semiconductors (PCAL6408A-ARD, PCAL6416AEV-ARD,
PCAL6524EV-ARD, and PCAL6534EV-ARD).
This section describes the GUI application and how the user can control the
PCAL6534EV-ARD daughterboard from the graphical interface. First, install the GUI
package and software on the PC (Windows 10). For more details, see
.
Once installation is complete, assure that one of the mentioned three EVKs with
attached PCAL6534EV-ARD daughterboard is connected to PC and powered-on. Open
NXP_(PCAL65x4,PCAL64xxA) GUI application. An interface will appear as is shown in
:
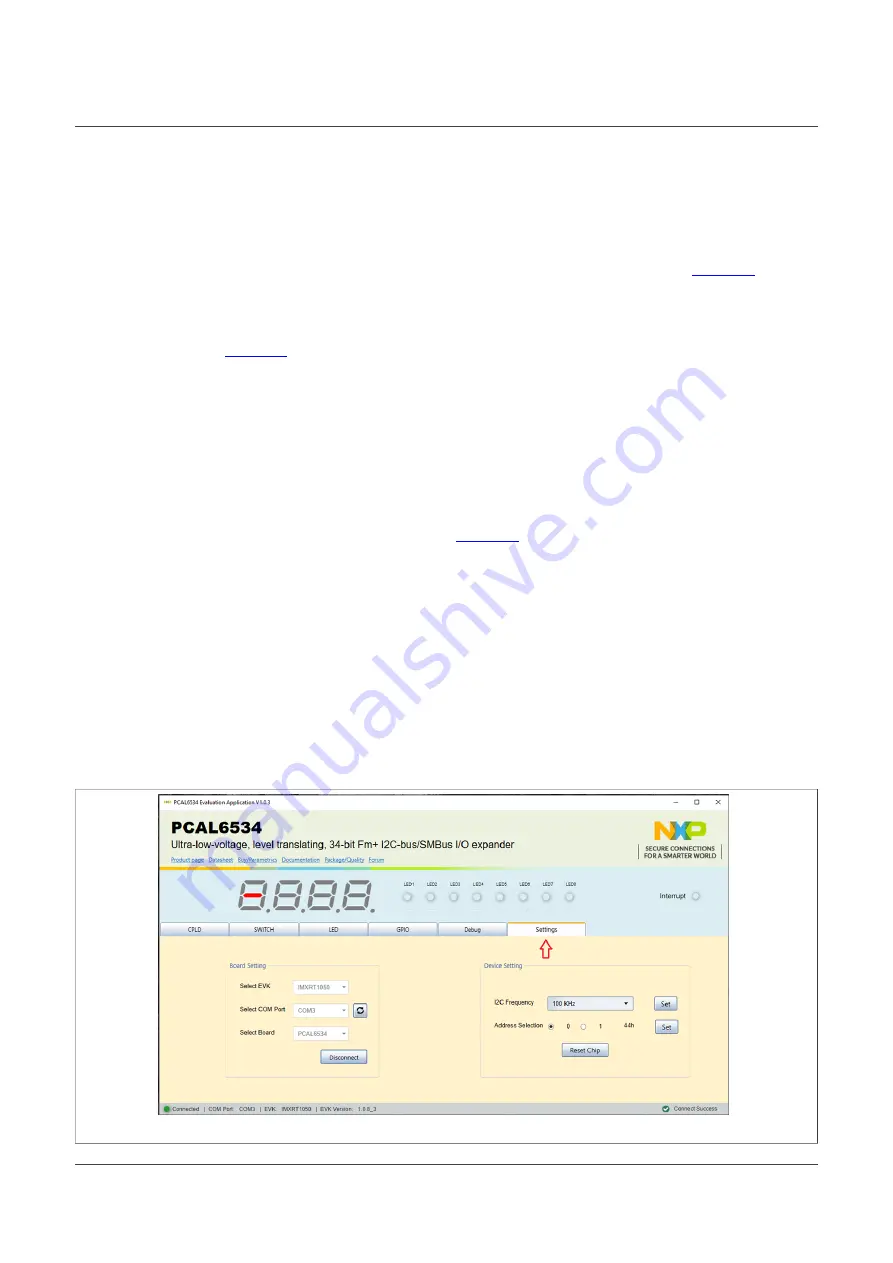
The GUI application starts with
Settings
tab (marked with red arrow). The left side of the
window displays
Board settings
. The section provides the following settings:
• Select EVK:
displays the list of EVKs. Selecting a wrong EVK board causes the
connection to fail and a pop-up window with the message:
“Unable to Connect with
EVK”
appears on the screen.
• Select COM port:
displays port selected for the communication. The port is
automatically selected by the system (in the picture is COM 3).
• Select Board:
allows the user to select the correct daughterboard (the application can
support four different boards). In
, the selected board is PCAL6534. Selecting
a wrong daughterboard causes the connection to fail and a pop-up window with the
message:
“Unable to Connect with Daughter Card”
appears on the screen.
In the right side of the window is located
Device setting
section. The following settings
are provided:
• I2C Frequency:
displays the I
2
C-bus clock frequency (100 kHz, 400 kHz, and 1 MHz).
With the
Set
button the value is written in the internal register of PCAL6534 IC.
• Address Selection:
allows the user to select the hardware address of PCAL6534 IC.
• Reset Chip:
reset the internal register of PCAL6534.
Assuming the correct parameters are chosen, clicking the
Connect
button establishes
the connection with the EVK. In the bottom side of the GUI window a status bar shows in
real time the status connection between PC and the EVK.
Figure 11. Graphical interface at start-up (“Settings” tab activated by default)
UM11712
All information provided in this document is subject to legal disclaimers.
© NXP B.V. 2022. All rights reserved.
User manual
Rev. 1.0 — 31 January 2022
22 / 31