


Figure 5. 10
Draw the Schedule
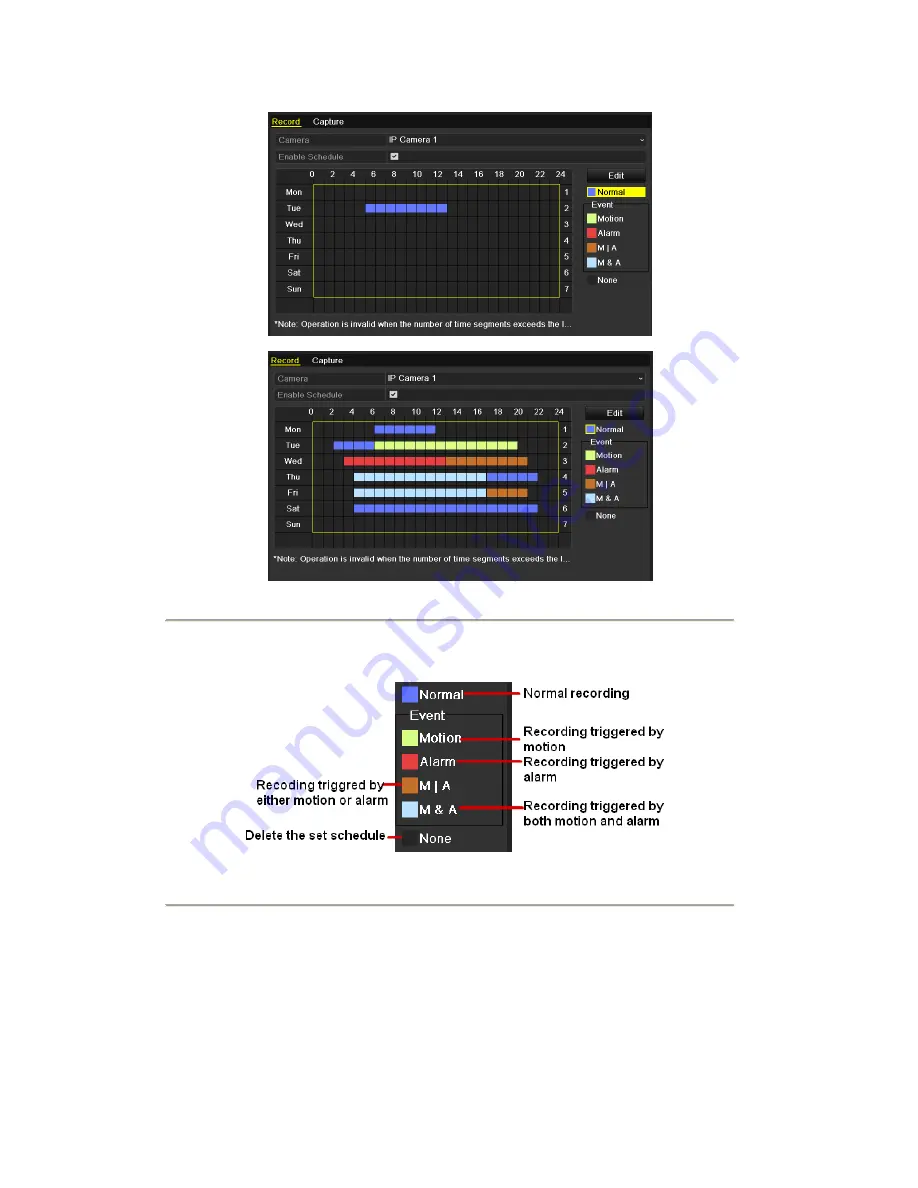
Descriptions of the color icons are shown in the figure below.
Figure 5. 11
Descriptions of the color icons
Click the
Apply
button to validate the settings.
If the settings can also be used to other channels, click
Copy
, and then choose the channel to which you want to
copy.
Содержание NVR-52 Series
Страница 1: ...NVR 52XX 58XX 60XX Series NVR...
Страница 11: ...Chapter 1 Introduction...
Страница 26: ...Chapter 2 Getting Started...
Страница 38: ...Chapter 3 Live View...
Страница 44: ...Figure 3 6 Live View Strategy...
Страница 49: ...Chapter 4 PTZ Controls...
Страница 59: ...Chapter 5 Record and Capture Settings...
Страница 66: ...Figure 5 12 Copy Schedule to Other Channels...
Страница 80: ...Chapter 6 Playback...
Страница 92: ...Figure 6 21 Interface of External File Playback...
Страница 97: ...Chapter 7 Backup...
Страница 116: ...Chapter 8 Alarm Settings...
Страница 121: ...inputs to copy the settings to them Figure 8 8 Copy Settings of Alarm Input...
Страница 130: ...Chapter 9 Network Settings...
Страница 148: ...Chapter 10 HDD Management...
Страница 150: ...Figure 10 5 HDD Status Changes to Normal Note Initializing the HDD will erase all data on it...
Страница 160: ...Figure 10 22 View HDD Status 2...
Страница 164: ...Chapter 11 Camera Settings...
Страница 168: ...Chapter 12 NVR Management and Maintenance...
Страница 172: ...Figure 12 5 HDD Information Interface...
Страница 180: ...Chapter 13 Others...
Страница 189: ...Appendix...
Страница 192: ......


