


Screen 2.3
2.4
Screen 2.4
2.5
2.3
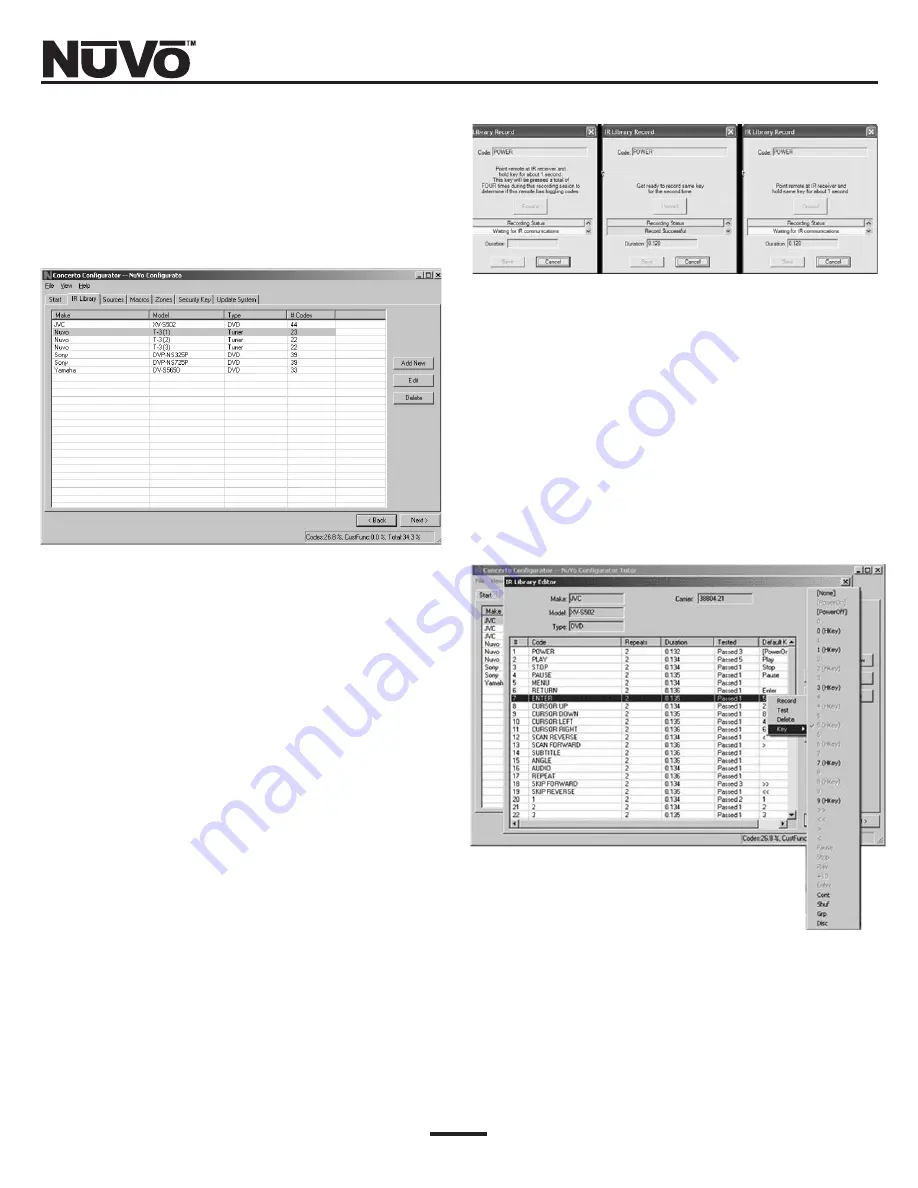
Recording IR codes
When a new component is added to the IR Library, it is
necessary to record the IR codes associated with each
function. To do this, connect the Learning Station
Interface as described above. Double-click on the
desired component from the IR Library page. This will
open the IR Library Editor. This window lists the com-
plete set of functions for that type of device.
To initiate the IR recording process, you can either
double-click on a function to be recorded or click on
the Record button. This will open the IR Library Record
window. The window will indicate that the
Configurator is "Waiting for IR Communications." To
record a new code, simply point the component’s
remote control at the IR receiver on the NuVo IR
Learning Station Interface. The first time you enter a
code, the Configurator determines if it is a "toggling
function," which means that the remote actually sends
two commands back-to-back. This requires that the
function button be pressed four times in succession.
When the remote code is entered, the IR Library
Record window will go from yellow to green and indi-
cate that the capture was successful, and it will then
return to yellow. Repeat this procedure three more
times until the desired code is added to the IR Library
Edit window. You will now see the number of code
repeats and the duration of the code. A normal non-tog-
gling remote will require two button pushes to success-
fully record a command, while a toggling remote will
require four button pushes for each command.
If there is an error in recording the code, the display in
the Record window will indicate that there was a com-
munication error. If this occurs, click on the Record
button and reenter the code.
IR Library Default Key Assignment
Once the desired codes are added, assign them to the
appropriate key on the Display Pad. To do this, right-
click on each code and select "Keys." This opens a drop-
down menu of the possible key selections for the
Concerto Display Pad. Select the appropriate key for
that command and the Configurator will add it to the
Default Key field for that command.
Once this sequence is completed, proceed to the next
function command, and repeat the above steps. When
you have assigned a default key for each IR, click on
"Done" and that component’s IR Library is complete.
IR Library Test
A unique feature of the Concerto Configurator is the
ability to test each IR code as it is added to the IR
Library. This insures that every code will work reliably.
16
Содержание Concerto NV-I8DMS
Страница 5: ...5...
Страница 34: ...www nuvotechnologies com 4940 Delhi Pike Cincinnati OH 45238 U S A 513 347 2180...


