background image

1

OSD Menu Controls & Navigation

Enter Key -

 Used to access MAIN SETUP menu mode.

Up / Down Key - 

Used to scroll through the desired sub-menu selection and to move the 

cursor up or down during the OSD menu. 

Left / Right Key -


Used to adjust the desired menu selection, and to move the cursor left or 

right during the OSD menu. Also used to confirm the setting changes.

To enter the main menu, press and hold the ENTER Key down for 2 or more seconds until 

the OSD menu appears on the screen.

To enter the sub-menu from the Main menu, press the 

Left / Right

 key at the selected line. 

While in the OSD menu, scroll up/down the available options by using the corresponding 

navigational keys.

To go to the up-menu from the sub- menu, press the 

Left / Right

 Key  at the RETURN line.

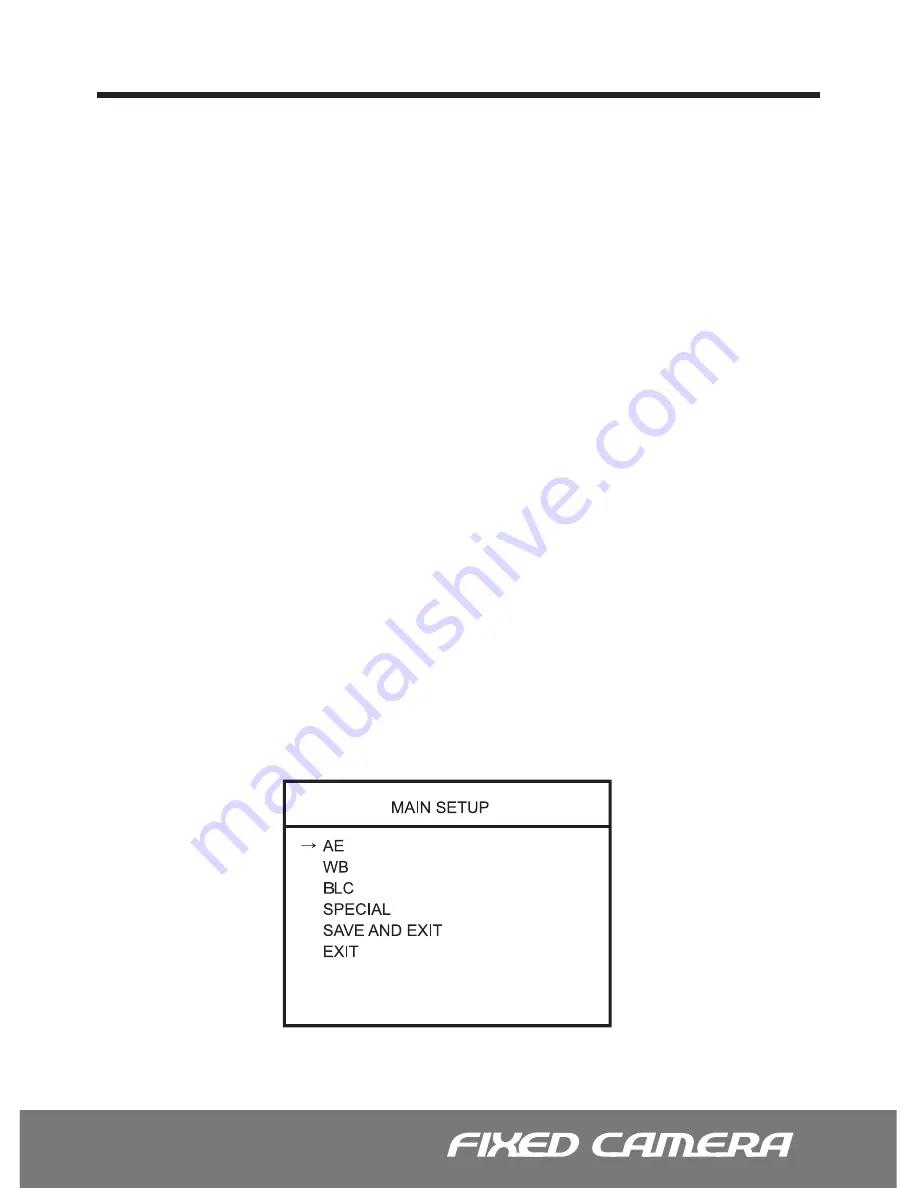
Once all of the desired changes have been made, move the cursor over to the SAVE AND 

EXIT line to save and exit. Choosing EXIT will lose all changes and revert back to its previ

-

ously saved configuration. 

OSD MENU CONTROLS (On-Screen-Display)

Entering and Navigating the Main Menu

Entering and Navigating the Sub-Menu

Go to the Up-Menu from the Sub-Menu

Exiting the OSD Menu  

Содержание CF-ST1N

Страница 1: ...580 TVL Lens not included ...

Страница 2: ...dware and software described herein at any time without prior notice No part of this guide may be reproduced transmitted transcribed stored in a retrieval system or translated into any language in any form by any means without prior written permission of NUVICO NUVICO makes no warranties for damages resulting from corrupted or lost data due to a mistaken operation or malfunction of the cameras per...

Страница 3: ...ol within an equilateral triangle is intended to alert the user to the presence of uninsulated dangerous voltage within the product s enclosure that may be of sufficient magnitude to constitute a risk of electric shock to persons CAUTION WARNING The exclamation point within an equilateral triangle is intended to alert the user to the presence of important operating and maintenance servicing instru...

Страница 4: ... CAUSE HARMFUL INTERFERENCE TO RADIO COMMUNICATIONS OPERATION OF THIS EQUIPMENT IN A RESIDENTIAL AREA IS LIKELY TO CAUSE HARMFUL INTERFERENCE IN WHICH CASE THE USER WILL BE REQUIRED TO CORRECT THE INTERFERENCE AT HIS OWN EXPENSE CAUTION CHANGES OR MODIFICATIONS NOT EXPRESSLY APPROVED BY THE PARTY RESPONSIBLE FOR COMPLIANCE COULD VOID THE USER S AUTHORITY TO OPERATE THE EQUIPMENT THIS CLASS A DIGIT...

Страница 5: ...t of the obsolete outlet Protect the power cord from being walked on or pinched particularly at plugs conve nience receptacles and the point where they exit from the equipment Only use attachments accessories specified by the manufacturer Unplug this equipment during lightning storms or when unused for long periods of time Refer all servicing to qualified service personnel Servicing is required wh...

Страница 6: ...ication Parts Descriptions Camera Dimensions Installing the DC Auto Iris Lens Power Requirement Camera OSD Setup Controls OSD Menu Control Navigation OSD MENU CONTROLS On Screen Display OSD Menu Terms Settings 1 AE SETUP Automatic Exposure 1 1 MODE ELC ALC 1 2 CONTROL 1 3 SHUTTER 1 4 AGC MODE Automatic Gain Control 1 5 MAX AGC 1 6 BRIGHTNESS 1 7 MAX FIELDS DSS Digital Slow Shutter 2 WB SETUP White...

Страница 7: ...3 2 LEVEL 3 3 BMB Mode Menu Brightlight Masking Block 4 SPECIAL 4 1 MD SETUP Motion Detection 4 2 PZM SET Private Zone Masking 4 3 DNR Digital Noise Reduction 4 4 SHARPNESS 4 5 LANGUAGE 4 6 EDIT TITLE 4 7 FACTORY DEFAULT Technical Specifications NTSC Technical Specifications PAL 19 19 20 20 20 21 22 23 24 24 24 24 24 25 26 27 ...

Страница 8: ...generation Super Image Enhancer II SIE II module viewing in the dark is radically amplified A user friendly on screen display OSD menu make it easy to setup and program functions ABOUT THIS MANUAL Content Verification Before installing the camera please make sure that all of the following items are included in the box 1 Fixed Camera 2 Installation Manual 3 C Mount Lens Adaptor 4 Auto Iris Lens Plu...

Страница 9: ... to mount a CS mount lens 3 C Mount Lens Adaptor Used to mount a C mount lens 4 Back Focus Set Screw If needed adjustment of back focus loosen the set screws using L wrench to turn CS mount lens adaptor and tighten the set screw after adjustment 5 Tripod Mount Hole Use to install the camera on the mount The tripod must be equipped with the 1 4 20UNC 20 Thread screw Bottom ...

Страница 10: ... BNC connector for composite video out 7 OSD Menu Set up Key Control the OSD menu 8 Power Indicator 9 Auto Iris Lens Connector Connect auto iris lens plug 10 Power Input Terminal Connect 24VAC or 12VDC power source Parts Descriptions ...

Страница 11: ...11 Dimensions Unit mm Camera Dimensions See the diagrams below for the exact dimensions of the Fixed Camera ...

Страница 12: ...ble for soldering 2 Remove the cover from the Iris lens plug and solder the lens cable to the plug pin following the table below 3 Connect the lens plug to the auto Iris lens connector on the rear of the camera IMPORTANT This camera is designed to work with DC Auto Iris Lens only Use of any other lens type is not recommended Pin 2 Pin 4 Pin 1 Pin 3 Pin No 1 2 3 4 DC Auto Iris Lens Damp Damp Drive ...

Страница 13: ...13 Installation Power Requirement 12VDC 24VAC 500mA regulated power supply The camera is reverse polarity protected Note Do not use power sources other than specified ...

Страница 14: ...mera OSD Setup Controls Please use the directional keys located at the back of the camera to make the desired changes in the OSD menu Enter Key Right Key Up Key Down Key Left Key Directional Navigation Keys ...

Страница 15: ...s on the screen To enter the sub menu from the Main menu press the Left Right key at the selected line While in the OSD menu scroll up down the available options by using the corresponding navigational keys To go to the up menu from the sub menu press the Left Right Key at the RETURN line Once all of the desired changes have been made move the cursor over to the SAVE AND EXIT line to save and exit...

Страница 16: ...ris to the most optimal level ELC Electric Level Control The ELC mode is not recommended for this camea ELC mode will automatically adjust the brightness level by shifting its shutter speed OSD Menu Terms Settings 1 2 CONTROL Lens Control Mode AUTO MANUAL In the case of ALC Mode DC Iris lens only In the case of ELC Mode Choose between AUTO or MANUAL In the AUTO setting the shutter and AGC will aut...

Страница 17: ...AGC limit can be set as low as 8dB or as high as 36dB MAX The factory default limit is 22dB In the case of ELC Mode Same as ALC Mode 1 6 BRIGHTNESS 0 100 In the case of ALC Mode The BRIGHTNESS can be adjusted by opening and closing of the Iris aperture User may fine tune the screen to their preferred brightness The brightness ranges from 0 100 0 being the darkest and 100 being the brightest In the...

Страница 18: ...e AUTO mode monitors the color changes and automatically adjusts the red and blue values to compensate for the color shifting LOCK mode locks in the previous color setting and adjusts accordingly CRLS mode is used to prevent color rolling commonly associated with fluorescent lighting ATW Automatic Tracking White Balance Select the ATW mode if the color temperature of the light source is between 2 ...

Страница 19: ...ed color balance is obtained press Left Key to lock in the current white balance setting 2 2 CONTROL WB Mode Control LOCK AUTO CRLS 3200 K 5400 K R BCONT 2 3 RED 0 255 2 4 BLUE 0 255 This field displays the current RED value of the WB mode RED value can only be altered in the MWB and ATW mode The red value ranges from 0 255 This field displays the current BLUE value of the WB mode BLUE value can o...

Страница 20: ...its exposure level to counterbalance excessive background light to distinguish the subject in the foreground SBLC Super Back Light Compensation Choose the SBLC to correct overexposure problem traditional BLC cannot compensate BMB Brightlight Masking Block The BMB masks out excessively bright areas within the frame and compensates the rest of the frame accordingly OFF The BLC is off BLC The BLC lev...

Страница 21: ...hoose the desired areas by highlighting the specific square and pressing the ENTER key colored in green Note Active masking area is colored in blue 3 Once all the desired areas have been designated press and hold the ENTER key until the AREA MENU displays 4 Choose the RETURN MENU to confirm the already selected areas or AREA SELECT to go back to the blue selection grid The BMB masking tint may be ...

Страница 22: ...ENSITIVITY The user can set the SENSITIVITY of the MOTION DETECTION to one of three settings LOW a MID a HIGH OUTPUT Select between the MARK or ALARM option When set to MARK an icon will be displayed when Motion Detection is triggered In the ALARM option camera will send out a MD signal Note The camera is not equipped with an MD output port Note The Motion detection will be disabled when DSS is ON...

Страница 23: ...TTING then press the LEFT RIGHT Key to enter the move screen At the H V START SET option adjust the width and height of the area concealed by pressing LEFT UP increasing or RIGHT DOWN decreas ing At the H V END SET option adjust vice versa by pressing LEFT UP decreasing or RIGHT DOWN increasing To change H V START SET option to H V END SET and vice versa press ENTER key To exit hold the ENTER Key ...

Страница 24: ...y to digitally sharpen the image to user preference The lower setting will soften the image while the higher setting will sharpen the image English is the factory default and cannot be changed The EDIT TITLE is used to display the camera title OFF The DNR is off LOW Select the LOW setting for light level of noise HIGH Select the HIGH setting for high level of noise 4 3 DNR Digital Noise Reduction ...

Страница 25: ...TER key to active the title screen Move the title to the desired location using the navigational keys To exit press and hold the ENTER key until the EDIT TITLE menu displays 4 If you want to change the specific character of the title then select the TITLE Then move the highlighting cursor to the desired location using the LEFT RIGHT keys Scroll up to the character table pressing the ENTER key whil...

Страница 26: ...stem Electronic Shutter Main Video Output Minimum Illumination lux S N Ratio Camera Control Setup General Information Operating Temperature Operating Humidity Power Consumption Input Voltage CF ST1N NTSC 1 3 CCD 580 TV Lines No C CS Internal 768 x 494 525 Lines 2 1 Interlaced 1 60 1 100 000 sec 1 0 Vp p Composite 75 ohm 0 1 DSS Off 0 001 DSS On More than 50dB AGC Off OSD Menu CF ST1N 23 F 113 F 5 ...

Страница 27: ...stem Electronic Shutter Main Video Output Minimum Illumination lux S N Ratio Camera Control Setup General Information Operating Temperature Operating Humidity Power Consumption Input Voltage CF ST1P PAL 1 3 CCD 580 TV Lines No C CS Internal 752 x 582 625 Lines 2 1 Interlaced 1 50 1 100 000 sec 1 0 Vp p Composite 75 ohm 0 1 DSS Off 0 001 DSS On More than 50dB AGC Off OSD Menu CF ST1P 23 F 113 F 5 C...

Страница 28: ...050600003600 ...

Отзывы: