background image

1

2

3

4

6

7

8

9

10

7

8

9

10

7

8

9

10

7

8

9

10

11

13

12

11

13

12

11

13

12

11

13

13

12

19

18

19

20

20

14

15

17

16

22

24

25

23

26

21

25

5

29

28

29 29

27

29 29

30


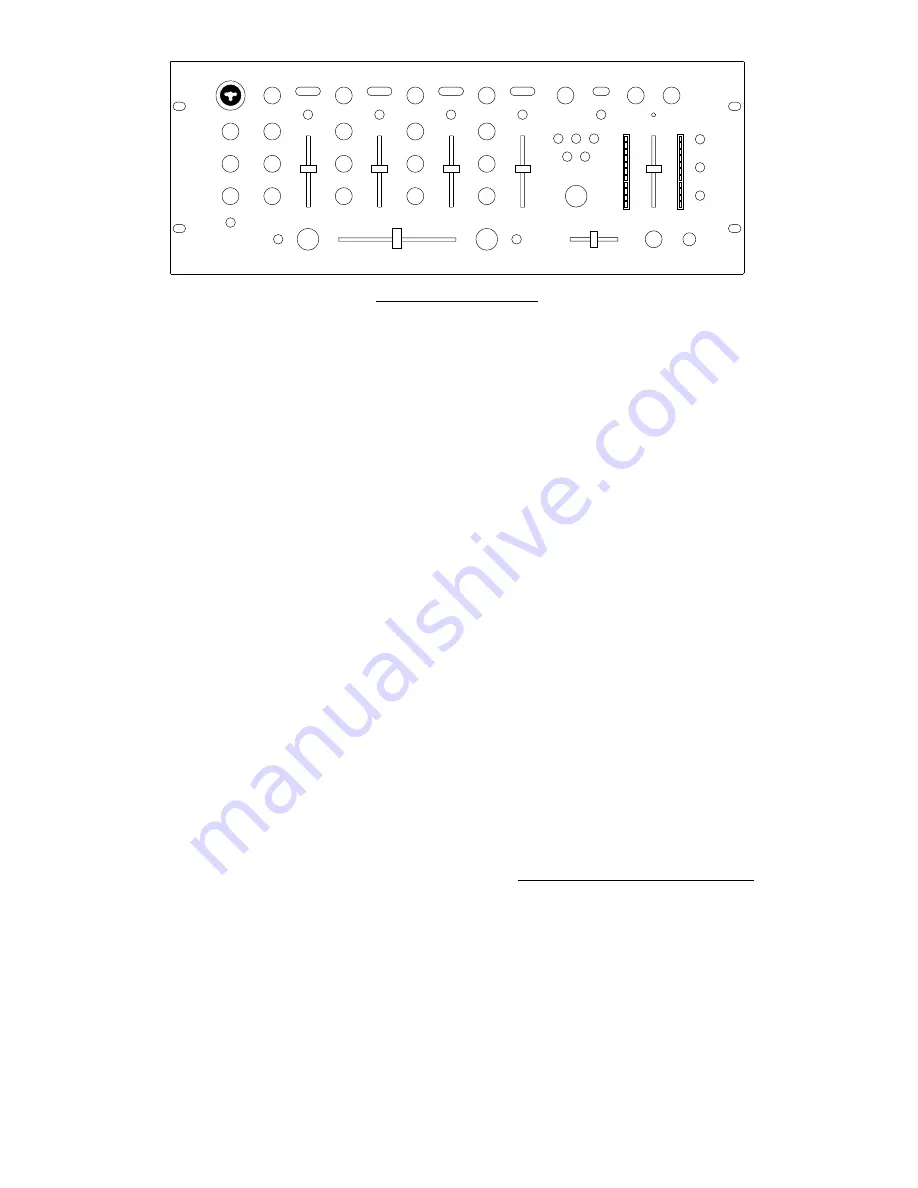
FRONT PANEL FEATURES 


1.


Power LED: Illuminates when the mixer is on. 

2.


Mic ON/OFF: Toggles activation of the DJ Mic.  

3.


Mic Gain: This knob adjusts the volume of the 

microphone input.  

4.


Mic Bass: This knob adjusts the low-tone of the 

microphone.   

5.


Mic Treble: This knob adjusts the high-tone of 

the microphone.  

6.


XLR/¼” Combo Microphone Input Jack: 

Connect your DJ mic at this location. 

7.


Channel Gain:  This rotary control adjusts the 

pre-fader input level. 

8.


Channel Treble: This rotary control adjusts the 

high-tone level.  

9.


Channel Middle: This rotary control adjusts the 
middle-tone level. 

10.


Channel Bass: This rotary control adjusts the 
low-tone level. 

11.


Input Selector: This toggles select what input 
source is routed to the channel from the rear 

panel connected units. 

12.


Channel Fader: This slide fader is used to 

adjust the level sent to program mix. 

13.


Cue Button: pressing this button sends post 

gain, post EQ, and pre channel fader level audio 
the PFL “Pre–fader level” section of the 

headphone cue.  

14.


Headphone Volume: This rotary control 

adjusts the volume level of the headphone 
output.  

15.


Headphone Mix: Program level and PFL (CUE) 
signal levels can be mixed  by this slider.  When 
all the way left, audio heard will be determined 

by Cue Button selections.   When all the way 
right final only (PGM) program mix audio will be 

heard.  

16.


Split/Blend Button: When in the down 

position, headphone audio will be split so mono 
PFL audio is in the left ear and mono PGM audio 

is in the right ear.  When the button is up, 
stereo PFL and PGM audio will be mixed 

(blended). 

17.


Headphone Jack: Your headphones can be 

connected to this ¼” terminal.   The volume 
should always be set at its lowest setting while 

connecting and disconnecting headphones to 
prevent damage to headphones and/or your 
hearing. 

18.


Replaceable Crossfader: This slide fader 
blends audio between the channels assigned to 

the left and right assign switches.  
Note: This fader is user replaceable if it should 

ever wear out. Simply remove the facepanel and 
then remove the screws holding it in position.  

Replace the fader with a quality authorized 
replacement from your local Numark retailer. 

19.


Assign Knob: Rotary position determines 

which input channel will be heard when the 
crossfader is moved towards this knob.   

Volume levels of channels not selected will be 
determined only by the individual channel 

sliders.  

20.


Fader Start: Activates the crossfader to send 

play and cue digital pulse commands to your 
auto-start Numark CD player or other popular 

brand. For fader start, attach your mixer to a 
remote start CD player using industry standard 

1/8”(3.5mm) cables. When you move the 
crossfader toward the active channel, the 

attached CD player will start.  When it is 
moved away, that side will cue (similar to 
pressing the cue button) or stop depending 

upon brand of CD player.  

21.


Master Slider: This control adjusts the main 

output volume using the PROGRAM audio as a 
source. 

22.


Stereo/Mono toggle: Adjusts the Master 
output for stereo or mono operation. 

23.


Panning: Adjusts the balance of right to left 
audio in all outputs (Master, Record, Zone).  

24.


Meter Assign: Determines whether PFL or 
post master level audio is sent to the stereo 

LED meter.   

25.


Stereo Level Indicator: Quickly and 

accurately tracks level of audio sent to it.  
When using as a master output meter, set 

the crossover, equalizer and power amp inputs 
to avoid distortion at each step in the audio 
chain. Proper attention to the peak meter 

results in the punchiest possible sound without 
audible distortion. When used to adjust the 

PFL levels, PFL cue signal is sent to the meter 
through the cue assign buttons.  Accurately 

match channel levels with the Pre-fader gain 
and EQ controls before mixing them together.  

The idea is to properly match PFL inputs, not 
the input with the stereo output meter!  

26.


Booth/Zone Fader: Controls volume for a 
remote zone or booth monitors using 

PROGRAM audio as a source.  
NOTE: This could also be used to supply line 

level audio to a lighting controller or to lights 
that are sound activated. 

27.


Effects ON/OFF:  Toggles activation of Digital 

Effects. 

28.


Blend Control Knob:  Rotary position 

determines amount of effect added to selected 
channel(s). 

29.


Effects Assign Button:  Determines what 
channel(s) the effects are added to. 

30.


Effects Selector: Rotary position 
determines what type of effect is assigned to 

selected channel(s).   

Содержание 200FX MKII

Страница 1: ...tung DEUTSCH Manuel d utilisation du propri taire FRAN AIS Manuale rapido di utilizzazione ITALIANO CONTENUTO DELLA CONFEZIONE MIXER CAVO DI ALIMENTAZIONE CONTENU DE LA BO TE MIXER C BLE D ALIMENTATIO...

Страница 2: ...RI CUT RATE RATE DVD PLAYER CD PLAYER TO LINE TO LINE DJ MIC TO MIC TO PHONO 2 TO PHONO 3 TO LINE HOUSE AMP DJ HEADPHONE TO AMP TO AMP CD BURNER TAPE DECK or or FROM RECORD OR DUAL CD PLAYER TO LINE T...

Страница 3: ...CD players Tape Decks Samplers or other line level input devices should be connected to these inputs 4 Microphone Input Microphones with a connector can be connected to these input terminals 5 Fader S...

Страница 4: ...hen remove the screws holding it in position Replace the fader with a quality authorized replacement from your local Numark retailer 19 Assign Knob Rotary position determines which input channel will...

Страница 5: ...ffected by being modulated by an LFO low frequency oscillator which causes the detuning to vary Set the Blend Knob to 100 WET FLANGER Flanging is similar to chorusing but modulates the delayed signal...

Страница 6: ...MICRO DE DJ HACIA PHONO HACIA PHONO AMP LOCAL AURICULARES DE DJ A AMPERIOS A AMPERIOS GRABADORA DE CD CINTA DE CASSETTE O O DESDE LA GRABADORA O REPRODUCTOR DE CD DUAL HACIA LINEA HACIA LINEA HACIA L...

Страница 7: ...3 Entradas de l nea Los Reproductores de CD unidades de cinta magn tica samplers u otros dispositivos de entrada de nivel de l nea deben ser conectados a estas entradas 4 Entrada de micr fono Los mic...

Страница 8: ...ornillos que lo mantienen sujeto Cambie el fader con un repuesto de calidad autorizado en su vendedor de Numark m s cercano 19 Control de asignaci n La posici n giratoria determina qu canal de entrada...

Страница 9: ...FO low frequency oscillator que hace que var e el detuning Bot n de control de mezcla 100 WET FLANGER El efecto de flanger es similar al del chorus coro aunque el flanger modula la se al atrasada a tr...

Страница 10: ...D SPIELER DJ MIC ZU PHONO ZU PHONO HAUPTVERST RKER DJ KOPFH RER ZUM VERST RKER ZUM VERST RKER CD BRENNER KASSETTENDECK ODER ODER VON AUFNAHME ODER DUALER CD SPIELER ZU LINEAR ZU LINEAR ZU LINEAR VON F...

Страница 11: ...ssen und mit dem Mischpult verbunden sind verwendet werden 3 Lineare Anschl sse CD Spieler Kassettendecks Sampler oder andere lineare Eingabeger te sollten an diese Anschl sse angeschlossen werden 4 M...

Страница 12: ...H ndler anerkannten Ersatzteil 19 Zuordnungsknopf Die Stellung des Knopfes ist ma gebend daf r welcher Eingabekanal geh rt wird wenn der Crossfader in Richtung dieses Knopfes geschoben wird Lautst rke...

Страница 13: ...ter effektiert in dem es mit einem LFO Niedrigfrequenzoszillator abgestimmt wird was das Verstimmen schwanken l sst Blendsteuerungsknopf 100 WET FLANGER Flanging ist hnlich wie ein Choreffekt allerdin...

Страница 14: ...CD MIC DJ VERS PHONO VERS PHONO AMP LOCAUX COUTEURS DJ VERS AMP RES VERS AMP RES GRAVEUR DE CD CONSOLE D ENREGISTREMENT OU OU DE L ENREGISTREUR OU LECTEUR CD DOUBLE VERS LIGNE VERS LIGNE VERS LIGNE D...

Страница 15: ...tillons ou autres dispositifs ligne d entr e devraient tre connect s ces entr es 4 Entr e de microphone input Les microphones avec un connecteur de peuvent tre connect s ces terminaux d entr e 5 Conne...

Страница 16: ...t nuateur de qualit approuv par votre distributeur Numark 19 Bouton d assignation La rotation d termine l entr e du canal qui sera entendu lorsque le crossfader est amen vers ce bouton Le volume des v...

Страница 17: ...n signal non trait et une section de d saccordage s par e pour le canal droit et gauche Le d saccordage est ensuite modul par un LFO oscillateur basse fr quence qui modifie le d saccordage Contr le du...

Страница 18: ...ONO A PHONO AMP FISSO CUFFIA DEL DJ AD AMPLIFICATORE AD AMPLIFICATORE MASTERIZZATORE PIASTRA DI REGISTRAZIONE O O DA REGISTRAZIONE O DOPPIO LETTORE CD A INGRESSI LINEA A INGRESSI LINEA A INGRESSI LINE...

Страница 19: ...si dovrebbero essere connessi lettori CD Piastre di Registrazione Campionatori o altri dispositivi di ingresso a livello di linea 4 Ingresso Microfono A questi terminali di ingresso possono essere con...

Страница 20: ...ricambio autorizzato che troverete presso il vostro rivenditore locale Numark 19 Manopola di Assegnazione Determina ruotandone la posizione quale canale di ingresso verr ascoltato quando il crossfader...

Страница 21: ...re di basse frequenze che fa s che il detuning vari Manopola di comando di modulazione blend 100 WET FLANGER L effetto di flanging simile a quello di chorusing ma modula il segnale ritardato su un ran...

Страница 22: ...to 47 ohm Distortion less than 0 01 Signal to Noise Ratio maximum output JIS A weighted Line Better than 87dB Mic Better than 80dB Phono Better than 76dB Frequencey response Line 20Hz 20KHz 0 5dB Mic...

Отзывы: