background image

NDR-HB4208, NDR-HB4416 User’s manual ver. 1.0  

All rights reserved © AAT Holding sp. z o.o.


81 


RECORDER’S OPERATION


4.15.  Playback 

 
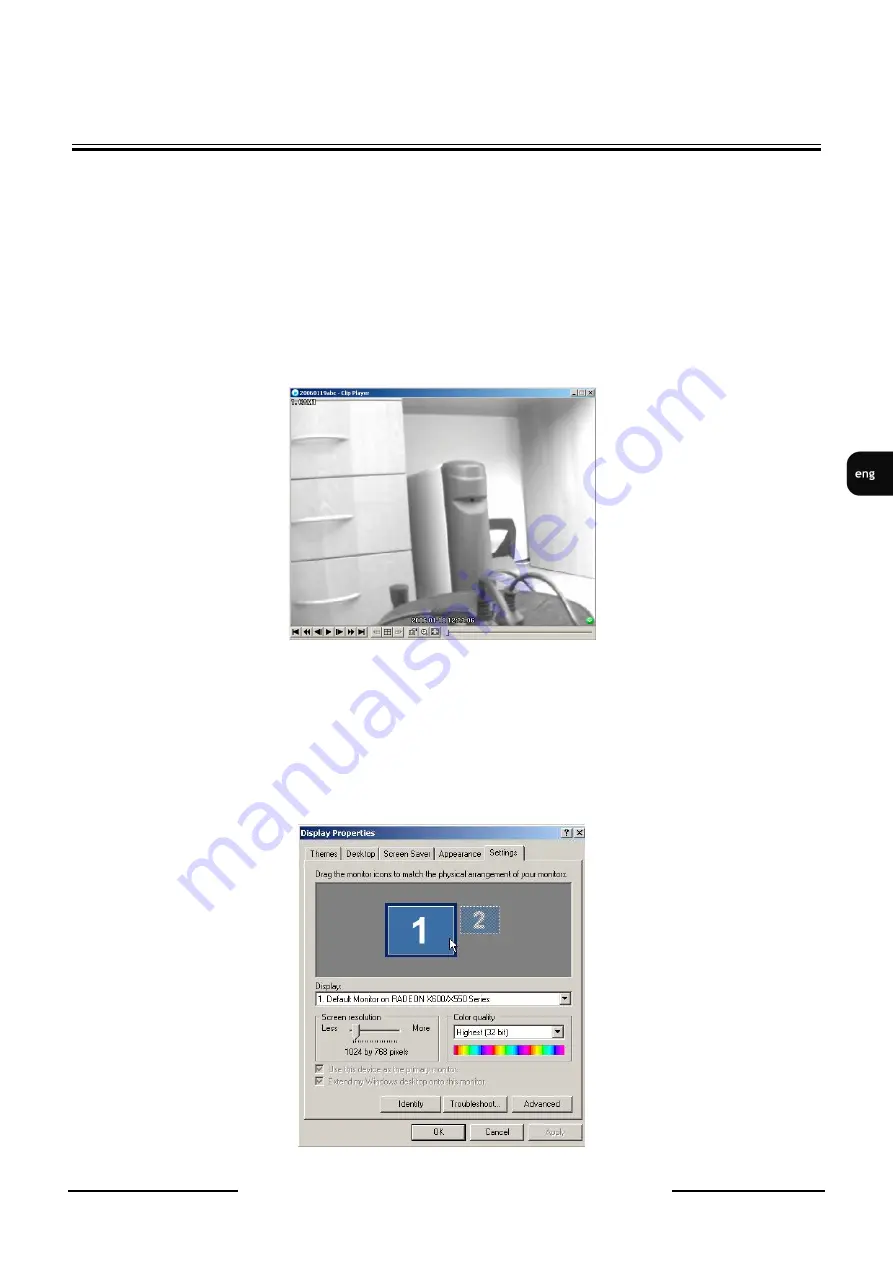
You do not need to install  any  special  software on  your personal  computer to review the  video clips. 
The copied video clip contains the ClipPlayer program. 
 

NOTE:

  It  is  suggested  that  the  computer  used  for  the  ClipPlayer  program  has  at  least  a  800MHz 

Pentium III. If your CPU is slower than stated above, video clips recorded at maximum speed with very 
high image quality will be played back slowly. DirectX 8.0 or higher is required while VGA card with 
16MB or higher video RAM is recommended for proper operation.  


NOTE: 

Proper image display depends on the display settings of your PC. 

If  you are experiencing display problems, click the right  mouse button on the background screen and 
select Properties à  Settings then set the 

Color quality

 to “

32 bit

”.  


Содержание NDR-HB4208

Страница 1: ...NDR HB4208 NDR HB4416 User s manual ...

Страница 2: ...his product The symbol on the product or the documents accompanying the product indicates that this appliance may not be treated as household waste It shall be handed over to the applicable collection point for the waste electrical and electronic equipment for recycling purpose For more information about recycling of this product please contact your local authorities your household waste disposal ...

Страница 3: ... water react immediately switch off the power supply and contact the authorised Novus service If the device gets dirty it might get damaged or electrocute someone 5 The device can only be cleaned with a damp cloth after the power supply has been switched off Avoid strong detergents liquids and sprays Mild detergents can be used if the recorder becomes very dirty 6 Power supply unit cords and signa...

Страница 4: ...n 15 3 RECORDER S MENU 18 3 1 Setup screen 19 3 2 System 19 3 2 1 General settings 19 3 2 2 System Log 20 3 2 3 Date time 21 3 2 4 Users 23 3 2 5 Storage 25 3 2 6 System Event 26 3 3 Record 27 3 3 1 General 27 3 3 2 Schedule 28 3 3 3 Pre Event 31 3 4 Event 32 3 4 1 Motion detection 32 3 4 2 Alarm In 33 3 4 3 Video loss 34 3 4 4 Video Blind 35 3 4 5 Text in 36 3 5 Camera 38 3 5 1 General 38 3 5 2 P...

Страница 5: ...6 PTZ Mode 64 4 7 Event monitoring 65 4 8 Covert cameras 66 4 9 SPOT Monitoring 66 4 10 Status 67 4 11 Playing recorded video 68 4 12 Searching video 70 4 12 1 Event log search 71 4 12 2 Record table search 72 4 12 3 Motion search 75 4 12 4 Text In search 76 4 13 Clip Copy 78 4 14 Time overlap 79 4 15 Playback 81 5 PTZ CAMERAS CONTROL AND CONNECTION 84 5 1 Novus PTZ cameras connection 84 6 CONNECT...

Страница 6: ...orts Pentaplex Functionality Monitoring Recording Playback Archiving and Transmission at the same time User friendly graphic interface 4 Channel Audio Recording and 1 Channel Audio Playback Built in text input for ATM and POS Alarm Connections Include Input Output and Reset Input Remote access to Live Monitoring Feature recordings menu settings system diagnostics and camera control via TCP IP netw...

Страница 7: ...status with local and network notification function Storage Supports up to 4 internal HDDs without DVD RW 1 HDD 1000 GB in set included Backup Onto DVD HDD or USB Flash Memory through USB port through the network DVD RW Drive Not included External Ports 1 x Ethernet RJ 45 interface 10 100 Mbit s 1x eSATA 2 x USB 2 0 for external drives HDD PC mouse Flash Memory 1 x RS 485 for PTZ cameras or NV KBD...

Страница 8: ...reaches the temperature of location it is currently in Turning the device on immediately after bringing it from a location with lower ambient temperature is forbidden as the condensing water vapour may cause short circuits and damage the device as a result Note Please get familiarized with description and functions of rear panel inputs 2 STARTING THE DEVICE 2 1 Getting ready to work NDR HB4208 or ...

Страница 9: ...ge of preamplifiers is recommended AUDIO OUT Audio output for connecting speaker and amplifier Connecting the speaker directly to the outputs is not advised Usage of pre amplifier is recommended 4 eSATA An eSATA port is provided to connect external storage devices for recording video Note do NOT connect or disconnect eSATA devices while the DVR power is on The DVR must be powered down to connect o...

Страница 10: ...I codes for additional information cash registers ATM machines Only one of the devices may be connected at once If transmission standard of connected device is different than RS 232 you need to use additional device to change standard transmission from RS 485 to RS 232 Attention Cord used for connecting to RS 232 port is not included with the set Make sure that the cord you have is appropriate DB9...

Страница 11: ... with the scheme located below depicting possible implementation of the DVR in the system before installation Depending on requirements each system will have different number of peripherals connected Monitors cameras etc should be purchased separately depending on current needs Detailed description of peripheral connections can be found in the following chapters of this manual STARTING THE DEVICE ...

Страница 12: ...ther in recording or playback mode 3 ALARM LED Solid light when alarm has been triggered and or internal buzzer is active 4 NETWORK LED Flashing of NETWORK LED means that the device is connected to Ethernet or external modem 5 CLIP COPY LED Emits solid light when copying is in progress 6 CHANNEL BUTTONS Press one of the channel buttons to display required camera in full screen mode Channel buttons...

Страница 13: ... PIP window and buttons are used to change size of the PIP window In DISPLAY mode pressing fast playback butons buttons speeds up the playback with the speed indicated by icons visible on the screen press or in PAUSE mode to watch picture frame by frame 9 MENU CAMEO Press MENU button to enter the DVR menu Pressing and holding MENU button for 2 seconds while in screen division display mode starts s...

Страница 14: ...on for 2 seconds to display selected camera on the SPOT monitor 13 SEQUENCE Consecutive pressing of the SEQUENCE button while in full screen live camera display successively switches between the cameras Press and hold SEQUENCE button for 2 seconds to start automatic sequence display 14 CLIP COPY CLIP COPY button allows to copy selected recordings onto DVD or Flash type memory 15 ALARM Press ALARM ...

Страница 15: ...www novuscctv com website NOTE HDDs previously used in any other device need to be formatted Please keep that in mind due to the possibility of important data loss ATTENTION The list of compatible HDDs contains all the HDDs that are compatible with a given DVR including HDDs designed to office use desktop disks However due to the fact that reliability of the recording process and data safety are m...

Страница 16: ...drives HDD DVD drive ODD please make sure the power is disconnected from the DVR A factory recommended HDD ODD should be used for this installation To install a HDD ODD on your DVR 1 Remove the lid of the DVR by unfastening the screws 2 Install the HDD in the HDD rack using the provided screws Connect power and SATA cables to the HDD ...

Страница 17: ... sp z o o 17 STARTING THE DEVICE 3 Install the ODD in the ODD rack using screws provided by ODD manufacturer Connect power and SATA cables to the ODD 4 Connect HDD ODD to the motherboard of the DVR with the included SATA cables 5 Re install the lid of the DVR and fasten screws ...

Страница 18: ...screen and then select Login in the Live Monitoring menu to enter the setup screens Select a User and enter the password by pressing the appropriate combination of Camera number but tons and then the button There is no default password when logging in for the first time as the admin user Please leave the password field void and press the button Arrow buttons navigate through the menu To confirm se...

Страница 19: ...e of the screen and then select Setup in the Live Monitoring menu to enter the setup screen 3 2 System 3 2 1 General settings After choosing this sub menu and pressing the following screen appears Highlight the Site box and press button A virtual keyboard appears for entering a SITE name Highlight the box beside System ID and press button System Record Event Camera Device Network Notification Disp...

Страница 20: ... software upgrades and ofi indicates that the file is for optical drive s firmware upgrades Select the desired file and press the button Highlight the Install button and press button to install selected software package Highlight Cancel button and press button to close the window without upgrading If the upgrade package file is not installed properly you will get an error message The system restar...

Страница 21: ...zard and press the button The Wizard setup screen appears The Wizard setup guides you through configuring the system for basic operation Highlight System Shutdown and press the button The Shutdown screen displays asking you to confirm whether or not you want to shut the system down After selecting Shutdown and pressing the button a screen will appear telling you when it is safe to disconnect power...

Страница 22: ...appear on the list Please select desired month and day using navigation buttons By pressing previously entered date may be deleted TIME SYNC tab allows for defining external time servers via entering their IP addresses which will update the time and date of the DVR in desired intervals from 30 minutes up to 1 day LAST SYNC TIME field informs about the latest update When a particular monitoring sys...

Страница 23: ...r group names selected group and names of particular users The administrator group and the user admin are default recorder s settings and cannot be deleted All users of the Administrator group have all administrator s rights by default Highlight Group Name and press button to change the authority levels assigned to the group Highlight User Name and press button to add or change the password assign...

Страница 24: ...ystem or a PC running iRAS and save video data in an AVI bitmap or JPEG file format Setup The user without Setup authority cannot establish any system settings excluding system shutdown and logout on a local system or a PC running iRAS System Time Change The user can change the system date and time on a local system or a PC running iRAS Data Clear The user can clear all video data or format disks ...

Страница 25: ... external disk with USB interface Capacity of the storage device is displayed in the CAPACITY column FORMAT column informs if the device is used for recording Record or not Unformatted indicates that device is not formatted icon indicates that the storage device HDD creates temporary partition serving as the buffer space during CD DVD RW backup data burning Burning the stored data without the buff...

Страница 26: ...ice highlight Clear and press button You will be asked whether or not you want to delete the data NOTE External disks with USB interfaces can be used only for copying data NOTE When disconnecting an USB hard disk drive from the DVR highlight Don t Use first and then disconnect the device Do NOT disconnect the USB cable or the power from the device while copying video clips If the USB cable is disc...

Страница 27: ...the Left and Right arrow buttons or Up and Down arrow buttons to adjust the length of time recorded data will be kept from 1 to 999 days The DVR automatically deletes video recorded earlier than the user defined period under three conditions at midnight whenever the system reboots or whenever the user changes the Auto Deletion settings Selecting Never will disable the Auto Deletion function Highli...

Страница 28: ...tially based on time again you must format all disks that are currently used for recording Highlighting Use Panic Recording and pressing the button toggles between On and Off Highlight the Panic Recording Duration box and set the duration of panic recording Panic recording will stop automatically after the preset duration as long as the PANIC button is not pressed to stop the panic recording You c...

Страница 29: ...l record and displays the icon at the top left corner of the screen during the scheduled times When the DVR is in the Event mode the red icon displays at the top left corner of the screen The DVR will record and displays the icon at the top left corner of the screen when any event occurs When the DVR is in the Pre Event recoding mode the yellow icon displays when there is no event and the DVR is n...

Страница 30: ...values if the ips Quality Resolution and Dwell values of events are different from each other However the ips will be reset to the supported maximum value when the ips Quality Resolution and Dwell are all set to the highest value Advanced Mode Only Highlight the box under the heading and press the button to delete the recording settings You will be asked to confirm that you want to delete the sett...

Страница 31: ...ed If recording is performed in EVENT mode a pre event recording is possible IPS field allows for setting the pre event recording speed ranging from 1 to 25 fps Quality field allows for selecting the quality of the recording VERY HIGH HIGH STANDARD LOW DWELL allows for setting the time of pre alarm recording ranging from 5 seconds to 30 minutes Attention If the recorder is active in the Schedule r...

Страница 32: ...NO column check boxes activate deactivate motion detection function for a desired channel SENSITIVITY sets the motion detection sensitivity Level 1 is the minimum sensitivity level 5 is the maximum value Sensitivity is defined separately for day and night operating modes Highlighting the box under the MIN BLOCKS heading and pressing the button allows you to adjust the minimum number of detection b...

Страница 33: ...l block denotes that motion detection is active for this block Press the button to display the menu screen The menu on the setup screen has the following functions SELECT Activates highlighted blocks to detect motion CLEAR Deactivates highlighted blocks so that they will not detect motion REVERSE Activates inactive highlighted blocks and deactivates active highlighted blocks SELECT ALL Activates a...

Страница 34: ...heading allows you to set the duration of a signal loss before the DVR will report a Video Loss The DVR will not consider any signal loss from a camera to be a Video Loss if the detected signal loss is shorter than the interval set on this screen Highlight the box under the Actions and press the button The DVR can be set to react to video loss differently for each camera Each camera can be associa...

Страница 35: ... will report a Video Blind The DVR will not consider any blinded camera to be a Video Blind if the detected blindness is less than the Activation Time set on this screen Highlight the box under the Actions and press the button The DVR can be set to react to video blind differently for each camera Each camera can be associated with another camera trigger an Alarm Out connector sound the DVR s inter...

Страница 36: ...vices such as ATMs Automated Teller Machines and POS Point of Sale i e cash registers This screen allows you to configure the DVR for each text in device Highlight the box under the Setup heading and press the button Selecting the Setup heading changes all the parameters excluding Port settings of all the text input channels NOTE The system performance might be affected when a large quantity of te...

Страница 37: ... the DVR to react to any character sent from the text input device you will want to turn On Any Character Highlight Any Character and press the button to toggle between On and Off NOTE If Any Character is turned On you will not be able to enter any text in the Transaction Start box Highlight the box beside Transaction End and press the button Use the virtual keyboard to enter the Transaction End s...

Страница 38: ...Set the length of time to wait for the new text string The DVR will consider a transaction complete if no new text strings are entered between the last text input and the dwell time out You can adjust the Time Out dwell from 5 seconds to 15 minutes Highlighting the box under the Actions and pressing the button The DVR can be set to react to text input Text input can be associated with cameras trig...

Страница 39: ...ons on the covert video When selecting the Covert 2 the DVR displays only camera title on the covert video A user who does not have Covert Camera View authority cannot view video from cameras set to Covert 1 or Covert 2 in both the live monitoring and playback modes You can select the width resolution supported by the camera between 720 and 960 by highlighting the box under the Mode heading and pr...

Страница 40: ...the button You will need to connect the camera to the RS232 or RS485 connector on the back of the DVR following the camera manufacturer s instructions You can assign IDs to each camera by highlighting the box under the ID heading and pressing the button Change the number by highlighting it and using the Up and Down arrow buttons to increase and decrease the number The PTZ ID number can be set from...

Страница 41: ...o four audio inputs Highlight the box beside the input and press the button A list of cameras appears and you can select which camera you want associated with that audio input Highlight Enable Audio Out and press the button This toggles between enabling and disabling audio out 3 6 2 Alarm Out Highlight Alarm Out and press the button The Alarm Out screen allows you to change the settings and establ...

Страница 42: ...utton allows you to edit the information in those boxes The Day box allows you to select the days that the alarm schedule will be active The choices are Sun Mon Tue Wed Thu Fri Sat M F Hol and All The Range box allows you to set the time that the alarm schedule will be active in 15 minute increments from 00 00 to 24 00 The Mode box allows you to set how the alarm reacts during the scheduled time W...

Страница 43: ...232 and RS485 If the RS232 port and RS485 port are in use for PTZ control networking or text input the remote keyboard cannot be configured Highlight the box beside Remote Control Product and select the device from the list Remote Control 1 use this option to control NV KBD30 keyboard using D2 protocol or NV KBD70 keyboard using D2B protocol Remote Control 2 use this option to control NV KBD70 key...

Страница 44: ...ossible but in reality depends directly on the settings of particular network devices and bandwidth quality of the network system In the Quality and Resolution fields you can select one of the available qualities Very High High Standard and Basic only for quality field Settings selected here do not influence the quality of recorded images Lower quality of images which are broadcasted through the n...

Страница 45: ...ransmitted for remote monitoring or remote recording can be enhanced by using the SSL Secure Sockets Layer authentication When using the SSL function the DVR cannot be connected with a remote program or a network keyboard which does not support the SSL function 3 7 2 Ogólne After selecting LAN tab the following setup screen appears Highlight box next to Type field and press button You can select t...

Страница 46: ... iRAS Changing port settings you must change the port settings on the PC running RASPlus as well Refer to the iRAS manual for details For the ADSL network connection with PPPoE protocol you need to manually configure connection parameters as far as ID number and passwords are concerned Highlight Use UPnP and press the button to toggle between On and Off When it is On port forwarding from the NAT N...

Страница 47: ...ears allowing you to enter the IP address or domain name of the FEN server NOTE You will need to get the IP Address or domain name of the FEN Server from your network administrator You can use the domain name instead of IP address if you already set up the DNS Server when setting up the LAN Highlight the box beside Port and press the button Set the port number of the FEN server using the Up and Do...

Страница 48: ...ined from your system administrator Highlight Use Mobile and press the button to toggle between On and Off When set to on you can access a remote DVR using a Blackberry or other mobile devices Selecting Use Mobile sets the WebGuard service to be enabled automatically regardless of your WebGuard settings NOTE When using NAT Network Address Translation or firewall services opening all UDP ports allo...

Страница 49: ...ss the button to toggle between On and Off WebGuard allows for configuring the DVR to be remotely accessible via IE 6 0 or newer browser The access to the DVR is achieved through ports ranging from 12001 to 14000 12088 is the default port for the IE remote access Highlight the box beside Port and press the button Set the port number used when accessing WebGuard by using the Up and Down arrow butto...

Страница 50: ...strator Highlight the box beside Password and press the button A virtual keyboard appears allowing you to enter the password for VNC connection NOTE Up to three users at a time can access a DVR remotely via VNC service When controlling the DVR remotely using a keyboard shortcut keys perform the following functions as described below Key Function or h Left arrow button on the front panel or l Right...

Страница 51: ...curs Highlight the box under the No heading and press the button to toggle between On and Off You will only be able to change the IP addresses if No is enabled Highlight the IP Address box that you want to change and press the button Use the arrow buttons to enter the IP address of the computer you want contacted during an event You can enter up to five IP addresses Highlight the box beside Retry ...

Страница 52: ...olumn it indicates the item is a Group Name If there is a in front of the Group Name it indicates that the group has been expanded and all of the Recipient Names within that group are displayed below the Group Name If there is a in front of the Group Name it indicates that the group has been collapsed and all of the Recipient Names within that group are hidden To collapse or expand a group highlig...

Страница 53: ...dress and enter the recipient s e mail address and mail server provider Highlighting allows you to select the mail server provider from a list of registered SMTP mail server providers Highlight the box under the Attach Type heading and press the button to change the image file format attached to an email NOTE Attaching a image file to an email will not be available for the Text In event Highlight ...

Страница 54: ...e button An Authentication screen appears Highlight Use and press the button to toggle between On and Off Highlight the box beside User Password and press the button A virtual keyboard appears allowing you to enter the user ID and password Highlight the box beside Sender and enter the sender s e mail address Use the virtual keyboard to enter the e mail address Highlight the box beside Display Name...

Страница 55: ...ting the boxes under the No heading and pressing the button To add an SNS account highlight the and press the button The following screen appears Highlight the box beside Type and press the button Selecting Twitter from the Type allows you to post a tweet on Twitter when an event occurs Highlight the box beside User Name Password and press the button A virtual keyboard appears allowing you to ente...

Страница 56: ...ification and pressing the button You can toggle the individual items On and Off by highlighting that item and pressing the button Highlight OK and press the button to accept your changes NOTE The notify item you select should be enabled in the Notification setup screen The DVR should be registered in the RAS Remote Administration System The Notify action for system events in the System Event setu...

Страница 57: ...he icon displays while in the Freeze mode and the displays while in the Sequence mode Screen Group The number of screen group displays when the DVR is not in the 4x4 3x3 display mode Free Space The icon displays when the DVR is in the Recycle mode and the percentage of available storage space displays when the DVR is not in the Recycle mode Date Time The current date and time information displays ...

Страница 58: ... Main Monitor Highlight Primary Monitor and press the button and the Primary Monitor setup screen appears Highlight the box beside Mode and press the button You can select between Full Sequence and Cameo Sequence Pressing the SEQUENCE button causes the DVR to sequence cameras and the DVR can sequence cameras in two modes Full and Cameo In the Full mode the DVR sequences through the cameras and dis...

Страница 59: ...an adjust the display dwell time by highlighting the box beside Interval and pressing the button You can select dwell intervals ranging from 1 second to 1 minute Highlight Event Monitoring On and press the button Pressing the button toggles between On and Off When it is On the DVR will display the camera associated with the event when an event occurs Highlight the box beside Resolution and press t...

Страница 60: ...the button You can define which cameras display sequentially on the Spot Monitor when in the single screen display format Highlighting the box under the Camera and pressing the button toggles between On and Off You can adjust the display dwell time by highlighting the box under the Dwell and pressing the button You can select dwell intervals ranging from 1 to 20 seconds ...

Страница 61: ...in the Live Monitoring menu accesses the Login screen and you will be asked to select a User and enter the password to log into the system Selecting Logout in the Live Monitoring menu displays the Logout screen asking you to confirm whether or not you want to log out the current user Monitor Selecting Monitor in the Live Monitoring menu will allow you to select the monitor from Main Monitor and Sp...

Страница 62: ... Live Monitoring menu moves to the previous or next page It is the same as pressing the GROUP button Freeze Selecting Freeze in the Live Monitoring menu will freeze the current image on the screen until you select again It is the same as pressing the Play Pause button Pressing any button except for the MENU ALARM and PANIC buttons while in the Freeze mode can also exit the Freeze mode While in the...

Страница 63: ... control the selected camera as long as it has Pan Tilt and Zoom capabilities It is the same as pressing the PTZ button Refer to the following PTZ Mode section for details Zoom Selecting Camera Menu Zoom and choosing the camera number zooms the current image of the selected camera on the screen It is the same as pressing the ZOOM button Selecting Zoom again in the Camera Menu again exits the Zoom ...

Страница 64: ... rectangle around using the arrow buttons Pressing the Play Pause button in the Zoom mode enlarges the area in rectangle Exit the Zoom mode by pressing the ZOOM button While in the Zoom mode the icon displays if Zoom is selected in the Display setup screen OSD tab 4 6 PTZ Mode If a user who has PTZ Control authority logs into the system the user can control PTZ cameras The DVR will control cameras...

Страница 65: ...e screen Use the arrow buttons on the toolbar to pan or tilt the camera in the direction you want The other controls on the toolbar perform as described below 4 7 Event monitoring When an event occurs the DVR will display the camera associated with the event and the icon displays on screen if Event Monitoring On is selected in the Display setup screen Primary Monitor tab How the cameras are displa...

Страница 66: ...eras that are Off have lost video or are set to Covert unless the user has authority to view covert cameras will be excluded from the sequence When the Spot Monitor is in the sequence mode you can set the camera s display dwell time Selecting Spot Monitor after selecting Monitor in the Live Monitoring menu displays the Spot Monitor menu and allows you to control a Spot Monitor Spot Monitor Menu Di...

Страница 67: ...menu Check Alarm In and Check Recording will be highlighted when each event is detected based on the settings you made in the System Event setup screen on the System menu Panic Record will be highlighted while the DVR is in the panic recording mode Disk Almost Full will be highlighted when the DVR is not in the Recycle mode and the level of disk usage reaches the Disk Almost Full percentage you ma...

Страница 68: ... user can view recorded image Once video has been recorded you can view it by pressing the PLAYBACK button Selecting the camera number plays back video of the selected camera When playing video for the first time the DVR will display the most recent image When playing video subsequent times the DVR will start playing video from the last recalled image Recorded audio will be played when the DVR dis...

Страница 69: ...within multi screen display The cameo mode allows you to change the screen layout by editing the cameo PLAYBACK Button Pressing the PLAYBACK button enters the playback mode and pressing the button again exits the playback mode When entering the playback mode video is paused Pressing the Play Pause button plays back video at regular speed The screen displays when the DVR is in the Pause mode and th...

Страница 70: ...he following menu Event log search search for recordings associated with events Record Table Search search for recordings using a recording table with 1 minute step Motion Search Selecting Motion Search searches for motion events Text In Search Selecting Text In Search searches for text input strings Uwaga When all cameras are working in pre alarm recording mode searching speed may decrease ...

Страница 71: ...screen appears All events in the system are recorded in DVR The Event Log can be accessed by pressing ALARM button on the front panel of the DVR or with help of playback menu through selecting Event Log Search option There is no determined user authority to display Event Log Search screen however the event video will not be played unless user with Search privileges logs into the system NOTE It is ...

Страница 72: ... only be able to turn the Check Time Overlap on or off if a user defined date and time is set in From and To mode If the DVR s date and time have been reset it is possible for the DVR to have more than one overlapping start and stop time NOTE a lower number denotes later recording time Highlight the box beside Alarm In You can select the alarm inputs that you want to include in your search Highlig...

Страница 73: ...icates the current search position To search specific video move the vertical line by using the Left or Right arrow buttons on the front panel or by clicking the mouse on the desired segment If the DVR s time and date have been reset to a time that is earlier than some recorded video it is possible for the DVR to have more than one video stream in the same time range In this case the overlapping t...

Страница 74: ...on in the Expanded view mode switches to the Standard view mode Selecting located at the bottom displays the Calendar Search screen Days with recorded video display on the calendar with white numbers You can highlight the days with recorded video by using the arrow buttons Once you have highlighted a day press the button to se lect it Playback controls displays 8 hours displays 24 hours go to the ...

Страница 75: ...g You can also narrow your event search by selecting the Option button and setting up the new search condition You can search video from the first to last recorded images or you can set the start and stop times and dates Highlight the box beside From and press the button to toggle between On and Off When set to Off you can enter a specific Date and Time When set to On the search will be from the f...

Страница 76: ...e able to select from 1 low sensitivity to 5 high sensitivity Highlight the box beside Min Blocks and press the button You will be able to set the number of sensor blocks that must be activated Once you set your desired search conditions highlight Search and press the button to display the search results in the Motion Search screen Selecting Cancel exits the screen without saving the changes When ...

Страница 77: ...arch for text input Highlight the Text Input Device box press the button and select Text Input Device from the list Highlighting the and pressing the button allows you to add a new set of search parameter The column can be used to delete a set of search parameter or entire sets of search parameters Highlighting the Option box and pressing the button allows you to select whether or not the search w...

Страница 78: ...ied by displaying the Clip Copy screen Pressing and holding the MENU button on the front panel or the CLIP COPY button on the remote control for more than three seconds while in the Search mode or Live Monitoring mode initiates the One Touch Clip Copy function The last recorded image will be the ending point of video to be clip copied and the system will automatically begin to calculate the possib...

Страница 79: ...e name for the video you are backing up and select Close The DVR will automatically add the camera number for example 01 and exe to the file name When the site name is added to the file name some special characters in the site name will be converted to _ Once you have given the video clip a file name highlight the Start button and press the button The confirmation screen displaying data size will ...

Страница 80: ...s possible for the DVR to have more than one video stream in the same time range In this case you can search overlapping video streams individually by selecting a specific segment For example when the DVR has recorded video from one to five o clock and the user changes the time backward from five to three o clock and then continues recording until six o clock there will be two video streams and se...

Страница 81: ...ipPlayer program has at least a 800MHz Pentium III If your CPU is slower than stated above video clips recorded at maximum speed with very high image quality will be played back slowly DirectX 8 0 or higher is required while VGA card with 16MB or higher video RAM is recommended for proper operation NOTE Proper image display depends on the display settings of your PC If you are experiencing display...

Страница 82: ...o check version number of the libraries installed please enter dxdiag in the RUN bar located in the START menu and press ENTER In the DISPLAY please select DIRECT DRAW HARDWARE ACCELERATION and check if it s working properly Please update the video drivers to the newest ones recommended by the producer When still having problems with playback please consider change of the video card ATI based vide...

Страница 83: ...essing you can save images in the form of BMP format print them or get file information cameras the name of camera input time type size resolution Image processing function brightness blurring sharpness is not available in split Click the to select from Normal Double and Full Screen views Copied materials may be watermarked to prevent manipulation icon visible in the lower right of the picture ind...

Страница 84: ...ld have the same control protocol and transmission speed set in their menus check the user s manual of the camera for more details Presented connection description is dedicated to Novus camera To connect cameras of different producent please contact your Novus distributor and read instruction of the camera Note For PTZ cameras control you can also use RS 232 port In this case you need to use RS232...

Страница 85: ...olding sp z o o 85 PTZ CAMERAS CONTROL AND CONNECTION Camera Novus CAMA III nr 1 Video Camera Novus CAMA III nr 16 24VAC 24VAC FGND RX RX RX TX RX TX GND 24VAC 24VAC 24VAC 24VAC FGND RX RX RX TX RX TX GND 24VAC 24VAC UTP 5 max 1200m max 1 5 m max 1 5 m View of NDR HB4416 ...

Страница 86: ...rminals Alarm inputs outputs of NDR HB4416 NOTE Alarm inputs and outputs are not lightning protected User should protect the inputs against the electric discharges that may damage the equipment Current load capacity of each alarm input cannot exceed 2 A for 125 V AC and 1A for 30 VDC Directly to outputs you can connect e g LED light emitting diode creating a circuit as presented on the chart below...

Страница 87: ...should not exceed 1200m In such a system devices are cascade connected with taps length not exceeding 1 5m Keyboard has its keys in accordance with appropriate buttons in the DVR serving the same function Additional informative feature is the LCD display located in the keyboard displaying information about active functions transmission parameters etc Diagrams depicting connection between NV KBD70 ...

Страница 88: ...ive monitoring mode to open the following menu Functions PTZ ZOOM SPOT MONITOR are the same as the functions which are setting with front panel buttons ZOOM function available only in HD mode can be used as follows Pressing and holding the left mouse button allows you to move the zoomed area Pressing the right mouse button on image opens additional menu You can change zoom multiples move the image...

Страница 89: ...D numbers If the DVR ID number is equal to 0 you can control it using remote controller without any additional settings If two or more DVRs have ID equal 0 you can control them simultaneously at the same time To control more than one DVR with remote controller first press the ID button and then press the number Other DVRs should have different ID numbers The remote controller allows you to select ...

Страница 90: ...2013 11 04 PR MK AAT Holding sp z o o ul Puławska 431 02 801 Warszawa Polska tel 22 546 07 00 faks 22 546 07 59 www novuscctv com ...

Страница 91: ...NDR HB4208 NDR HB4416 instrukcja obsługi ...

Страница 92: ...h oznacza że nasz produkt nie jest klasyfikowany jako odpad z gospodarstwa domowego Urządzenie należy oddać do odpowiedniego punktu utylizacji odpadów w celu recyklingu Aby uzyskać dodatkowe informacje dotyczące recyklingu niniejszego produktu należy skontaktować się z przedstawicielem władz lokalnych dostawcą usług utylizacji odpadów lub sklepem gdzie nabyto produkt Dyrektywa RoHS 2002 95 EC Info...

Страница 93: ...nie zalecanych przez producenta 7 Nie wolno używać rejestratora w środowisku o dużej wilgotności np w pobliżu basenów wanien w wilgotnych piwnicach 8 Nie należy instalować tego urządzenia w miejscu gdzie nie można zapewnić właściwej wentylacji np zamknięte szafki itp co powoduje zatrzymanie się ciepła i w konsekwencji może doprowadzić do uszkodzenia 9 Nie wolno umieszczać rejestratora na niestabil...

Страница 94: ...TRATORA 18 3 1 Ustawienia 19 3 2 System 19 3 2 1 Ogólne ustawienia 19 3 2 2 Rejestr systemu 20 3 2 3 Data czas 21 3 2 4 Użytkownicy 23 3 2 5 Dyski 25 3 2 6 Zdarzenia systemowe 26 3 3 Nagrywanie 27 3 3 1 Ogólne 27 3 3 2 Harmonogram 28 3 3 3 Przed alarm 31 3 4 Zdarzenie 32 3 4 1 Detekcja ruchu 32 3 4 2 Alarmy zewnętrzne 33 3 4 3 Utrata sygnału 34 3 4 4 Oślepienie kamery 35 3 4 5 Transakcja Przechwyt...

Страница 95: ...darzeń 65 4 8 Kamery ukryte 66 4 9 Monitor pomocniczy SPOT 66 4 10 Stan 67 4 11 Odtwarzanie zarejestrowanego materiału 68 4 12 Wyszukiwanie materiału 70 4 12 1 Przeszukiwanie rejestru zdarzeń 71 4 12 2 Wyszukiwanie segmentów 72 4 12 3 Wyszukiwanie ruchu 75 4 12 4 Wyszukiwanie po transakcjach 76 4 13 Kopiowanie nagrań 78 4 14 Nakładanie się czasu 79 4 15 Odtwarzanie skopiowanych materiałów 81 5 POD...

Страница 96: ...u kontroli dostępu urządzeń fiskalnych bankomatów itp Zaawansowane funkcje przeszukiwania zarejestrowanego materiału Sterowanie kamerami szybkoobrotowymi bezpośrednio z rejestratora i przez sieć Ethernet Możliwość sterowania kamerami stacjonarnymi NOVUS z interfejsem RS 485 Protokoły sterowania Novus C Pelco D N Control i inne Współpraca z klawiaturą NV KBD70 NV KBD30 Możliwość zainstalowania nagr...

Страница 97: ...eratury z funkcją alarmowania lokalnego jak i przez sieć komputerową HDD 4 HDD SATA montowane wewnątrz bez nagrywarki DVD RW dysk 1000 GB w standardzie Kopiowanie obrazów na płyty CD DVD przez port USB na dysk twardy lub pamięć typu Flash przez sieć komputerową Nagrywarka DVD RW brak istnieje możliwość zamontowania Porty zewnętrzne 1 x Ethernet złącze RJ 45 10 100 Mbit s 1 x eSATA 2 x USB 2 0 do p...

Страница 98: ...temperaturze należy odczekać aż osiągnie temperaturę pomieszczenia w którym ma pracować Nie wolno włączać urządzenia bezpośrednio po przyniesieniu z chłodniejszego miejsca Kondensacja zawartej w powietrzu pary wodnej może spowodować zwarcia i w konsekwencji uszkodzenie urządzenia Uwaga Przed uruchomieniem urządzenia należy zapoznać się z opisem i rolą poszczególnych wejść znajdujących się na panel...

Страница 99: ...ży podłączać bezpośrednio mikrofonów lecz należy stosować w torach przedwzmacniacze Jedno wyjście audio do podłączenia głośnika ze wzmacniaczem Wyjście głośnikowe nie posiada w torze audio wzmacniacza i dlatego należy stosować głośniki ze wzmacniaczem 4 eSATA Port eSATA służy do podłączenia zewnętrznych urządzeń pamięci masowej UWAGA Nie należy podłączać ani odłączać urządzeń eSATA podczas pracy r...

Страница 100: ... w postaci kodów ASCII kasy fiskalne bankomaty itp Jednocześnie możliwe jest podłączenie tylko jednego z wymienionych urządzeń W przypadku podłączenia urządzenia posiadającego inny interfejs niż RS 232 wymagane jest zastosowanie odpowiedniego konwertera np do zmiany transmisji ze standardu RS 485 na RS 232 Uwaga Kabel do połączenia z portem RS 232 nie jest dostarczany z urządzeniem Należy upewnić ...

Страница 101: ...zeprowadzone przez wykwalifikowany personel Przed wykonaniem połączeń należy zapoznać się ze schematem przedstawionym poniżej który jest schematem poglądowym W zależności od wymagań konkretny system będzie składał się z różnej liczby urządzeń peryferyjnych Monitory kamery i inne urządzenia należy zakupić oddzielnie w zależności od potrzeb URUCHAMIANIE URZĄDZENIA HDMI iRAS ...

Страница 102: ...ewnętrzny brzęczyk 4 DIODA LED SIEĆ Dioda świeci kiedy rejestrator zostanie podłączony do sieci Ethernet 5 DIODA LED KOPIA Dioda świeci podczas kopiowania 6 1 16 1 8 Przyciski wyboru kanału naciśnięcie jednego z przycisków wyboru kanału powoduje wyświetlenie na ekranie obrazu z kamery podłączonej do danego kanału Obraz wyświetlany jest w trybie pełnoekranowym Przyciski wyboru kanału wykorzystywane...

Страница 103: ... naciśnięcie przycisku szybkiego odtwarzania powoduje zwiększenie prędkości odtwarzania w przód lub w tył Zmiana prędkości odtwarzania realizowane jest poprzez kolejne naciśnięcia przycisku lub Prędkościom odtwarzania towarzyszą wyświetlane na ekranie monitora następujące znaki graficzne W trybie pauzy użycie przycisku lub powoduje przejście do poprzedniego lub następnego obrazu 9 MENU CAMEO Naciś...

Страница 104: ...ełny ekran 2x2 3x3 4x4 4x4 tylko w modelu NDR HB4416 i funkcja PIP obraz w obrazie Wciśnięcie i przetrzymanie przycisku przez 2 s umożliwia wybór wyświetlanej kamery na monitorze pomocniczym 13 SEQUENCE W trybie na żywo naciśnięcie przycisku powoduje wyświetlanie kolejnych kamer w trybie pełnoekranowym Wciśnięcie i przetrzymanie przycisku przez 2 s umożliwia uruchomienie sekwencyjnego wyświetlania...

Страница 105: ...ować się z dystrybutorem lub sprawdzić na stronie www novuscctv com UWAGA Lista kompatybilnych dysków zawiera wszystkie dyski poprawnie współpracujące z danym rejestratorem w tym także przeznaczone do pracy biurowej tzw desktopowe Jednak ze względu na to że w systemach CCTV priorytetem jest niezawodność procesu rejestracji i zarządzania danymi zaleca się stosowanie dysków przeznaczonych do pracy c...

Страница 106: ...udowy należy się upewnić czy kabel zasilający został odłączony od rejestratora W celu zamontowania nagrywarki DVD i lub dysków HDD Należy 1 Zdjąć górną cześć obudowy rejestratora 2 Zainstalować dyski w specjalnym koszyku śrubami dołączonymi w zestawie Podłączyć kable zasilające oraz kable SATA URUCHAMIANIE URZĄDZENIA ...

Страница 107: ... URZĄDZENIA 3 Zainstalować dysk HDD i lub napęd DVD RW w specjalnym koszyku Podłączyć kable zasilające oraz kable SATA Śruby do zamontowania DVD RW znajdują się w zestawie 4 Podłączyć dyski i nagrywarkę DVD RW do płyty głównej rejestratora kablami SATA 5 Założyć górną cześć obudowy i skręcić obudowę rejestratora ...

Страница 108: ... pomocą przycisków kamerowych 1 9 wpisać hasło użytkownika W przypadku pierwszego logowania dla użytkownika admin domyślnie nie jest ustawione hasło Oznacza to że pole Hasło należy zostawić puste i nacisnąć przycisk na panelu czołowym Domyślnym językiem urządzenia jest język angielski W celu zmiany języka na polski należy wykonać następujące czynności wywołać okno logowania w sposób opisany powyże...

Страница 109: ...ej Należy wybrać ikonę USTAWIENIA a następnie wcisnąć klawisz 3 2 System 3 2 1 Ogólne ustawienia Po wybraniu tego pod menu i naciśnięciu pojawi się poniższy ekran W pozycji LOKALIZACJA za pomocą wirtualnej klawiatury należy wpisać nazwę lokalizacji rejestratora W pozycji ADRES URZĄDZENIA za pomocą klawiszy nawigacyjnych góra dół należy ustawić numer identyfikacyjny ID urządzenia MENU REJESTRATORA ...

Страница 110: ...RW Po ukazaniu się okna aktualizacji należy wybrać właściwy plik i potwierdzić instalację oprogramowania W przypadku nieprawidłowej instalacji informacja o błędzie zostanie wyświetlona na ekranie monitora Po dokonaniu aktualizacji systemu urządzenie automatycznie się restartuje W czasie aktualizacji oprogramowania nie należy naciskać żadnych przycisków rejestratora i pilota zdalnego sterowania Uwa...

Страница 111: ...y potwierdzić operację lub ją anulować Po potwierdzeniu tej operacji po chwili pojawi się komunikat który poinformuje że można bezpiecznie odłączyć urządzenie od zasilania 3 2 3 Data czas Po wybraniu tego pod menu i naciśnięciu pojawi się poniższy ekran W oknie ustawienia daty i czasu za pomocą klawiszy nawigacyjnych i klawisza należy wybrać spośród dostępnych wyświetlany format daty i czasu oraz ...

Страница 112: ...ożna zdefiniować serwer czasu za pomocą adresu IP lub nazwy domenowej który w określonych przez użytkownika interwałach czasowych od 30 min do 1 dnia będzie aktualizował bieżący czas wbudowanego zegara urządzenia W pozycji OSTATNIA SYNCHRONIZACJA wyświetlany jest czas ostatniej aktualizacji zegara W przypadku rozbudowanego systemu monitoringu zbudowanego z dwóch lub więcej urządzeń jeden rejestrat...

Страница 113: ...ycji z pierwszej kolumny oznaczonej lub pozwala na wyświetlenie tylko nazw grup wybranej grupy lub nazw grup wybranej grupy wraz z nazwami poszczególnych użytkowników Grupa Administrator oraz użytkownik admin są domyślnymi ustawieniami rejestratora i nie mogą zostać skasowane Domyślnie wszyscy użytkownicy grupy Administrator posiadają pełne uprawnienia administratorskie Wybranie za pomocą klawiszy...

Страница 114: ...e lub zdalnie za pomocą oprogramowania iRAS Ustawienia uprawnienie do zmiany ustawień menu rejestratora lokalnie lub zdalnie za pomocą oprogramowania iRAS nie licząc możliwości wyłączenia rejestratora i wylogowania Zmiana ustawień zegara uprawnienie do zmiany ustawień daty i czasu lokalnie lub zdalnie za pomocą oprogramowania iRAS Kasowanie nagrań uprawnienie do kasowania danych lokalnie lub zdaln...

Страница 115: ...mnie FORMATUJ wyświetlana jest informacja o trybie pracy dysku NAGRYWANIE dysk twardy przeznaczony jest do rejestracji NIE FORMATOWANY dysk twardy nie jest przygotowany do współpracy z urządzeniem i wymaga formatowania Ikona oznacza że na dysku twardym została wydzielona partycja plików tymczasowych Wydzielenie powyższej partycji umożliwia nagrywanie materiałów na płytę CD DVD RW urządzenia w przy...

Страница 116: ...sk jest aktualnie wykorzystywany Komunikat INNY wskazuje że dysk uprzednio był używany w innym urządzeniu Wybranie i zatwierdzenie przyciskiem kolumny INFORMACJE dla wybranego dysku wyświetla czas rejestracji obrazów z kamer 3 2 6 Zdarzenia systemowe Po wybraniu podmenu SYSTEMOWE wyświetlony zostanie poniższy ekran Dla następujących zdarzeń systemowych rejestratora SYSTEM URUCHOMIENIE URZĄDZENIA R...

Страница 117: ...grywania zdarzenia detekcji ruchu aktywacji wejścia alarmowego utraty sygnału w zakresie od 5 sekund do 15 minut Funkcja AUTO KASOWANIE pozwala na automatyczne kasowanie zarejestrowanych nagrań starszych niż zdefiniowany okres nawet jeśli jest dostępne miejsce na dysku Funkcję AUTO KASOWANIE ustawia się w zakresie do 999 dni lub funkcja wyłączona NIGDY Funkcja działa niezależnie od funkcji NADPISY...

Страница 118: ...niować domyślne prędkości nagrywania w zakresie od 1 do 25 kl s oraz jakość rejestrowanych obrazów NAJWYŻSZA WYSOKA STANDARDOWA PODSTAWOWA W pozycji ROZDZIELCZOŚĆ należy dokonać wyboru rozdzielczości rejestrowanych obrazów Dla ustawienia NAJWYŻSZA obrazy są rejestrowane w rozdzielczości D1 dla ustawienia WYSOKA obrazy są rejestrowane w rozdzielczości połowiczna D1 Dla ustawienia STANDARDOWA obrazy...

Страница 119: ...grywanie ma być nieaktywne Jeżeli rejestrator pracuje w trybie nagrywania harmonogramowego w lewym górnym rogu obrazu z kamery wyświetlana jest ikona Dodatkowo rejestrator wyświetla ikonę w lewym górnym rogu ekranu dla zdefiniowanych przedziałów czasowych nagrywania harmonogramowego Jeżeli rejestrator pracuje w trybie nagrywania zdarzeń w lewym górnym rogu obrazu z kamery wyświetlana jest ikona Do...

Страница 120: ...go przedziału czasowego dokonuje się szczegółowych ustawień pracy rejestratora prędkość zapisu jakość czas trwania w trybie ciągłym oraz w trybach alarmowych alarmy zew ruch utrata sygnału oraz transakcja dla każdej kamery niezależnie Wszystkie tryby zapisu ciągły oraz alarmowe alarmy zew ruch utrata sygnału oraz transakcja za pomocą znaku w pierwszej kolumnie mogą zostać rozwinięte i dla każdej k...

Страница 121: ...est realizowana w trybie nagrywania ZDARZENIA możliwe jest nagrywanie przed alarmowe W pozycji IPS dla każdej kamery definiuje się prędkość nagrywania przed alarmowego w zakresie od 1 do 25 kl s W pozycji JAKOŚĆ definiuje się jakość rejestrowanych obrazów nagrywania przed alarmowego NAJWYŻSZA WYSOKA STANDARDOWA NISKA W pozycji CZAS trwania definiuje się czas nagrywania przed alarmowego w zakresie ...

Страница 122: ... można włączyć lub wyłączyć funkcję detekcji ruchu W kolumnie CZUŁOŚĆ definiuje się poziom czułość w zakresie od 1 do 5 Poziom 1 oznacza minimalną czułość poziom 5 oznacza maksymalną czułość Poziom czułości definiuje się niezależnie dla trybu dziennego i dla trybu nocnego W kolumnie PRÓG AKTYWACJI definiuje się minimalną ilość pól dla których zmiany wywołują detekcję ruchu Pozwala to na unikniecie...

Страница 123: ...na jest detekcja ruchu Naciśnięcie klawisza ENTER na panelu czołowym rejestratora powoduje wyświetlenie menu ustawień pola detekcji ruchu WYBIERZ uaktywnia wszystkie pola w obrębie bloku SKASUJ dezaktywuje wszystkie pola w obrębie bloku ODWROTNE ZAZNACZENIE uaktywnia pola dezaktywowane i dezaktywuje pola aktywne w obrębie bloku ZAZNACZ WSZYSTKO uaktywnia wszystkie pola siatki SKASUJ WSZYSTO dezakt...

Страница 124: ...dce MONITOR POMOCNICZY użytkownik może wybrać która z kamer będzie wyświetlana na monitorze pomocniczym w przypadku pojawienia się sygnału alarmowego 3 4 3 Utrata sygnału Po wybraniu zakładki UTRATA SYGNAŁU pojawi się poniższy ekran W zakładce UTRATA SYGNAŁU definiuje się reakcję systemu na utratę sygnału video Kolumna CZAS UTRATY SYGNAŁU określa opóźnienie reakcji systemu na utratę sygnału wideo ...

Страница 125: ...i czarnego w zakresie od 0 Nigdy do 15 Najwyższa czułość Kolumna CZAS AKTYWACJI określa opóźnienie reakcji systemu na oślepienie kamery Jeżeli rzeczywisty czas oślepienia któreś z kamer będzie mniejszy niż określony czas aktywacji to system nie zareaguje na dane zdarzenie Ustawienia w kolumnie DZIAŁANIE są identyczne z ustawieniami ustawień alarmowych w ALARMY ZEW Aktywowanie opcji UŻYJ FUNKCJI CZ...

Страница 126: ...że współpracować maksymalnie z 16 urządzeniami peryferyjnymi generującymi tekst i podłączonymi do portów RS 232 RS 485 USB oraz sieć komputerową Uwaga Współpraca z urządzeniami peryferyjnymi wymaga znajomości formatu wysyłanych danych przez urządzenie Dane tekstowe przechwytywane przez rejestrator muszą być w formacie ASCII Poniższe ustawienia są prawidłowe dla urządzeń generujących tekst w postac...

Страница 127: ...ga W przypadku braku definicji PORTU pozostałe ustawienia zakładki są nieaktywne W przypadku współpracy z kasami fiskalnymi lub innymi urządzeniami należy w pozycji USTAWIENIA dokonać ustawień parametrów transmisji zgodnych z zaleceniami producentów urządzeń W pozycji POCZĄTEK TRANSAKCJI należy za pomocą wirtualnej klawiatury zdefiniować znaki które interpretowane będą jako początek pierwszej lini...

Страница 128: ... ZNAK KOŃCA LINII należy zdefiniować znaki które będą interpretowane przez system jako koniec linii i pozwolą na przejrzyste sformatowanie wyświetlanego tekstu W pozycji PLUS X LINII więcej definiuje się ilość dodatkowych linii w zakresie od 0 do 10 które są zapisywane przez rejestrator W pozycji IGNORUJ znaki definiuje się znaki których detekcja jest przez system całkowicie ignorowana W przypadku...

Страница 129: ...ietla jedynie nazwę i ikonę statusu danej kamery W trybie Ukryta 2 rejestrator wyświetla jedynie nazwę danej kamery Użytkownik który nie posiada uprawnień o nazwie Podgląd kamer ukrytych nie może odtwarzać nagrań zarejestrowanych z tych kamer i nie widzi obrazu z nich pochodzącego w trybie podglądu na żywo W kolumnie TRYB ustawia się obsługiwaną rozdzielczość 720 lub 960 z jaką będzie pracować dan...

Страница 130: ... wejścia kamerowego rejestratora do którego zostanie podłączona Nie ma możliwości ustawienia tego samego adresu dla więcej niż jednej kamery W pozycji PORT wybiera się port telemetrii na którym transmitowane będą komendy PTZ oraz definiuje jego parametry prędkość transmisji liczba bitów bit stopu oraz parzystość UWAGA Nie można jednocześnie podłączyć sterowania kamer szybkoobrotowych oraz klawiatu...

Страница 131: ...źwięk będzie słyszalny tylko podczas odtwarzania w trybie pełnoekranowym danego kanału Sygnał wejściowy powinien pochodzić ze źródła generującego wstępnie wzmocniony sygnał np z mikrofonu zamontowanego w kamerze Zaznaczenie pozycji WYJŚCIE AKTYWNE pozwala na odsłuchiwanie sygnału audio powiązanego z sygnałem wizji na żywo w trybie pełnoekranowym lub pełnoekranowo w trybie odtwarzania Odtwarzanie n...

Страница 132: ...ę czas aktywności wyjścia przekaźnikowego w zakresie 24h W kolumnie TRYB należy zdefiniować typ aktywności wyjścia alarmowego Zdarzenie wyjścia alarmowe będą aktywne tylko w przypadku zdarzeń WŁ będą włączone w zdefiniowanych przedziałach czasowych lub WYŁ będą wyłączone w zadanych przedziałach czasowych W kolumnie KANAŁY definiowane są wyjścia alarmowe oraz dodatkowo wewnętrzny sygnał akustyczny ...

Страница 133: ... będzie podłączona klawiatura W pozycji TYP KLAWIATURY należy wybrać pozycje KLAWIATURA aby sterować rejestratorem klawiaturą NV KBD30 protokołem D2 lub NV KBD70 protokołem D2B KLAWIATURA2 aby sterować rejestratorem klawiaturą NV KBD70 protokołem D2E Uwaga Jeżeli porty RS 232 lub RS 485 są już wykorzystywane do sterowania kamer szybkoobrotowych lub współpracują z inserterami tekstu nie jest możliw...

Страница 134: ...d 1 do 25 obrazów na sekundę Zdefiniowana wartość jest maksymalną do osiągnięcia ale jej uzyskanie zależy od ustawień urządzeń sieciowych W pozycji JAKOŚĆ lub ROZDZIELCZOŚĆ istnieje możliwość wyboru jakości i rozdzielczości transmitowanych przez sieć obrazów Najwyższa Wysoka Standardowa Podstawowa tylko dla pozycji jakość Dokonane w tej pozycji ustawienia nie wpływają na jakość rejestracji obrazów...

Страница 135: ...SL Secure Sockets Layer należy podświetlić pole Włącz SSL do przesyłania danych i nacisnąć przycisk Jeśli funkcja SSL jest włączona to rejestrator blokuje możliwość nawiązania zdalnego połączenia z oprogramowaniem lub klawiaturą sieciową która nie obsługuje funkcji SSL 3 7 2 LAN Po wybraniu zakładki LAN zostanie wyświetlony następujący ekran W pozycji TYP dokonuje się wyboru typu sieci w której pr...

Страница 136: ...w oprogramowaniu iRAS dla poszczególnych usług Dla typu połączenia sieciowego ADSL z protokołem PPPoE należy ręcznie skonfigurować parametry połączenia w zakresie numeru ID i hasła Po wpisaniu i zatwierdzeniu numeru ID oraz hasła w pozycji ADRES IP zostanie wyświetlony aktualny numer IP urządzenia Każdorazowy restart systemu może spowodować zmianę adresu IP zarówno dla połączenia ADSL jak i DHCP A...

Страница 137: ...N i nacisnąć przycisk Na ekranie pojawi się wirtualna klawiatura za pomocą której należy wprowadzić adres IP lub nazwę domeny serwera FEN Uwaga Adres IP lub nazwę domeny należy uzyskać od administratora sieci Nazwy domeny można używać jeżeli w zakładce LAN został poprawnie ustawiony serwer DNS Podświetlić pole Port nacisnąć przycisk i za pomocą strzałek wprowadzić numer portu dla serwera FEN Podśw...

Страница 138: ... od administratora sieci Aby włączyć lub wyłączyć obsługę urządzeń mobilnych należy podświetlić pole Użyj urządzenia przenośnego i nacisnąć przycisk Kiedy obsługa urządzeń mobilnych jest włączona usługa Ochrony sieci jest automatycznie aktywowana niezależnie od ustawień w zakładce Ochrona sieci UWAGA W przypadku użycia techniki NAT Network Address Translation lub usługi firewall otworzenie wszystk...

Страница 139: ... 3 7 5 Ochrona sieci Po wybraniu zakładki Ochrona sieci zostanie wyświetlony następujący ekran Podświetlić pole Użyj funkcji ochrony sieci i nacisnąć przycisk aby włączyć lub wyłączyć tą funkcję W polu Port ustawiamy port przez który logujemy się do rejestratora przeglądarką Internet Explorer np http 192 168 1 1 12088 ...

Страница 140: ...ć pole Hasło i nacisnąć przycisk Na ekranie pojawi się wirtualna klawiatura za pomocą której należy wprowadzić hasło dla połączenia VNC Uwaga Maksymalnie trzech użytkowników może być jednocześnie połączonych z rejestratorem poprzez usługę VNC Odpowiedniki klawiszy skrótów Klawisz Funkcja lub h Lewa strzałka na panelu frontowym lub l Prawa strzałka na panelu frontowym lub k Górna strzałka na panelu...

Страница 141: ...ormacje do komputera z zainstalowanym oprogramowaniem RAS Remote Administration System W tym celu należy zaznaczyć pole w kolumnie Nr i nacisnąć przycisk włączając tą funkcje Podświetlić pole w kolumnie Adres IP nacisnąć przycisk i za pomocą przycisków strzałek wprowadzić żądane adresy IP do tabeli Podświetlić pole Ilość prób nacisnąć przycisk i wybrać za pomocą przycisków strzałek wartość z przed...

Страница 142: ...iorców Jeśli przy nazwie grupy znajduje się to oznacza to że widok grupy jest rozszerzony a nazwy adresatów w obrębie tej grupy są wyświetlane poniżej nazwy grupy Jeśli przy nazwie grupy znajduje się to oznacza to że widok grupy jest zwinięty i wszystkie nazwy adresatów w obrębie tej grupy są ukryte Aby zwinąć lub rozwinąć widok grupy należy podświetlić pole przy żądanej grupie i nacisnąć przycisk...

Страница 143: ...isk i wpisać nazwę odbiorcy Podświetlić pole Adres nacisnąć przycisk wpisać adres odbiorcy a następnie dostawcę serwera pocztowego Podświetlenie pola i naciśnięcie przycisku otworzy listę zarejestrowanych serwerów SMTP Aby wybrać format obrazu dołączanego do wiadomości e mail należy podświetlić pole Typ załącznika w odpowiednim wierszu w tabeli i nacisnąć przycisk UWAGA Opcja dodawania obrazu do w...

Страница 144: ...zając funkcję autoryzacji Podświetlić pole Użytkownicy i nacisnąć przycisk Pojawi się wirtualna klawiatura za pomocą której należy wprowadzić nazwę użytkownika Podświetlić pole Hasło i nacisnąć przycisk Pojawi się wirtualna klawiatura za pomocą której należy wprowadzić hasło dla danej nazwy użytkownika Podświetlić pole Adres nadawcy i nacisnąć przycisk Pojawi się poniższe okno Podświetlić pole Naz...

Страница 145: ...nto SNS należy podświetlić pole i nacisnąć przycisk Pojawi się poniższy ekran Podświetlić pole Typ i nacisnąć przycisk Wybranie opcji Twitter pozwoli na dodawanie postów na tablicy konta Twitter w razie wystąpienia zdarzenia Podświetlić pole Nazwa użytkownika i nacisnąć przycisk Pojawi się wirtualna klawiatura za pomocą której należy wprowadzić nazwę użytkownika Podświetlić pole Hasło i nacisnąć p...

Страница 146: ... przycisk Można także włączyć lub wyłączyć poszczególne powiadomienia Aby to zrobić należy zaznaczyć wybrane z nich i wcisnąć przycisk Podświetlenie pola OK i naciśnięcie przycisku zatwierdzi wprowadzone zmiany Uwaga Wybrane powiadomienia powinny być aktywowane w odpowiedniej zakładce powiadomień Rejestrator powinien być zarejestrowany w programie RAS Remote Administration System Ustawienia powiad...

Страница 147: ... w trybie sekwencyjnym PODZIAŁY EKRANU aktualny numer wyświetlanej grupy kamer jeżeli obraz z rejestratora nie jest wyświetlany w podziale 4x4 3x3 WOLNE MIEJSCE NA DYSKU ikona informuje że rejestrator ma włączoną funkcję nadpisywania lub wyrażoną w procentach ilość dostępnej pamięci w przypadku pracy bez nadpisywania DATA CZAS wyświetlanie daty i czasu NAZWA UŻYTKOWNIKA wyświetla się nazwa obecnie...

Страница 148: ...usowych i dopasować do formatów wyświetlania monitora 3 9 2 Monitor główny Po wybraniu zakładki Monitor główny pojawi się następujący ekran W polu TRYB definiuje się sposób automatycznego przełączania kamer Sekwencja pełnoekranowa oznacza że przełączanie kamer będzie się odbywać w trybie pełnoekranowym Sekwencja w podziale oznacza że sekwencja obywa się jedynie w prawym dolnym oknie podziału Uwaga...

Страница 149: ...est możliwe włączenie funkcji sekwencji W pozycji PRZEŁĄCZ CO definiuje się globalnie czas automatycznego przełączania obrazów z kamer w zakresie od 1 sekundy do 1 minuty Wybranie pozycji WYŚWIETLANIE KAMER ALARMOWYCH powoduje że wszystkie zdarzenia powiązane z daną kamerą są wyświetlane pełnoekranowo na monitorze głównym W pozycji ROZDZIELCZOŚĆ można wybrać rozdzielczość wyświetlanego obrazu z na...

Страница 150: ...STRATORA Podświetlić pole kanały i nacisnąć przycisk W kolumnie Kamery można określić które kamery mają być wyświetlane sekwencyjnie na monitorze pomocniczym W kolumnie Czas trwania można określić czas wyświetlania obrazu z pojedynczej kamery w sekwencji Czas ten można zdefiniować w zakresie od 1 do 20 sekund ...

Страница 151: ...a prawą krawędź ekranu Logowanie Wylogowanie Wybranie przycisku Logowanie w Menu podglądu na żywo otwiera ekran logowania Aby zalogować się do systemu należy wybrać użytkownika i wpisać hasło Wybranie przycisku Wylogowanie w Menu podglądu na żywo otwiera ekran wylogowania Aby się wylogować należy potwierdzić ten wybór przyciskiem Wyloguj Monitor Wybranie przycisku Monitor w Menu podglądu na żywo p...

Страница 152: ...łącza OSD kamery lub OSD statusu Poprzedni Następny Wybór lub Poprzedni lub Następny w Menu podglądu na żywo przenosi do poprzedniego lub następnego widoku kamery lub grupy kamer Zamrożenie Wybór Zamrożenie w Menu podglądu na żywo zamrozi aktualny obraz na ekranie monitora do czasu ponownego naciśnięcia Naciśnięcie dowolnego przycisku z wyłączeniem MENU ALARM i PANIC powoduje wyjście z trybu zamro...

Страница 153: ...ła dla nich utrata sygnału wizji lub zostały ukryte i użytkownik nie posiada uprawnień do ich oglądania to taki podział zostanie wykluczony z sekwencji Ustawienia sekwencji pełnoekranowej lub sekwencji w podziale dokonuje się w menu urządzenia 4 3 Menu Kamery PTZ Wybór Menu Kamery PTZ numer kamery pozwala sterować wybraną kamerą PTZ otwierając dodatkowe menu przy prawej krawędzi ekranu Zoom Wybór ...

Страница 154: ...wanej sceny Po włączeniu funkcji zoom pojawia się obraz w obrazie z zaznaczonym obszarem który został powiększony Za pomocą klawiszy nawigacyjnych wybrany fragment powiększenia można przemieszczać Za pomocą przycisku Play Pause można dokonać powiększenia Ponowne naciśnięcie funkcji ZOOM powoduje wyjście z trybu powiększenia W przypadku włączenia funkcji ZOOM wyświetla się ikona w lewym dolnym rogu...

Страница 155: ...toring zdarzeń Jeżeli w menu rejestratora jest wybrana funkcja WYŚWIETLANIE KAMER ALARMOWYCH wszelkie zdarzenia powiązane z wybrana kamerą zostaną wyświetlone na ekranie monitora głównego Sposób wyświetlania kamer na ekranie monitora zależy od ilości kamer powiązanych ze zdarzeniem oraz od liczby zdarzeń które maja równocześnie miejsce w systemie Jeżeli ze zdarzeniami powiązana jest pojedyncza kam...

Страница 156: ...w wybranej konfiguracji Konfiguracje 1 7 oraz 4x4 dostępne są tylko dla modelu NDR HB4416 Wybór Wyświetlanie Kamera OSD Status OSD włącza lub wyłącza OSD kamery lub OSD statusu Poprzedni Następny Wybór lub Poprzedni lub Następny w Menu podglądu na żywo przenosi do poprzedniego lub następnego widoku kamery lub grupy kamer Alarm Wybór Alarm w Menu podglądu na żywo powoduje skasowanie wewnętrznego br...

Страница 157: ... STAN NAGRYWANIA będą aktywne w zależności od ustawień dokonanych w podmenu SYSTEMOWE Pozycja NAGRYWANIE NAPADOWE jest aktywna w chwili trwania nagrywania napadowego Pozycja DYSK prawie pełny jest aktywna jeżeli rejestrator nie pracuje w trybie z nadpisywaniem i dostępna pamięć rejestratora do zdefiniowanego poziomu została zapisana Pozycja ZAPEŁNIENIE DYSKÓW jest aktywna jeżeli rejestrator nie pr...

Страница 158: ...ych obrazów po zalogowaniu się do urządzenia mogą odtwarzać zapisane obrazy Aby rozpocząć odtwarzanie zarejestrowanych materiałów należy nacisnąć przycisk PLAYBACK Po wyborze numeru odpowiedniej kamery rozpocznie się odtwarzanie nagrania Jeżeli odtwarzamy zarejestrowany materiał po raz pierwszy od uruchomienia urządzenia odtwarzany będzie ostatnio zarejestrowany materiał Jeżeli po raz kolejny prze...

Страница 159: ...w strzałek wskazuje zaznaczoną kamerę Naciśnięcie jednego z przycisków kamer od 1 do 16 powoduje wyświetlenie obrazu z wybranej kamery na ekranie Naciśnięcie przycisku PLAY PAUSE wychodzi z aktywnego trybu sekwencyjnego PLAYBACK Wciśnięcie przycisku PLAYBACK powoduje przejście do trybu odtwarzania Ponowne wciśnięcie PLAYBACK powoduje powrót do trybu podglądu na żywo Po przejściu do trybu odtwarzan...

Страница 160: ...esuwając mysz do prawej krawędzi ekranu monitora Przeszukiwanie rejestru zdarzeń wyszukiwanie zarejestrowanych obrazów powiązanych ze zdarzeniami Wyszukiwanie segmentów wyszukiwanie nagrań na grafie w postaci pasków Wyszukiwanie ruchu wyszukiwanie zmian w treści obrazowej Wyszukiwanie po transakcjach wyszukiwanie ciągów znaków powiązanych z zarejestrowanymi obrazami UWAGA Prędkość wyszukiwania moż...

Страница 161: ...ukiwanie rejestru zdarzeń Po wybraniu funkcji wyszukiwania obrazów powiązanych ze zdarzeniami zostanie wyświetlony poniższy ekran Wszystkie zdarzenia w systemie są zapisywane w rejestrze urządzenia Otworzenie rejestru zdarzeń może zostać zrealizowane poprzez naciśnięcie przycisku ALARM na panelu czołowym urządzenia lub za pomocą menu odtwarzania poprzez wybór funkcji Przeszukiwanie rejestru zdarze...

Страница 162: ...aczone pozycje Pierwszy i Ostatni W przypadku nakładania się zakresów czasowych operator zostanie poproszony o wybór zakresu Uwaga Niższy numer segmentu oznacza późniejszą datę rejestracji Dla pozycji ALARMY ZEW następuje wyszukiwanie alarmów dla wybranych wejść alarmowych Dla pozycji RUCH następuje wyszukiwanie zdarzeń detekcji ruchu dla wybranych wejść kamerowych Dla pozycji UTRATA SYGNAŁU nastę...

Страница 163: ...a Aby wyszukać określone nagranie należy przesunąć pionową linię za pomocą lewego lub prawego przycisku strzałek na panelu przednim lub kliknąć na wybrany fragment przy użyciu myszki komputerowej Jeśli czas i data zostały zresetowane i są wcześniejsze niż te na niektórych nagraniach wideo istnieje możliwość że rejestrator zapisze więcej niż jeden strumień video dla tego samego przedziału czasowego...

Страница 164: ...do trybu standardowego należy wybrać ikonę Aby wyświetlić kalendarz należy wybrać przycisk zlokalizowany na dole ekranu Dni z zarejestrowanymi nagraniami wideo oznaczone są w kalendarzu białymi numerami Aby wybrać konkretny dzień należy użyć przycisków strzałek a następnie zatwierdzić wybór przyciskiem Przyciski zarządzania odtwarzaniem wyświetla 8 godzin wyświetla 24 godziny przechodzi do następn...

Страница 165: ...ia WYSZUKIWANIE RUCHU wykrywa zmiany w treści obrazowej dla zdefiniowanego obszaru ZNIKNIĘCIA OBIEKTU wykrywa zniknięcie zdefiniowanych obiektów Definiowanie obszaru lub obiektu dla których wykrywa się zmiany w treści obrazowej lub zniknięcie obiektu dokonuje się identycznie jak dla detekcji ruchu W przypadku trybu pracy ZNIKNIĘCIA OBIEKTU należy strefę zaprogramować tak aby w całości zawierała si...

Страница 166: ...ymi obrazami Zdarzenie należy wybrać za pomocą przycisków strzałek Po zatwierdzeniu wyboru przyciskiem otworzy się pierwszy obraz związany ze zdarzeniem Kolejne wciśnięcie przycisku spowoduje rozpoczęcie odtwarzania nagrania Można także zawęzić wyszukiwanie zdarzeń wybierając przycisk Opcje Można wyszukiwać nagrania w kolejności od pierwszego do ostatniego lub ustawić datę oraz godzinę rozpoczęcia...

Страница 167: ... i nacisnąć Po wybraniu przycisku Opcje i wciśnięciu otwiera się nowe okno w którym można wybrać ustawienia wyszukiwania po transakcjach uwzględnij wielkość liter dokładna fraza usuń zduplikowane transakcje Przycisk ŁADOWANIE służy do wgrywania gotowych opcji wyszukiwania Przycisk ZAPISZ umożliwia zapisanie obecnych opcji wyszukiwania Po jego wybraniu na ekranie pojawi się wirtualna klawiatura któ...

Страница 168: ...puterach z zainstalowanym systemem operacyjnym MICROSOFT WINDOWS 98 ME XP VISTA WINDOWS 7 Aby przejść do trybu kopiowania nagrań należy w odtwarzaniu nacisnąć przycisk MENU i wybrać pozycję kopiowanie z menu W pozycji POBIERZ DANE Z mamy informacje o źródle z którego ma nastąpić kopiowanie nagrań W pozycji OD DO oraz KANAŁY definiuje się przedział czasowy oraz kamery których nagrania mają być kopi...

Страница 169: ...przycisku ENTER w pozycji NAZWA pliku wyświetla wirtualną klawiaturę do samodzielnego wpisania nazwy pliku W celu zapisania pliku w wybranym folderze należy nazwę pliku poprzedzić znakiem oraz nazwą katalogu np KATALOG PLIK EXE Uwaga W nazwie pliku nie można używać następujących znaków Wybranie pozycji Start i potwierdzenie jej przyciskiem ENTER powoduje rozpoczęcie procesu kopiowania W przypadku ...

Страница 170: ...niż te na niektórych nagraniach wideo istnieje możliwość że rejestrator zapisze więcej niż jeden strumień video dla tego samego przedziału czasowego Można wyszukać pojedynczy z nakładających się przedziałów czasowych zaznaczając konkretny segment nagrania Na przykład gdy rejestrator nagrywał obraz wideo do godziny 5 00 a następnie użytkownik cofnął czas do godziny 3 00 i kontynuował nagrywanie do ...

Страница 171: ...częstotliwości taktowania nie mniejszej niż 800MHz Jeżeli procesor posiada mniejszą częstotliwość taktowania zarejestrowane sekwencje wideo zarejestrowane w najwyższej jakości i maksymalnej prędkością mogą być odtwarzana z mniejszą prędkością Do prawidłowego działania zaleca się stosowanie bibliotek DirectX 8 0 lub wyższych oraz karty graficznej z 16MB pamięci operacyjnej Dwukrotne naciśnięcie lew...

Страница 172: ...talowanych bibliotek należy w pasku URUCHOM menu START wpisać dxdiag i nacisnąć klawisz ENTER W zakładce EKRAN należy włączyć PRZYSPIESZENIE SPRZĘTOWE DIRECT DRAW i następnie przetestować prawidłowość jego działania Należy zaktualizować sterowniki kary graficznej polecane przez producenta W przypadku dalszych problemów z odtwarzaniem należy rozważyć wymianę karty graficznej Zalecane są karty grafi...

Страница 173: ...ając ikonę PRZETWARZANIE OBRAZU istnieje możliwość zapisania obrazów w formacie BMP drukowania bezpośrednio na drukarce lub uzyskania informacji o pliku kamery nazwa wejścia kamerowego czas typ rozmiar i rozdzielczość Funkcja przetwarzania obrazu jasność rozmycie wyostrzenie nie jest dostępna w podziale Aby powiększyć odtwarzany obraz należy nacisnąć ikonę Dostępne formaty powiększenia NORMALNY PO...

Страница 174: ...A III firmy Novus W celu podłączenia kamer innych producentów należy skontaktować się z działem technicznym oraz zapoznać się z instrukcją obsługi kamery Uwaga Do sterowania kamer obrotowych można również użyć złącza RS 232 Należy wówczas zastosować na wyjściu konwerter RS 232 RS 485 Taka potrzeba istnieje w przypadku równoczesnego podłączenia do rejestratora klawiatury oraz kamer szybkoobrotowych...

Страница 175: ... o o 85 PODŁĄCZANIE I STEROWANIE KAMERAMI OBROTOWYMI PTZ Kamera Novus CAMA III nr 1 Przewód wizyjny Kamera Novus CAMA III nr 16 24VAC 24VAC FGND RX RX RX TX RX TX GND 24VAC 24VAC 24VAC 24VAC FGND RX RX RX TX RX TX GND 24VAC 24VAC Skrętka UTP 5 max 1200m max 1 5 m max 1 5 m Widok dla NDR HB4416 ...

Страница 176: ...ch Użytkownik powinien zadbać o zabezpieczenie wejść przed ewentualnymi wyładowaniami które mogą je trwale uszkodzić Uwaga Wyjścia alarmowe nie są zabezpieczone przed przeciążeniem Użytkownik powinien zadbać o zabezpieczenie wyjść Obciążalność prądowa każdego z wyjść nie może przekraczać 2A dla napięcia 125 V AC i 1 A dla napięcia 30 V DC Do wyjść można podłączyć np diodę LED tworząc dla każdego w...

Страница 177: ...ądzenia łączy się w topologii kaskady z odczepami nie dłuższymi niż 1 5m Klawiatura KBD 70 posiada przyciski i pokrętła odpowiadające funkcją i opisem przyciskom w rejestratorze Dostępne są prawie wszystkie funkcje rejestratora Dodatkowym ułatwieniem jest wyświetlacz ciekłokrystaliczny wyświetlający podstawowe informacje o egzekwowanych funkcjach parametrach transmisji itp Poniżej przedstawione są...

Страница 178: ...jącego ekranu menu Funkcje PTZ ZOOM oraz MONITOR POMOCNICZY są identyczne do ustawień dokonywanych z panelu czołowego za pomocą przycisków Funkcją ZOOM dostępna tylko w trybie HD za pomocą myszy można sterować w następujący sposób naciśnięcie i przytrzymanie lewego przycisku myszy pozwala na przesunięcie obszaru powiększonego kliknięcie prawego przycisku myszy na obrazie powoduje wyświetlenie doda...

Страница 179: ...e jest sterowanie za pomocą pilota zdalnego sterowania bez żadnych dodatkowych ustawień Jeżeli dwa lub więcej rejestratorów posiadają ID równy 0 wówczas będą sterowane równocześnie Dla ID rejestratora z zakresu 1 16 aby sterować rejestratorem z poziomu pilota zdalnego sterowania należy najpierw nacisnąć przycisk ID i następnie przycisk numeryczny z odpowiednia liczbą Pilot zdalnego sterowania pozw...

Страница 180: ...2013 11 04 PR MK AAT Holding sp z o o ul Puławska 431 02 801 Warszawa Polska tel 22 546 07 00 faks 22 546 07 59 www novuscctv com ...

Отзывы: