P
8
/
30
N-LINE OWNERS MANUAL
9
Installation
The N-Line consists of 3 models: Panel mount, Vesa Mount and Rear Mount. The first part of this chapter describes the universal
installation of all models. Please refer to the corresponding paragraphs below for more detailed mounting description per
model.
Before installation check the power source to be compatible with the power input of your monitor.
9.1
Mounting the monitor
When installing the monitor first make sure to determine the right place. There should be sufficient airflow at the back of the
monitor when using the panel mount version. For any model always make sure that there is no direct sunlight on the monitor.
This might heat-up the unit too much.
Determine location in compliance with the minimum radar distance mentioned on the back side of the monitor
9.1.1
Panel mount
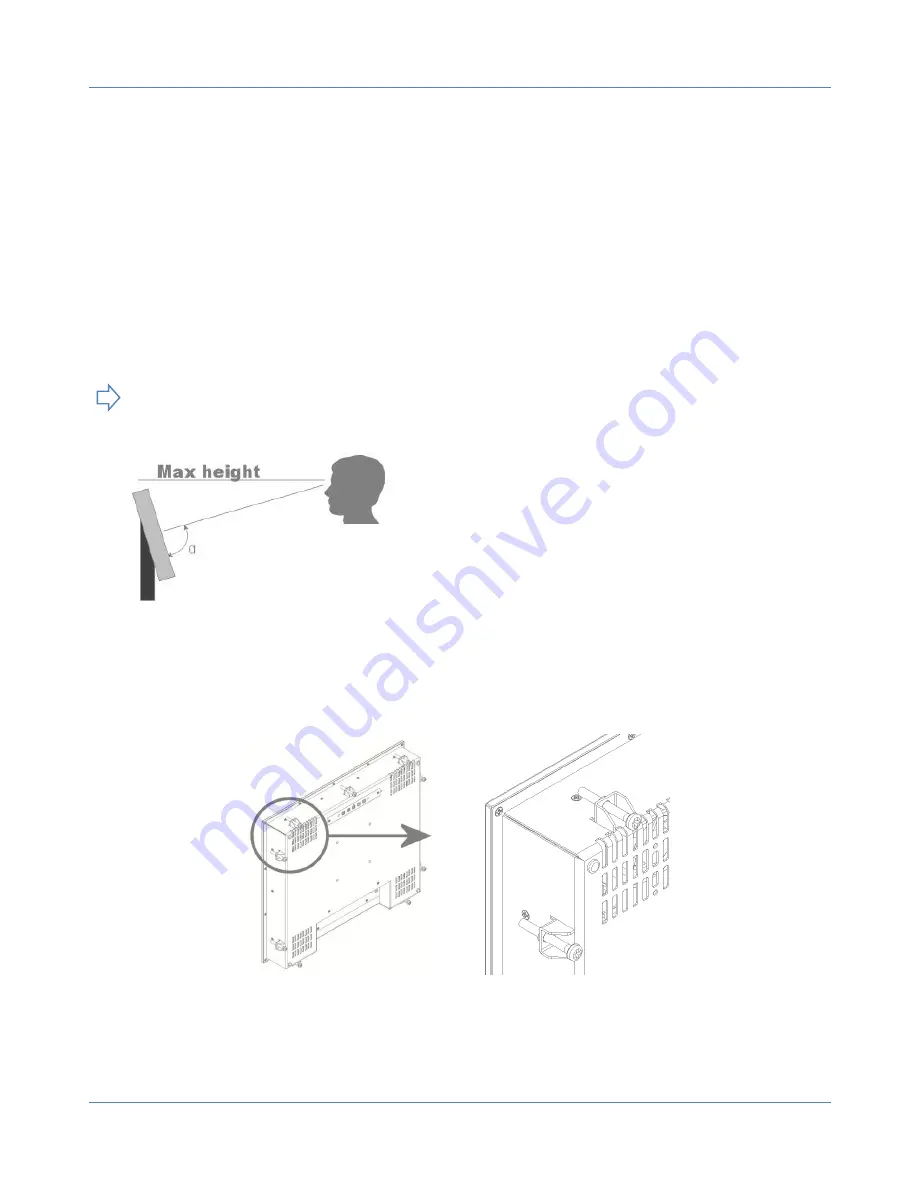
The monitor is supplied with mounting brackets for all mounting positions. All brackets need to be installed as shown in figure
below to ensure safe and rigid mounting.
Please follow these steps for successful installation of the panel mount monitor
Locate the right position for the monitor and take following in account:
o
Leave space around the monitor to ensure sufficient airflow for cooling to meet the temperature specifications
mentioned in this manual
o
Mount the monitor in an angled position (≥ 35° from horizontal) to ensure airflow through the monitor
o
Make sure that there is enough airflow (cooling) in the desk. Install a cooling fan if necessary.
IEC
Viewing angle is an theretical value measured
with standard colors and contrast. In real life
the monitor should be installed with angle: 120
< α < 90. This means that viewing from bottom
side should be avoided. For viewing
convenience install the monitor below eye-
level (max height).
Содержание N-LINE
Страница 28: ...P 28 30 N LINE OWNERS MANUAL 15 2 IEC 60945 ...


